33
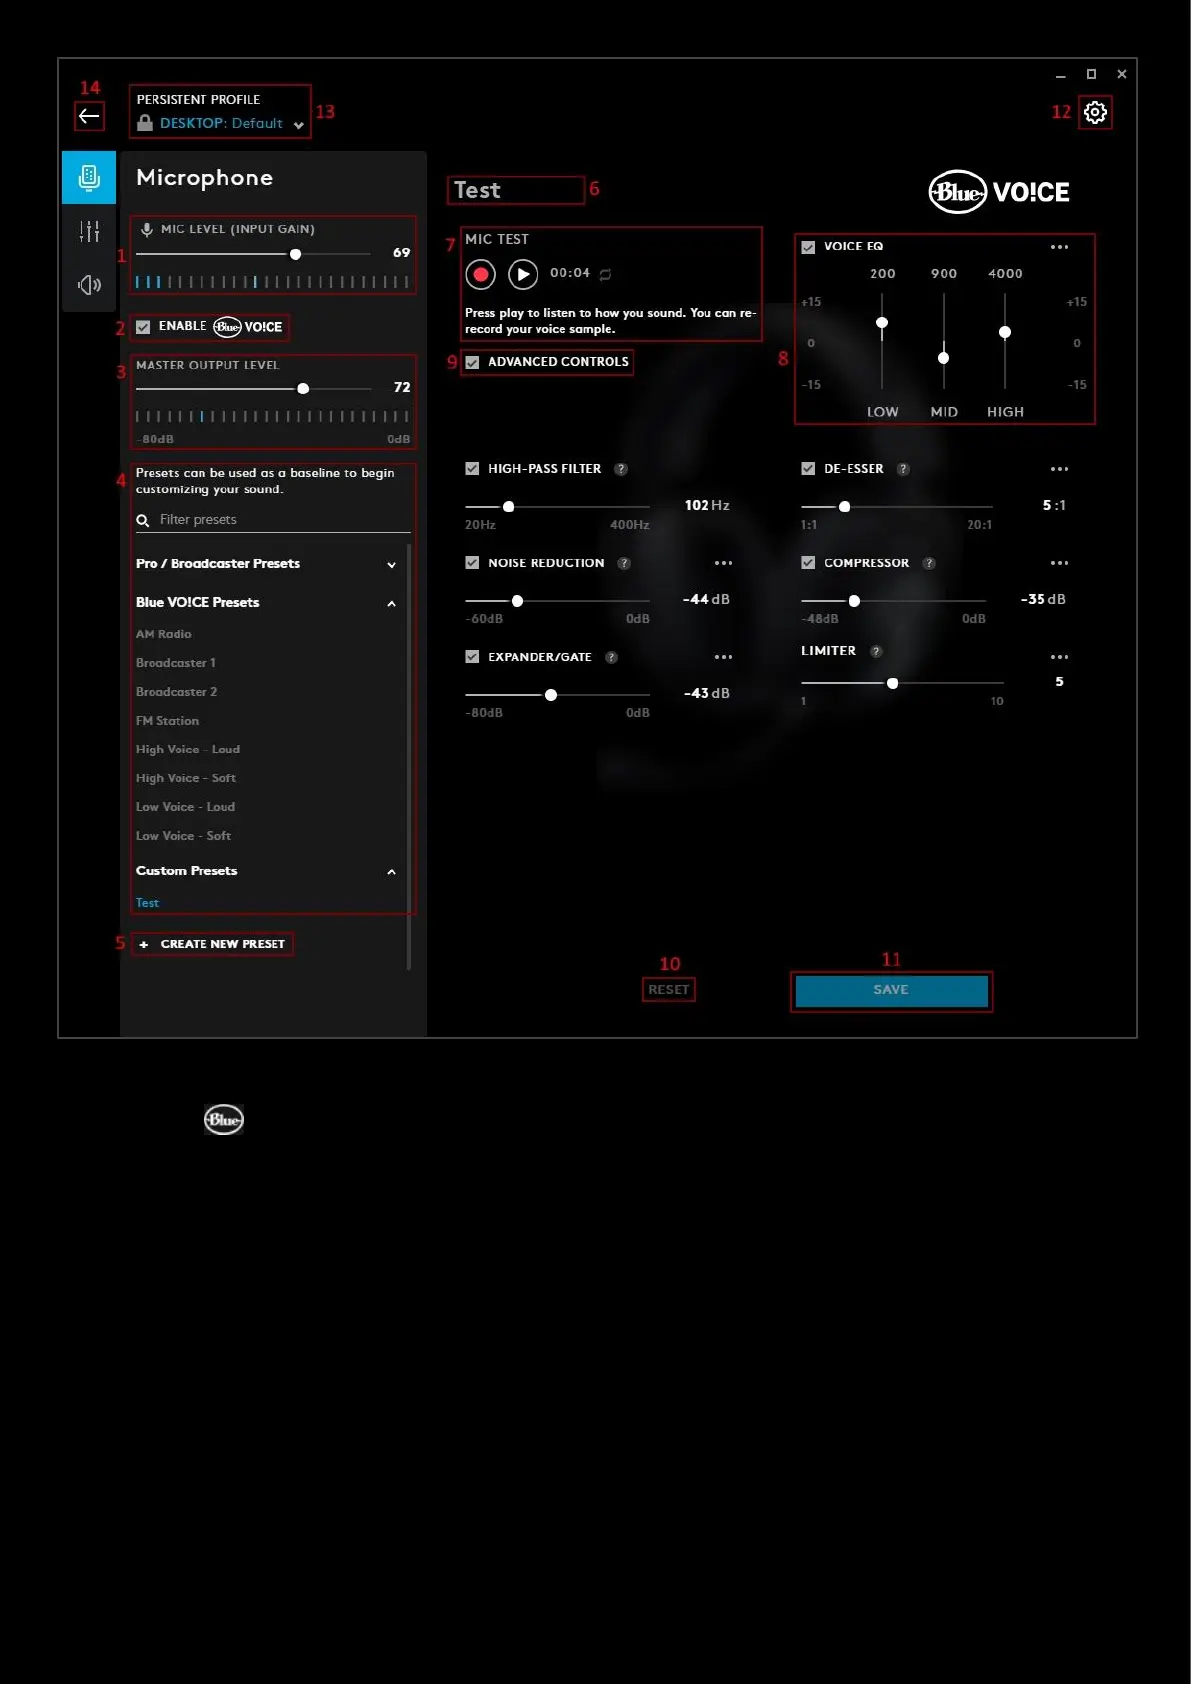
1. MIC LEVEL (INPUT GAIN). This adjusts the input gain of the microphone and syncs with the system mic volume.
2. ENABLE VOICE. Tick this box to enable Blue VO!CE
3. MASTER OUTPUT LEVEL. Controls the final output level for the microphone after all Blue VO!CE processing is
done.
4. Presets. You can select one of the Presets that come with G HUB or create your own. Any ones you create will
be in the section Custom Presets.
5. + CREATE NEW PRESET. Click this to start creating your own preset. Don't forget to rename it! (7)
6. Preset Name. In the example above, we have created a Test preset. Click the name to highlight and edit
7. MIC TEST. Use the record and playback to listen to how you sound. The playback will be on a loop and you can
re-record this at any time. Clicking the record button will overwrite the last recording.
8. VOICE EQ. Check the box to allow you to make changes to the LOW /MID / HIGH ranges. More on this in the
advanced settings section.
9. ADVANCED CONTROLS. Check this box to show the advanced controls. More on this in the advanced settings
section.
10. RESET. Click this to reset the preset back to default settings.
11. SAVE. Click save to update the preset