BOTTOM CUTTER
Before you open the safety doors on the
planer, ensure that the power is switched
off and that the cutters are not rotating. Use
protective gloves, particularly when you need
to loosen screws that are tightly fastened, or
when you are tightening screws (see warning
instructions). Beware of the planer knives. It is
extremely easy to cut yourself on these, even
with the slightest touch.
The bottom cutter is xed to the planer table on the
planer's infeed side. Two planer knives are moun-
ted in two of the bottom cutter's tooling slots on
delivery (planer knife 410 mm (16") HSS, item no.
7000-002-8410). Another two planer knives, or
molding knives can be mounted in the two empty
tooling slots.
SETTING THE BOTTOM CUTTER'S CUT
The cut of the bottom cutter is set using a lever
(211). Locking is done using a lever (224).
The normal cut on the bottom cutter is 2 mm
(8/100").
DISASSEMBLING THE PLANER KNIFE
The planing knife is disassembled by loosening the
chip breaker's (A) lock screws (B) and then unscre-
wing the planing knife with adjuster screws (C).
GRINDING THE PLANING KNIFE
Always grind the knives in pairs, so they are the
same height, min. 15 mm (.600"), otherwise vibra-
tions could occur in the cutter. The grinding angle
must be 38 degrees. You can order a grinder from
Logosol for sharpening molding and planing knives
(Tormek Grinder, item no. 7010-000-1000, Jig for
planing knives, item no. 7010-000-1005).
ADJUSTING THE BOTTOM CUTTER'S
PLANING KNIFE
The bottom cutter's planing knife must be set so
that it is on the same level as and in line with the
planer table.
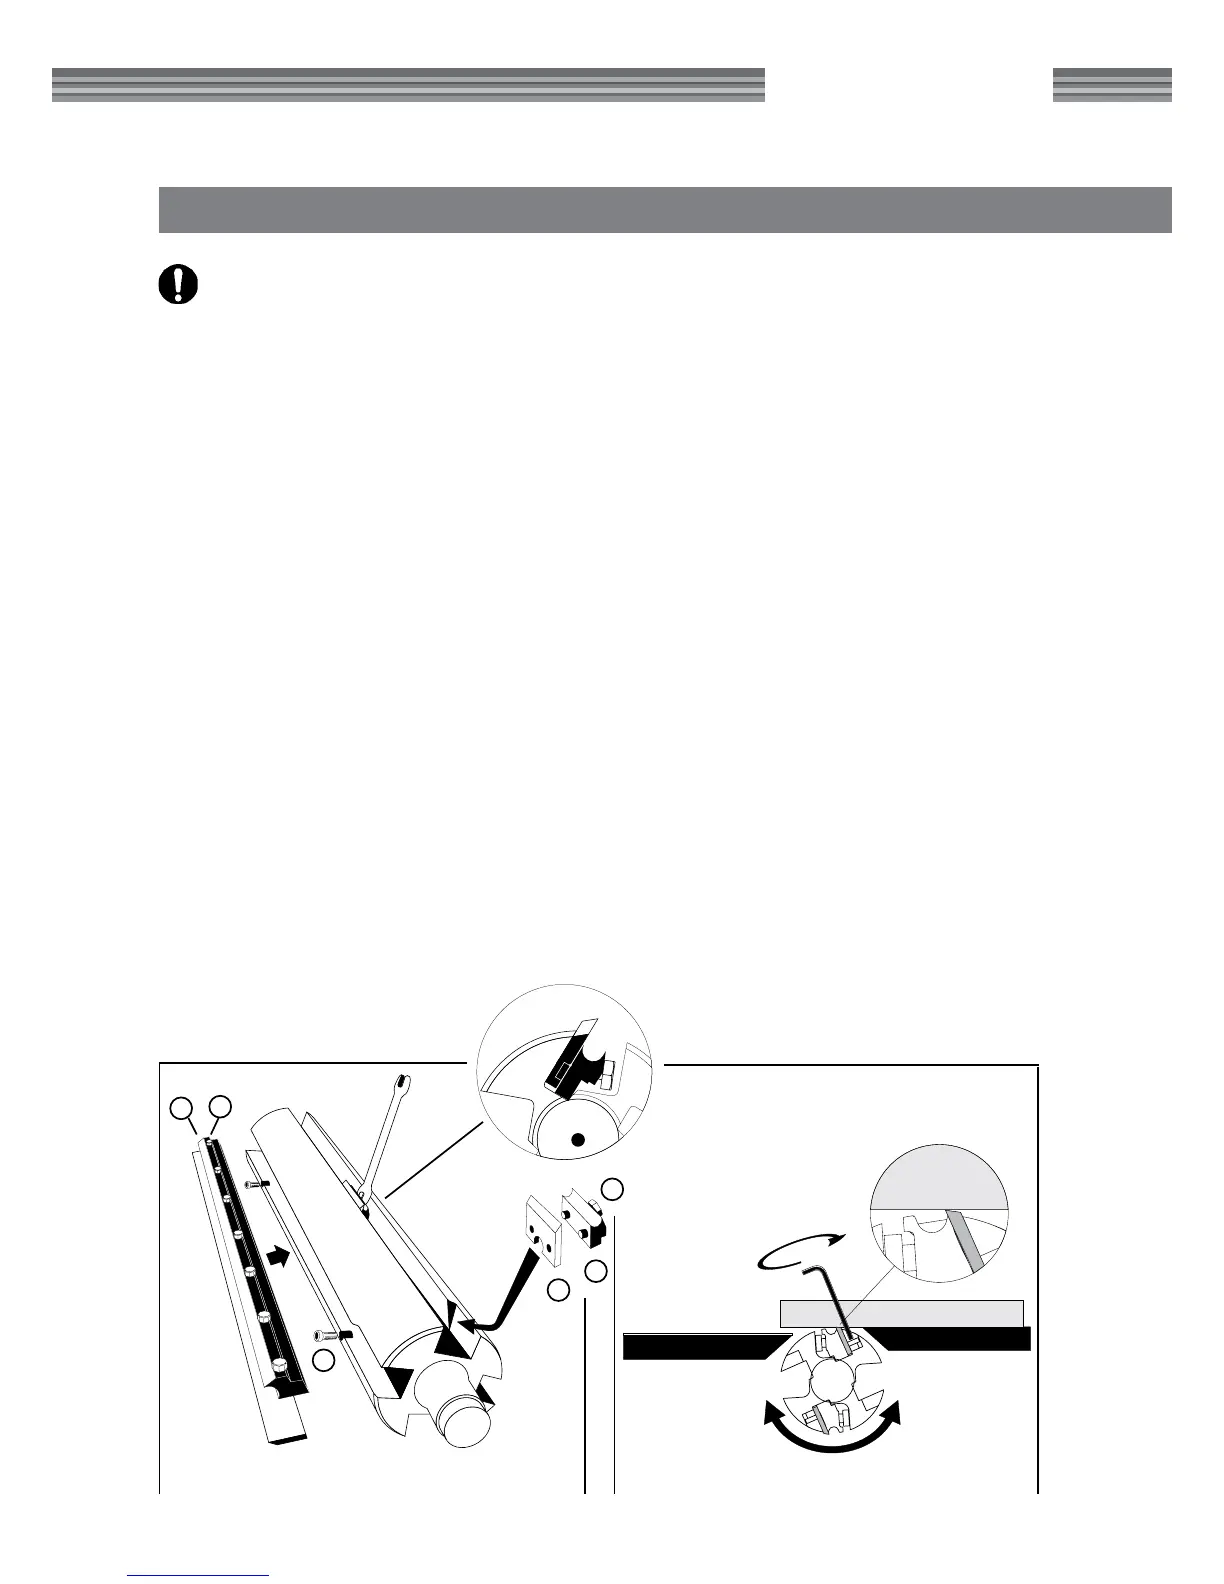
• Loosen the chip breaker's lock screws (B) that
are found in the groove between the chip brea-
ker (A) and the cutter using a 10 mm (4/10")
key (supplied). After this the knife can be raised
or lowered using the two adjustable screws
(4 mm socket head) (C) that are recessed by
the cutter's keyway. Use a 4 mm socket head
screw (supplied). The knife must stick out 1 mm
(.040") from the cutter body to align with the
molding knife from Logosol.
• Check the level of the knife by placing a bit of
planed edging on the planer table behind the
cutter. The cutter's knife should then touch the
edging (see image below). Another method is to
A
B
C
D
E
F