Replacing the Hard Drive19
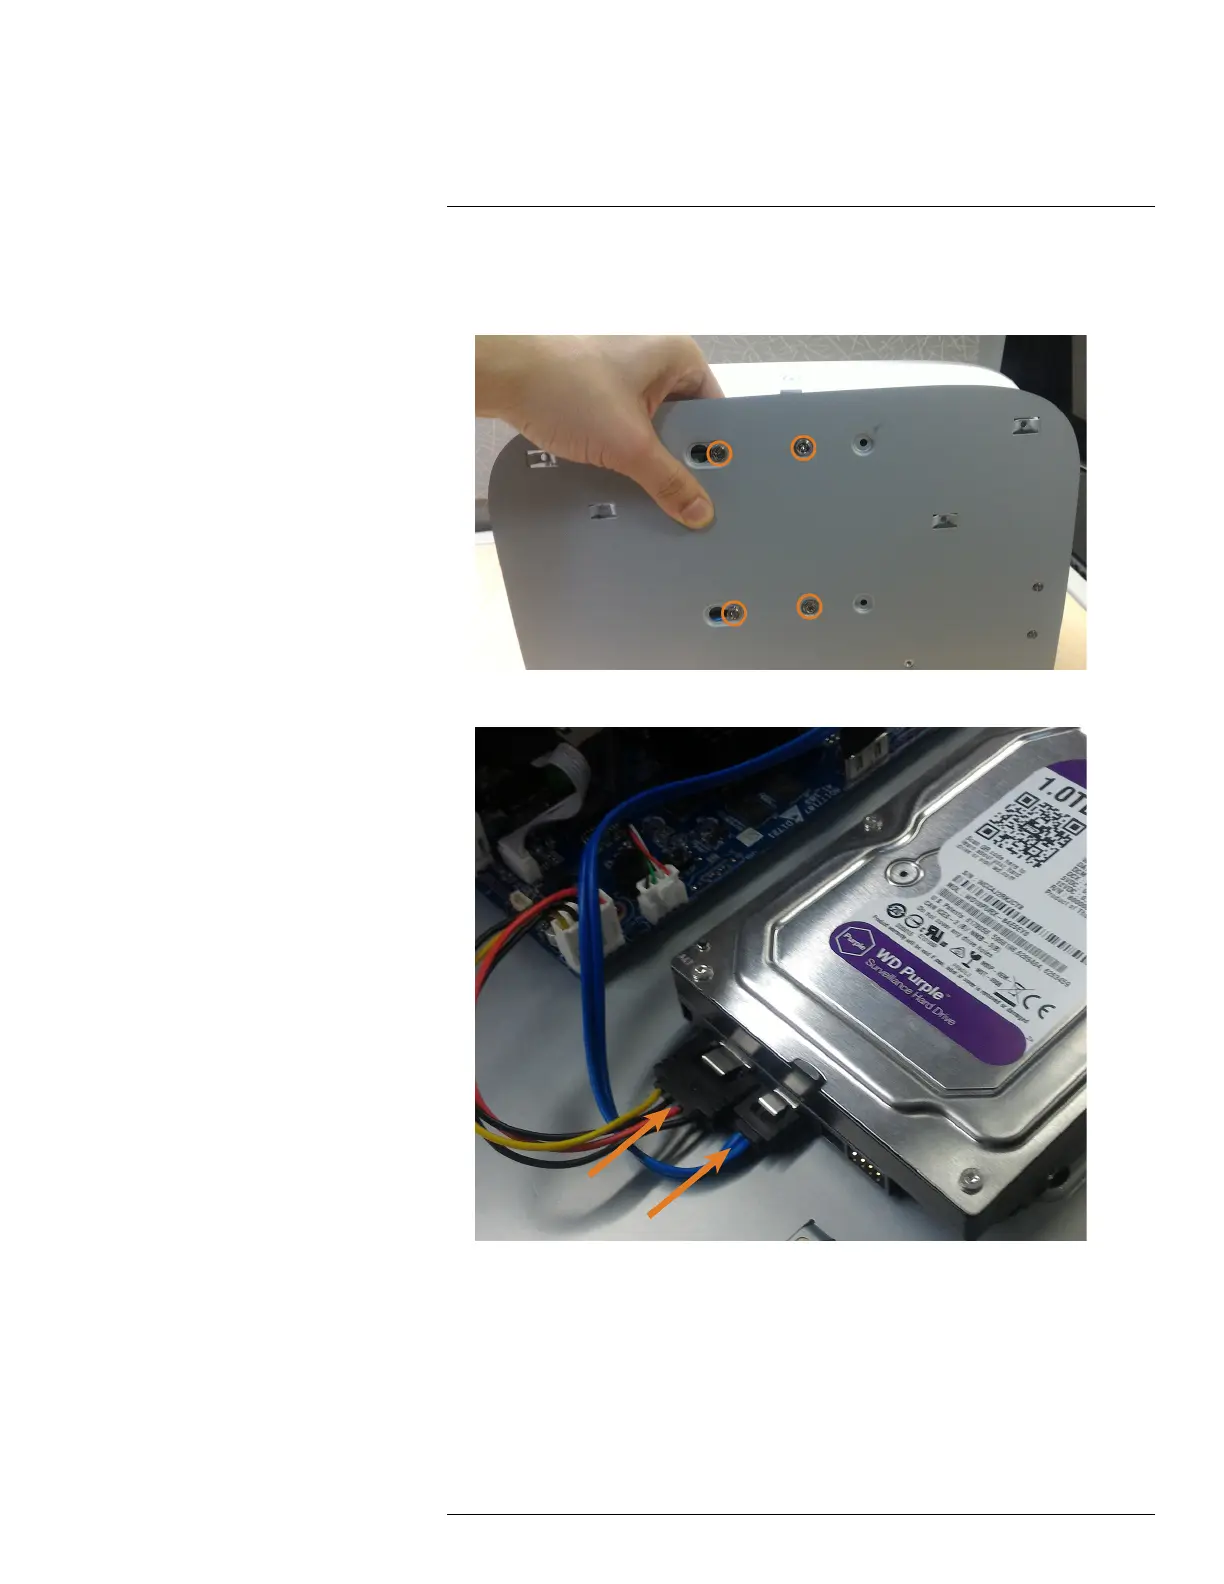
6. Carefully pick up the bottom panel with the hard drive, being mindful of the sharp edges of
the bottom panel. Slide the 2 pre-inserted screws into the locked position, then tighten the
screws. Insert and tighten the 2 remaining hard drive screws.
7. Connect the power and SATA cables to the hard drive.
8. Replace the top panel and the 6 bottom panel screws.
#LX400111; r. 1.0/55872/56018; en-US 95