Using the Main Menu15
15.3.10 Configuring Network Warnings
Network warnings will notify you if your system loses connection to the Internet or local
network or if there is an issue on your network.
To configure network warnings:
1. From the Main Menu, click
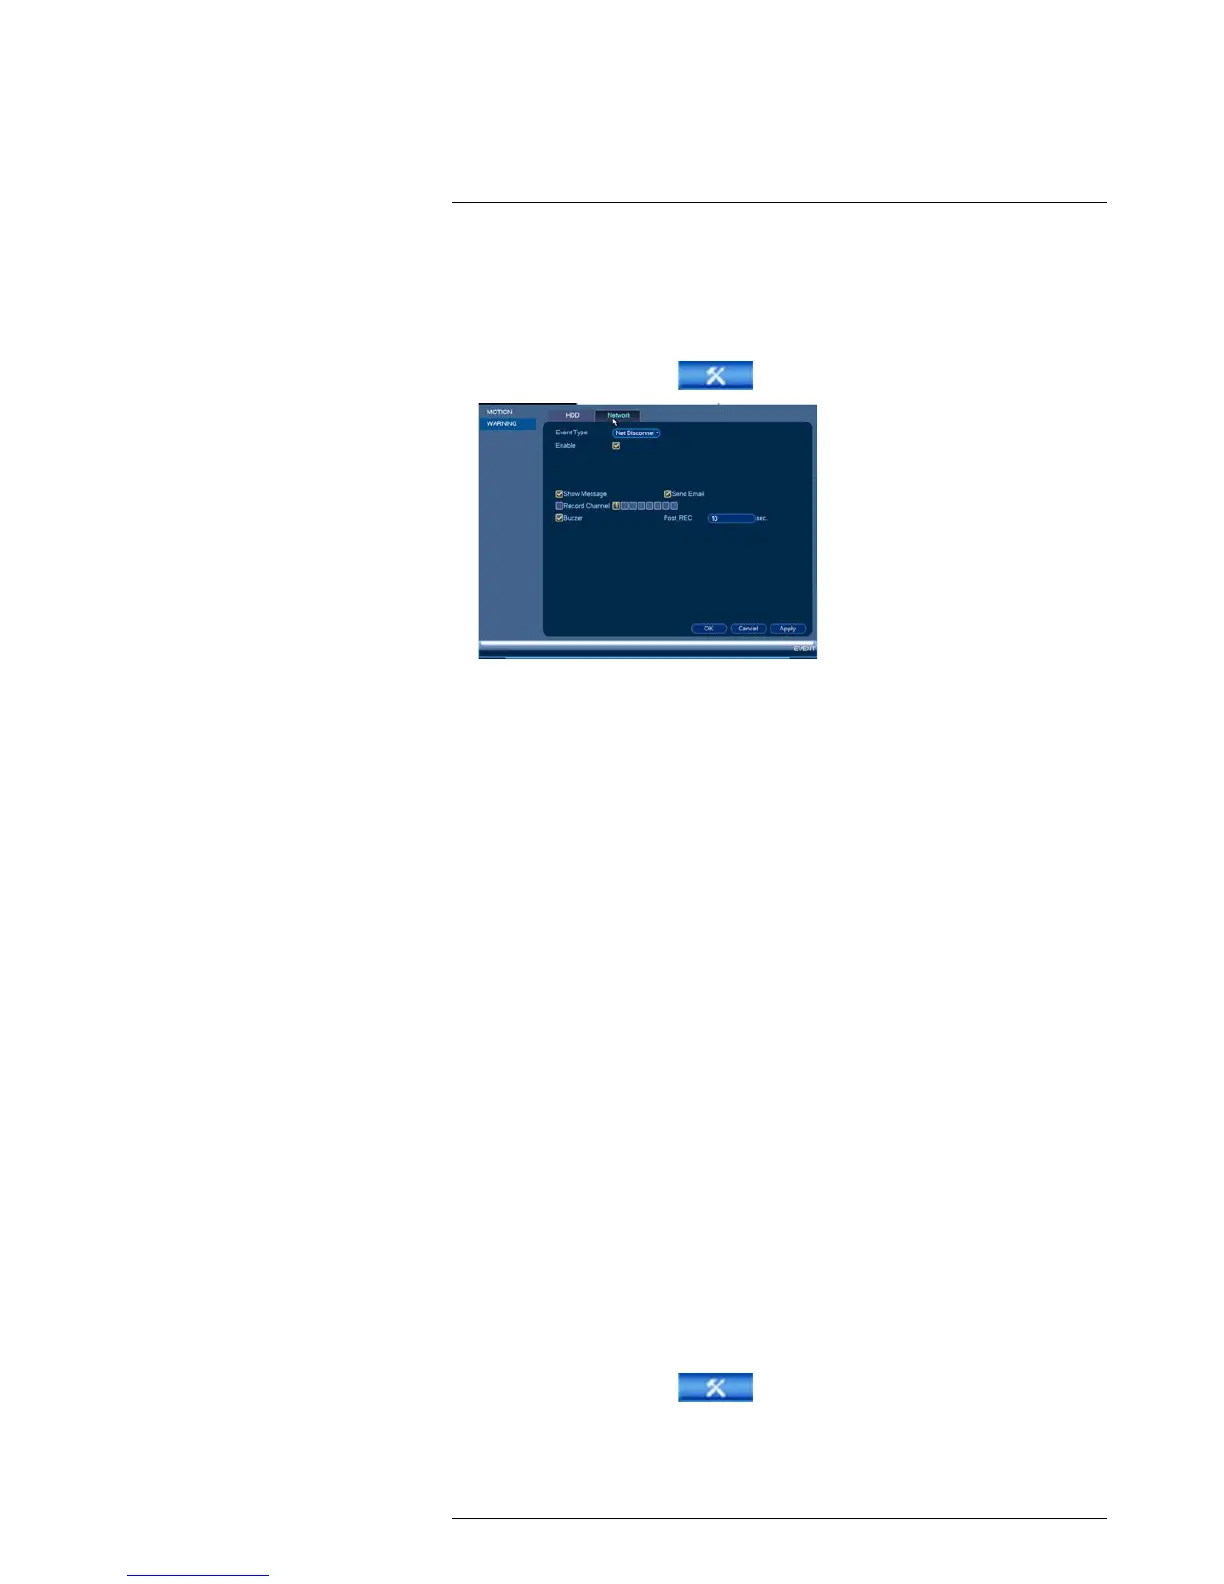
and then click Event>Warning>Network.
2. Under Event Type, select the event type you would like to configure.
• Net Disconnection: The system has lost connection to the network.
• IP Conflict: More than one device on your network has the same IP address.
• MAC Conflict: More than one device on your network has the same MAC address.
• All: Configure responses for all network events.
3. Configure the following for the selected event type:
• Enable: Check to enable the selected event type.
• Show Message: Check to show a popup message when the selected event
occurs.
• Send Email: Check to enable email alerts. You must configure email alerts before
you will be able to receive them (see 15.3.5 Configuring Email Alerts, page 55).
• Buzzer: Check to activate the system buzzer.
• Record Channel: If Net Disconnect is selected, you can set the system to trigger
recording after it loses connection to the network. Check Record Channel to ena-
ble video recording and select the channels you would like to record. Set the
amount of time you would like the system to record under Post_REC.
4. Click OK to save changes.
15.3.11 Storage
The Storage menu allows you to configure the recording schedule and hard drives con-
nected to the system.
15.3.12 Configuring the Video Recording Schedule
You can set a custom recording schedule according to your needs. For example, you can
set the system to record continuously during business hours and record on motion de-
tection only outside of business hours.
A custom recording schedule helps reduce the amount of hard drive space required, in-
creasing the time your system can retain recordings.
To configure the video recording schedule:
1. From the Main Menu, click
and then click Storage>Schedule>Record.
2. Under Channel, select the channel you would like to configure or select All.
 Loading...