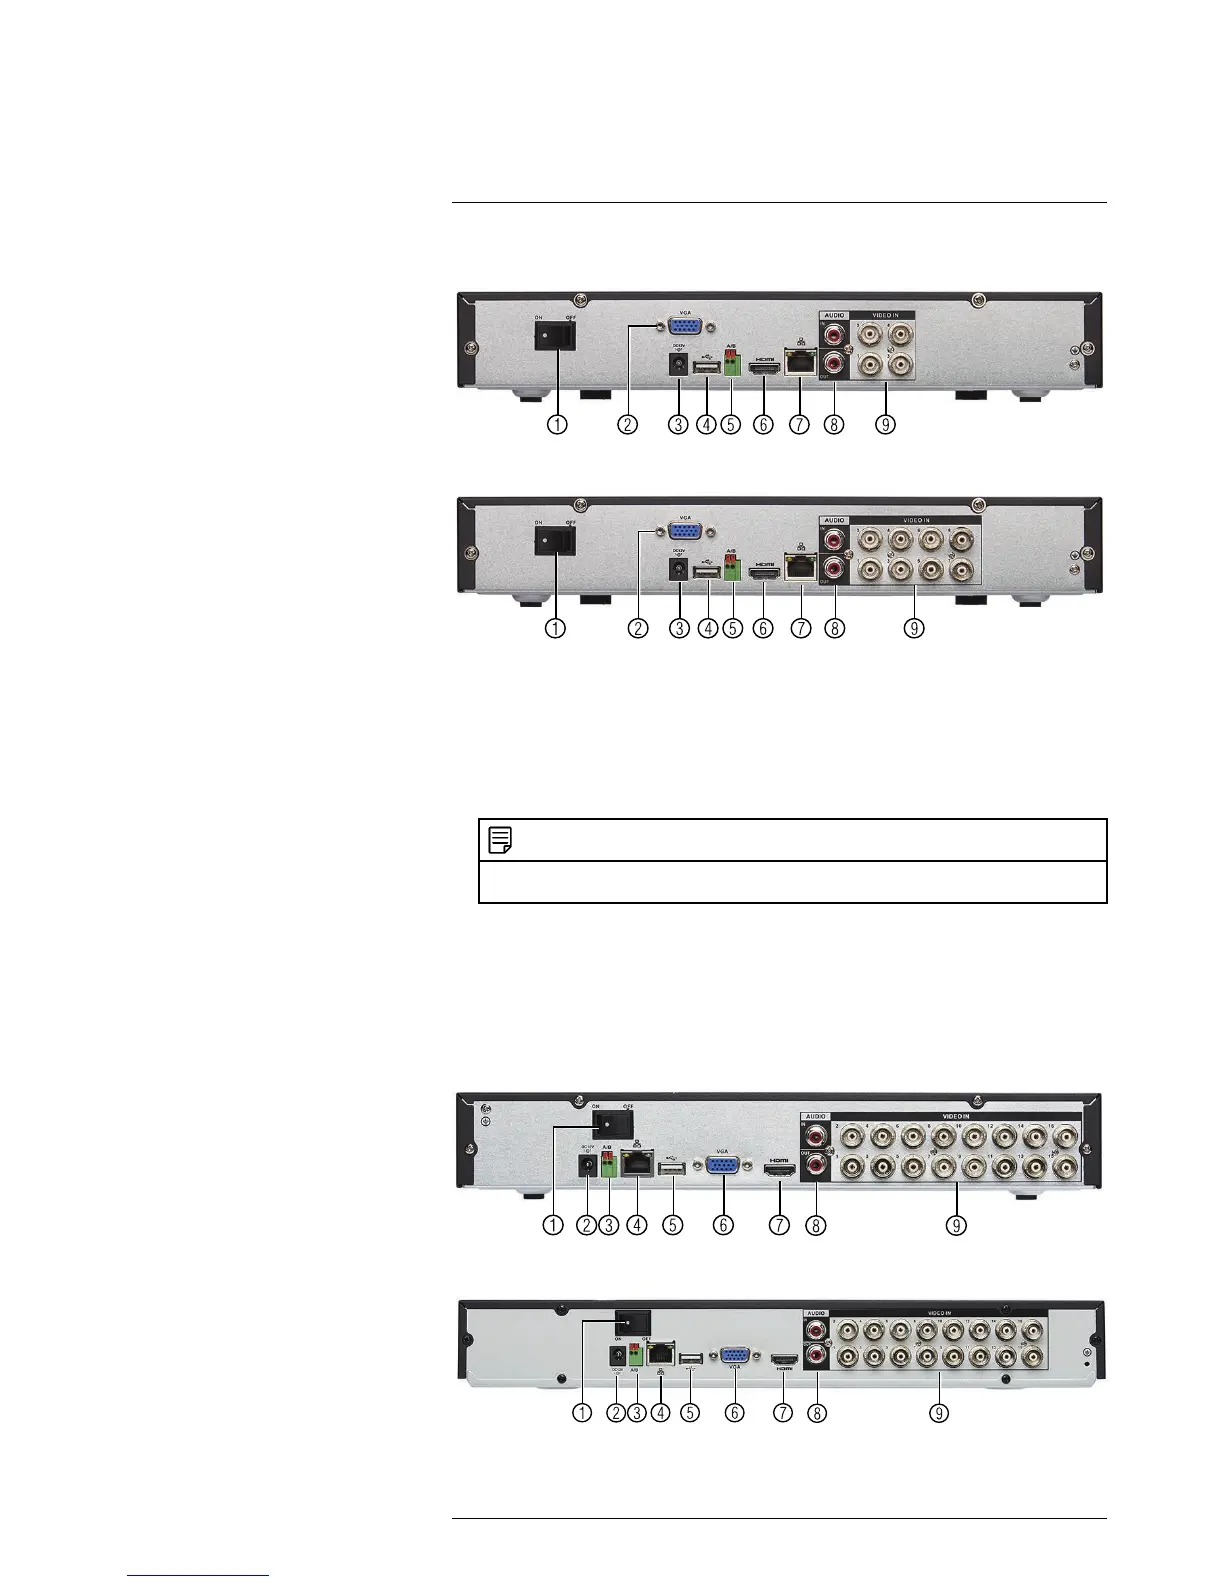
Rear Panel (LHV2000 Series)
5
LHV2104 (4–Channel)
LHV2108 (8–Channel)
1. On / Off switch: Turns the DVR on or off.
2. VGA: Connect a VGA monitor (not included) to view the system interface.
3. DC12V: Connect the included AC power adapter.
4. USB port(s): Connect a USB mouse (included) or USB flash drive (not included) for
data backup or firmware updates.
5. A/B: Connect RS485 cables for analog PTZ cameras. See 21 Connecting a PTZ
Camera (LHV2000 Series), page 152 for more details.
NOTE
Lorex 1080p MPX and 720p wired HD PTZ cameras can accept commands directly via the video
cable.
6. HDMI: Connect to an HDMI monitor or TV (not included) to view the system interface.
7. LAN: Connect a CAT 5 RJ45 Ethernet cable for local and remote connectivity.
8. Audio IN/Audio OUT (RCA): Connect a self-powered microphone (not included) to
the Audio IN port to record one channel of audio. Connect a speaker to the Audio
OUT port. See 22 Recording Audio, page 157 for more details.
9. Video input: Connect Lorex 1080p MPX, 720p HD, or analog cameras.
LHV2116 (16–Channel)
LHV2216 (16–Channel)
1. On / Off switch: Turns the DVR on or off.
#LX400060; r.30328/35049; en-US
8
 Loading...