14
PALESTRA CONFIGURATION
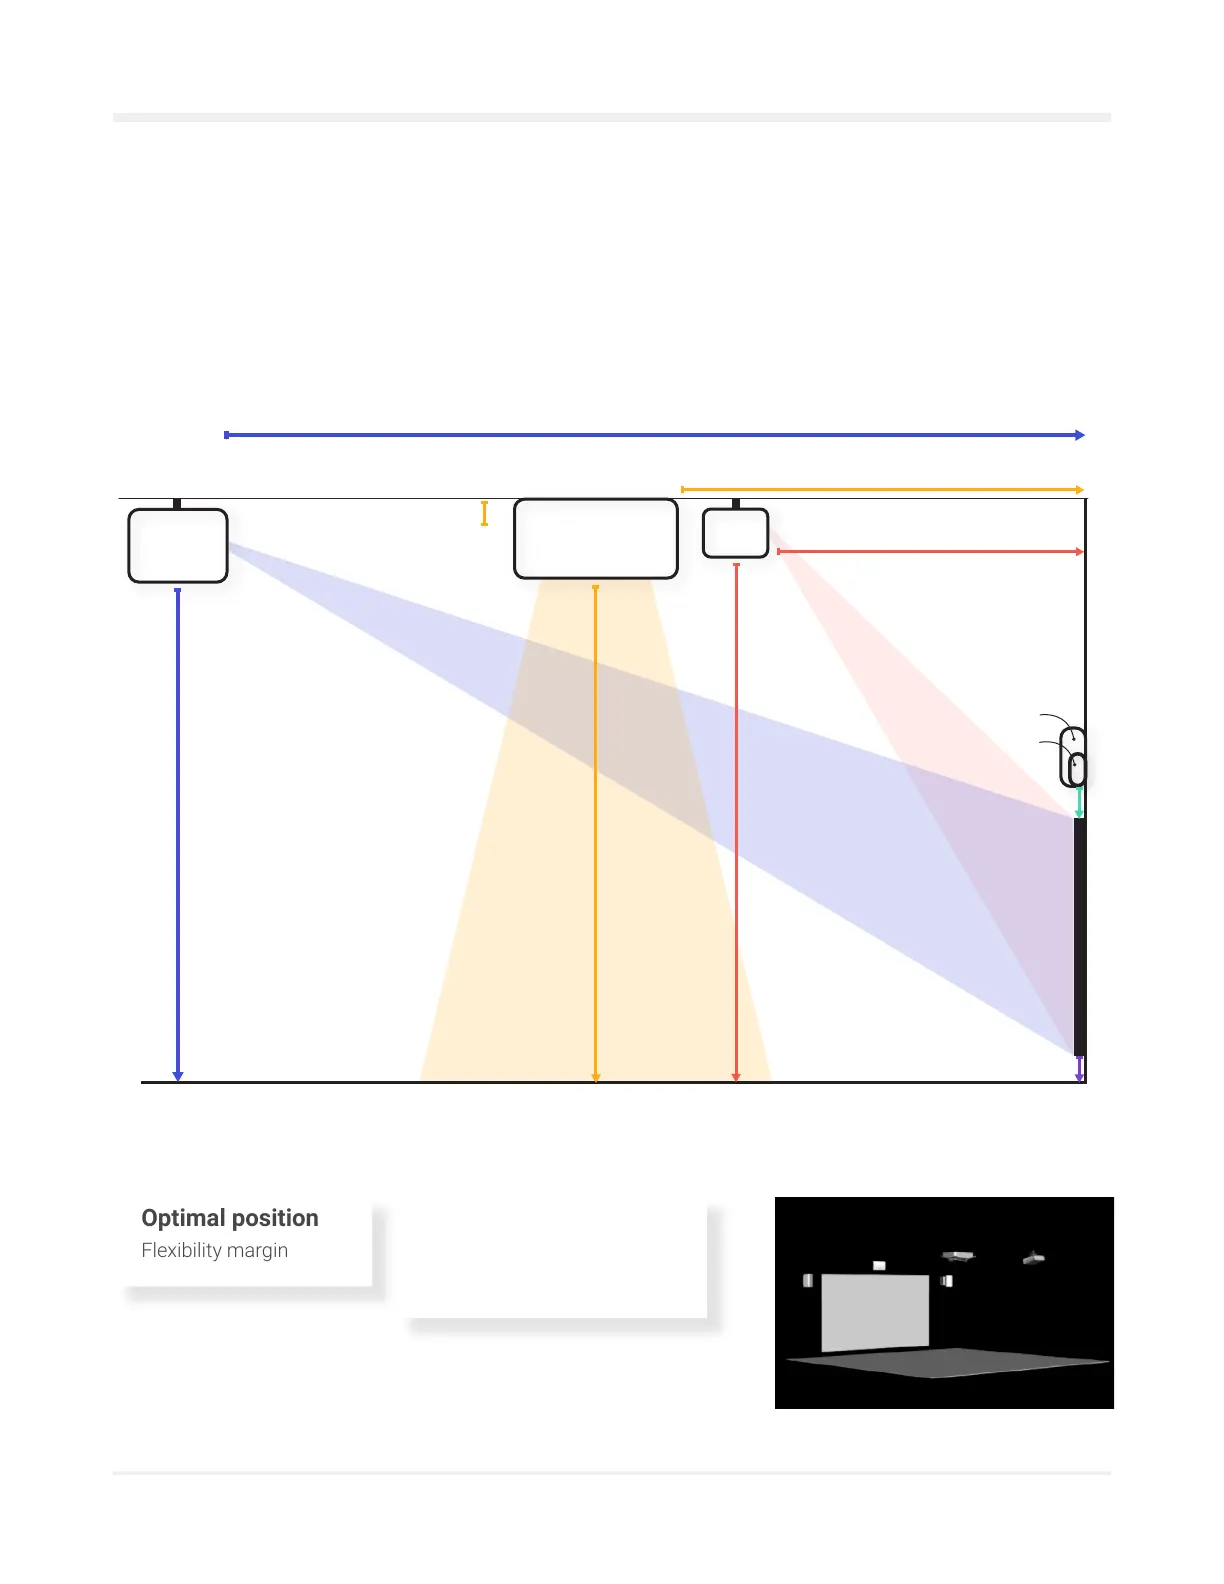
ÜNO installation diagram
Side view
All units must be mounted to the ceiling and aligned with the projection area. The diagram below shows the
optimal position. Some exceptions for special environments can be made, provided they fall within the margins.
Flexibility margin
Optimal position
UNÖ-DUÖ P
D: 16’ (4,9 m)
15’ (4,5 m) to 18’ (5,5 m)
D: 15’ (4,5 m)
13’ (3,9 m) to 15’ (4,5 m)
H: 20’ (6 m)
10’ (3,0 m) to 24’ (7,3 m)
H: 20’ (6 m)
10’ (3,0 m) to 24’ (7,3m)
H: 12” (0,3 m)
H: 8” to 16”
(0,2 m to 0,5 m)
H: 18’ (5,5 m)
10’ (3,0 m) to 18’ (5,5 m)
D: 28’ (8,6 m)
28’ (8,5 m) to 40’ (12,2 m)
Sound
Heart
Be careful not to have any obstacles in the projection.
Projector
Lighting
Camera
H: zero clearance
19’ (5.8 m) wide
10’ 7” (3.3m) high
Max projection surface