24
INSTALLATION RIGGING -
PROJECTION MODULE (F)
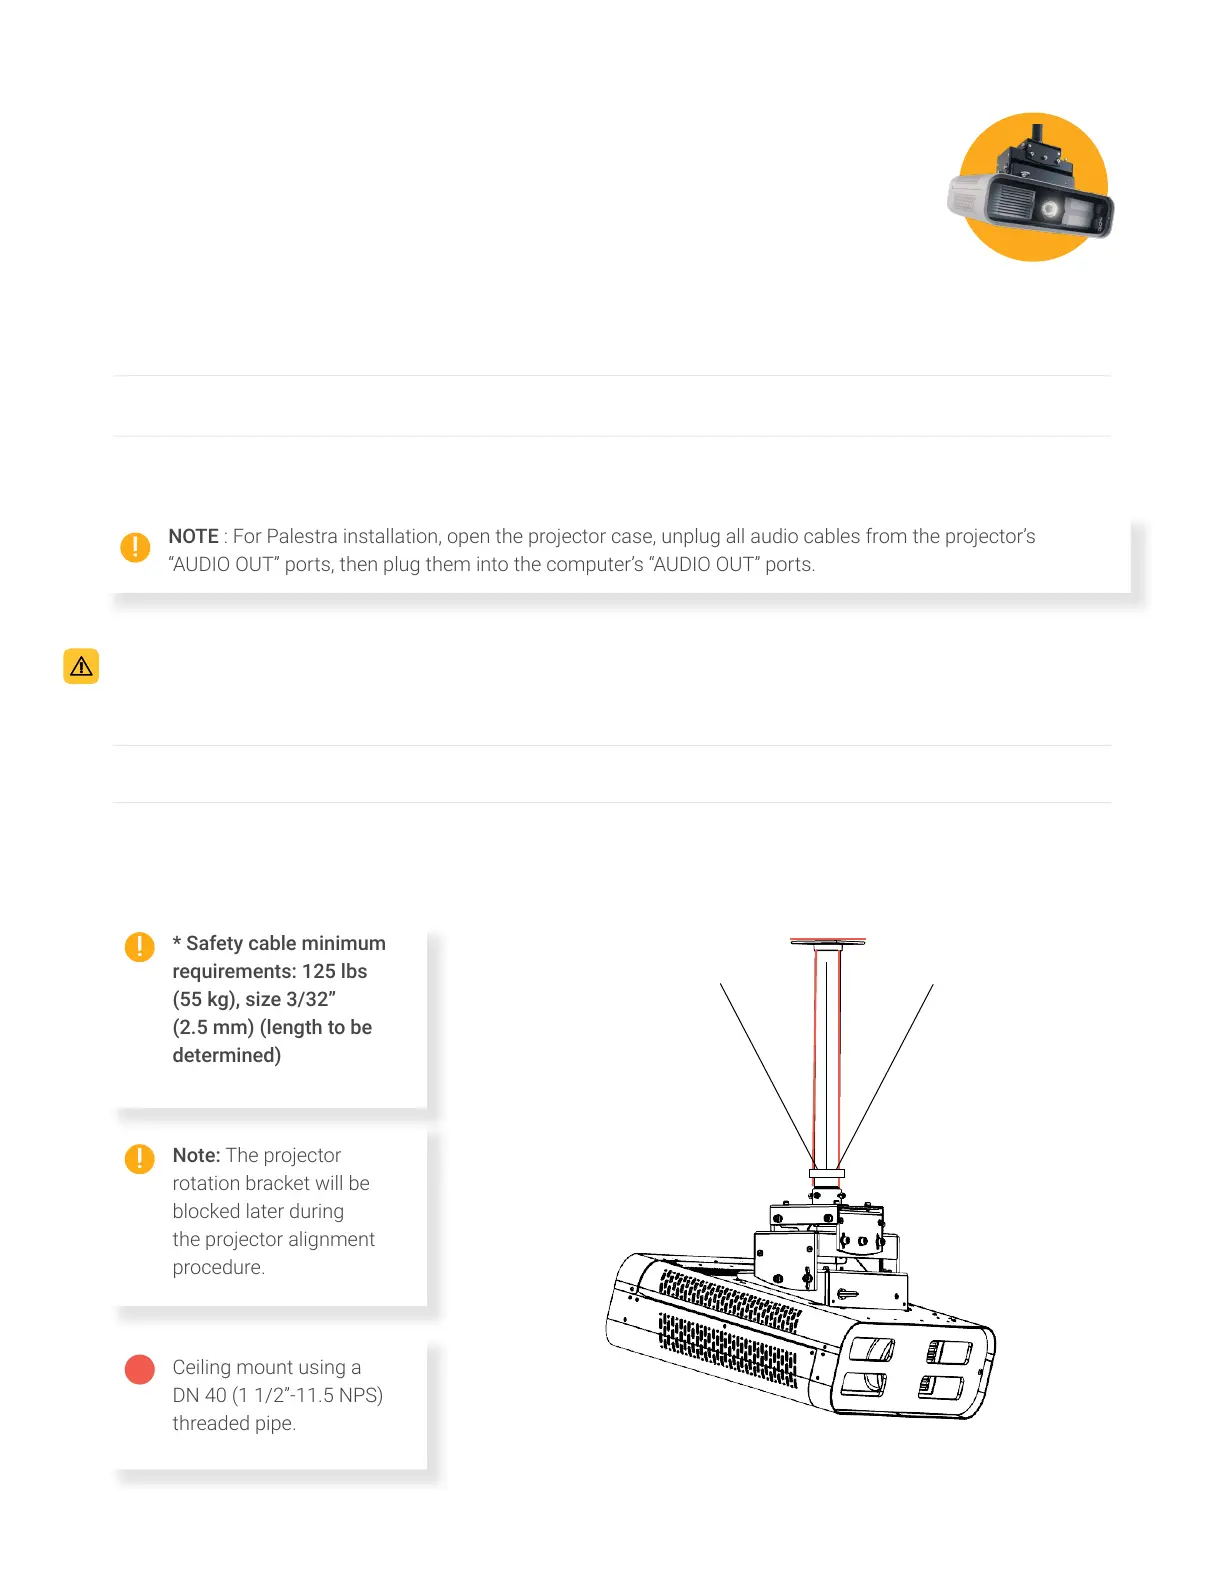
* Safety cable minimum
requirements: 125 lbs
(55 kg), size 3/32”
(2.5 mm) (length to be
determined)
Note: The projector
rotation bracket will be
blocked later during
the projector alignment
procedure.
Ceiling mount using a
DN 40 (1 1/2”-11.5 NPS)
threaded pipe.
A
Stabilization cables systems (to be used on all pipes longer than 24” [60 cm])
Install the ring on the pipe at 1/3 of the length of the pipe from the camera.
Install all 3 metal cables at 120 degrees angle towards the structure in the ceiling.
Stretch solidly the 3 cables with the turnbuckles until the pipe is stabilized at 90 degrees from the ceiling
in all directions and rmly holds in place.
02
03
01
Secure the projector module using the ceiling plate and a DN 40 (1 1/2”-11.5 NPS) threaded pipe (length to be
determined by the ceiling height; the bottom of the camera should be at 20’ [6 m] from ground).
Use a self-drilling screw at the ceiling plate to block any pipe rotation.
Install a safety cable from the eye bolt located between the top of the projector module and the structure.
02
03
01
Lift and install the projector module
NOTE : For Palestra installation, open the projector case, unplug all audio cables from the projector’s
“AUDIO OUT” ports, then plug them into the computer’s “AUDIO OUT” ports.