30
Turn off the lights around the interactive wall (the room should not be completely dark).
Click on the “CALIBRATE” button.
A calibration grid will be displayed while the system is calibrating. A few seconds later, the message
“Calibration successful” should appear.
Even if the automatic calibration has failed, continue on to manual calibration.
Using the keyboard, press “M” to enter manual calibration mode, then “H” to hide the instructions and “I” to
display the invalid red pixels. There should be no red pixels in the detection zone, which is represented by a
green rectangle. The green rectangle must frame the projection. If there is red in the detection area, clean
the camera lens and test the detection in that area. If the detection is not good, contact technical support.
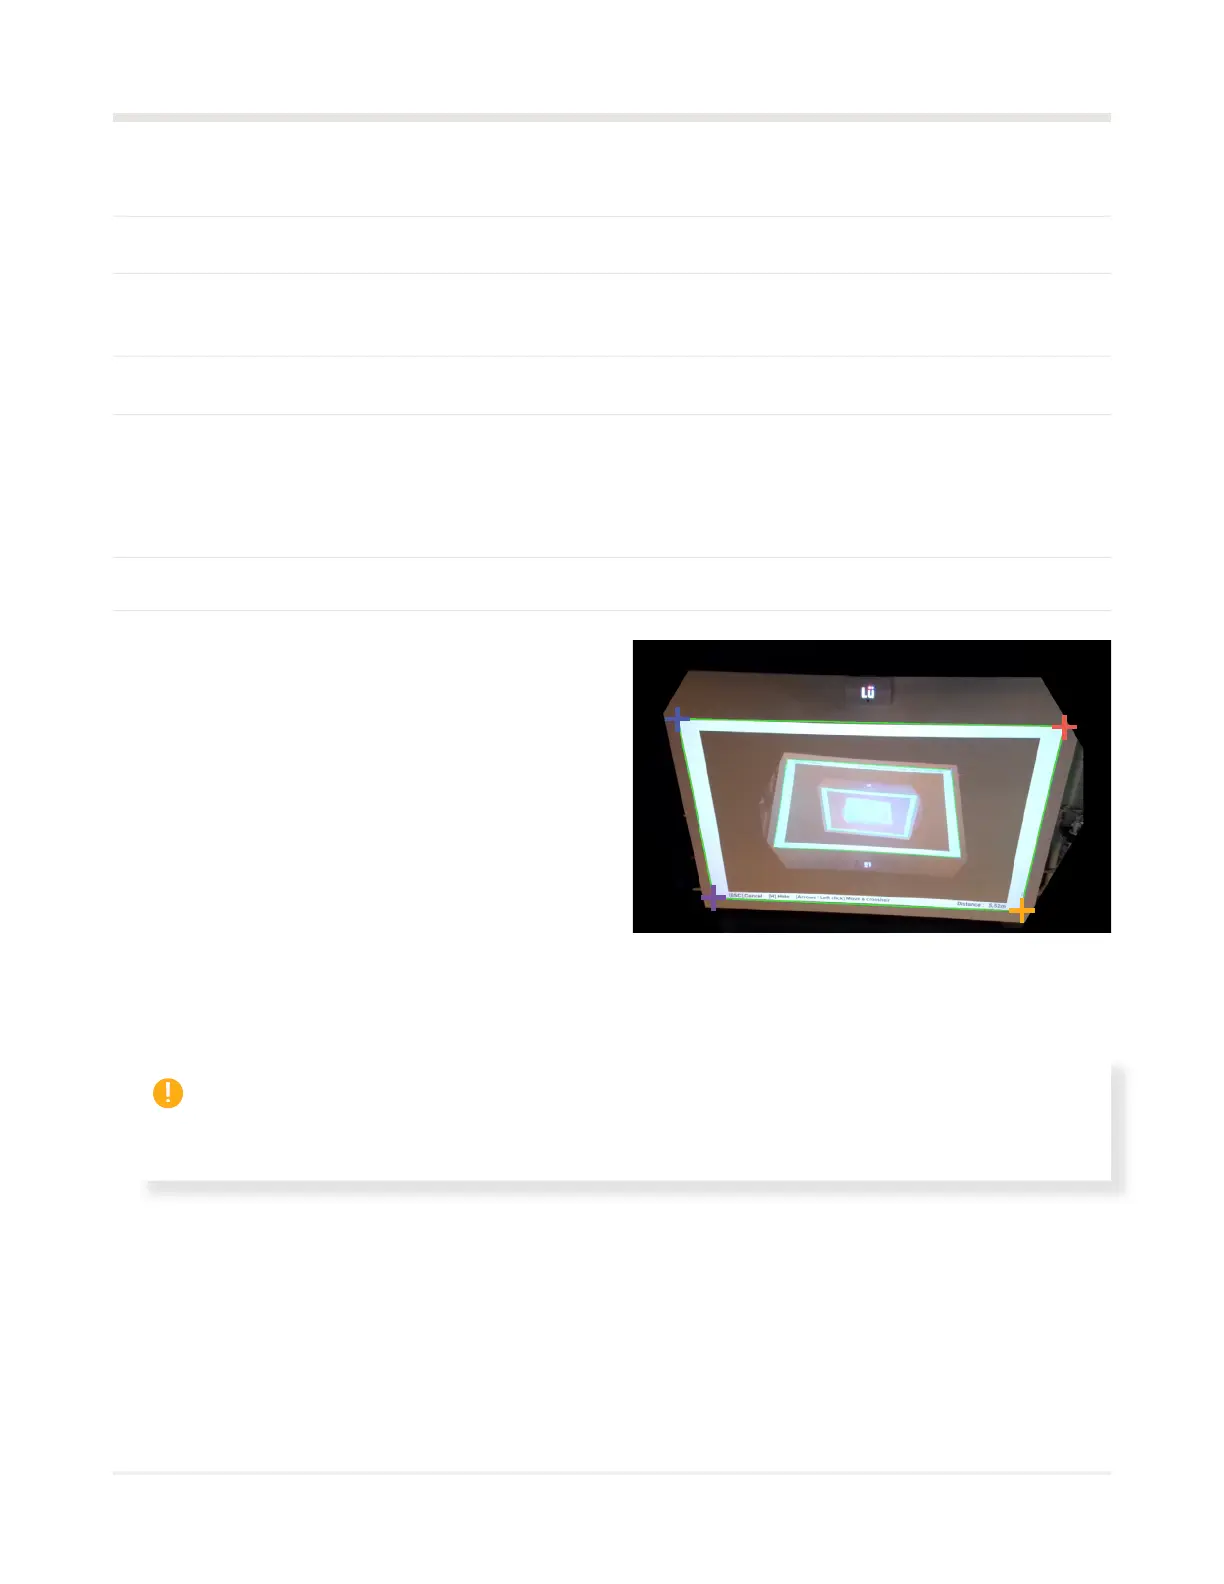
Using the keyboard arrow, move the crosshairs to the corners as shown below.
02
03
04
05
06
07
01
Test mode
Perform a calibration test by throwing balls
at the wall. The point where the ball hit the
wall should be represented by a purple dot.
Repeat the process by throwing several balls at
different points on the wall to make sure that the
camera is detecting accurately across the entire
projection. To exit test mode, press “ESC” and
then “OK” twice on the keyboard.
Check for false positives
Make sure you do not get any false positives (obstacles on the interactive wall). Very good! If you
don’t see this, remove any obstacles from the wall.