96
Mackie Control
®
and HUI
®
Your Code Series keyboard can send messages using the Mackie Control
®
or HUI
®
(Human
User Interface) protocols rather than standard MIDI communication. You must first select
which one it will use.
Remember that the faders, buttons, and/or encoders you want to use with this protocol must
be set to Mackie Control/HUI Mode for this to work properly. See Basic Concepts > Control
Modes to learn about this.
Using either protocol does not affect the pads or keyboard.
To select the Mackie Control or HUI protocol:
1. Press Edit to enter Edit Mode. The Edit button will light up.
2. Press and hold Shift, and then press the Curve / Mackie/HUI key. Each time you press it,
it will switch between the Mackie Control protocol or HUI protocol. The current mode will
appear in the display.
3. To confirm your selection, wait for 1 second. You will exit Edit Mode automatically.
Using Mackie Control
When your faders, buttons, and/or encoders are in Mackie Control/HUI Mode, their respective
Fader Mode, Button Mode, or Encoder Mode button will be lit green.
Use the Bank Right/Left () buttons to move to another bank of tracks.
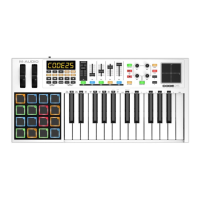
Important note if you are using Code 25: In your DAW, it may look like you are controlling 8
tracks, but you can control only 4 tracks at a time. When you press one of the Bank
Right/Left () buttons, you will control only the next/previous 4 tracks.
When using the Mackie Control protocol, each of the controls will do the following:
• Faders: Moving the faders will adjust the volume of each track.
• Buttons: Pressing the buttons will perform one of the following functions for each track,
depending on its color:
o Track Select (green, the default)
o Record-Arm (red)
o Solo (yellow)
o Mute (blue)
The first button (B1, under the master fader) does not have a track-specific function.
To set the function of all buttons, press and hold Shift, and then press the first button
(B1, under the master fader) to cycle through the four functions. The display will show
the current function: TRACK (track select), RECORD (record-arm), SOLO, or MUTE. This
will set all buttons to the same function regardless of their current functions.
To set the function of one button only, press and hold Shift, and then press the desired
button to cycle that button only through the four functions. The display will show the
current function: TRACK (track select), RECORD (record-arm), SOLO, or MUTE.
• Encoders: Turning the encoders will adjust the panning of each track.