SET-UP AND INSTALLATION 18000 OPERATOR MANUAL
4-98
Published 12-05-17, Control # 032-23
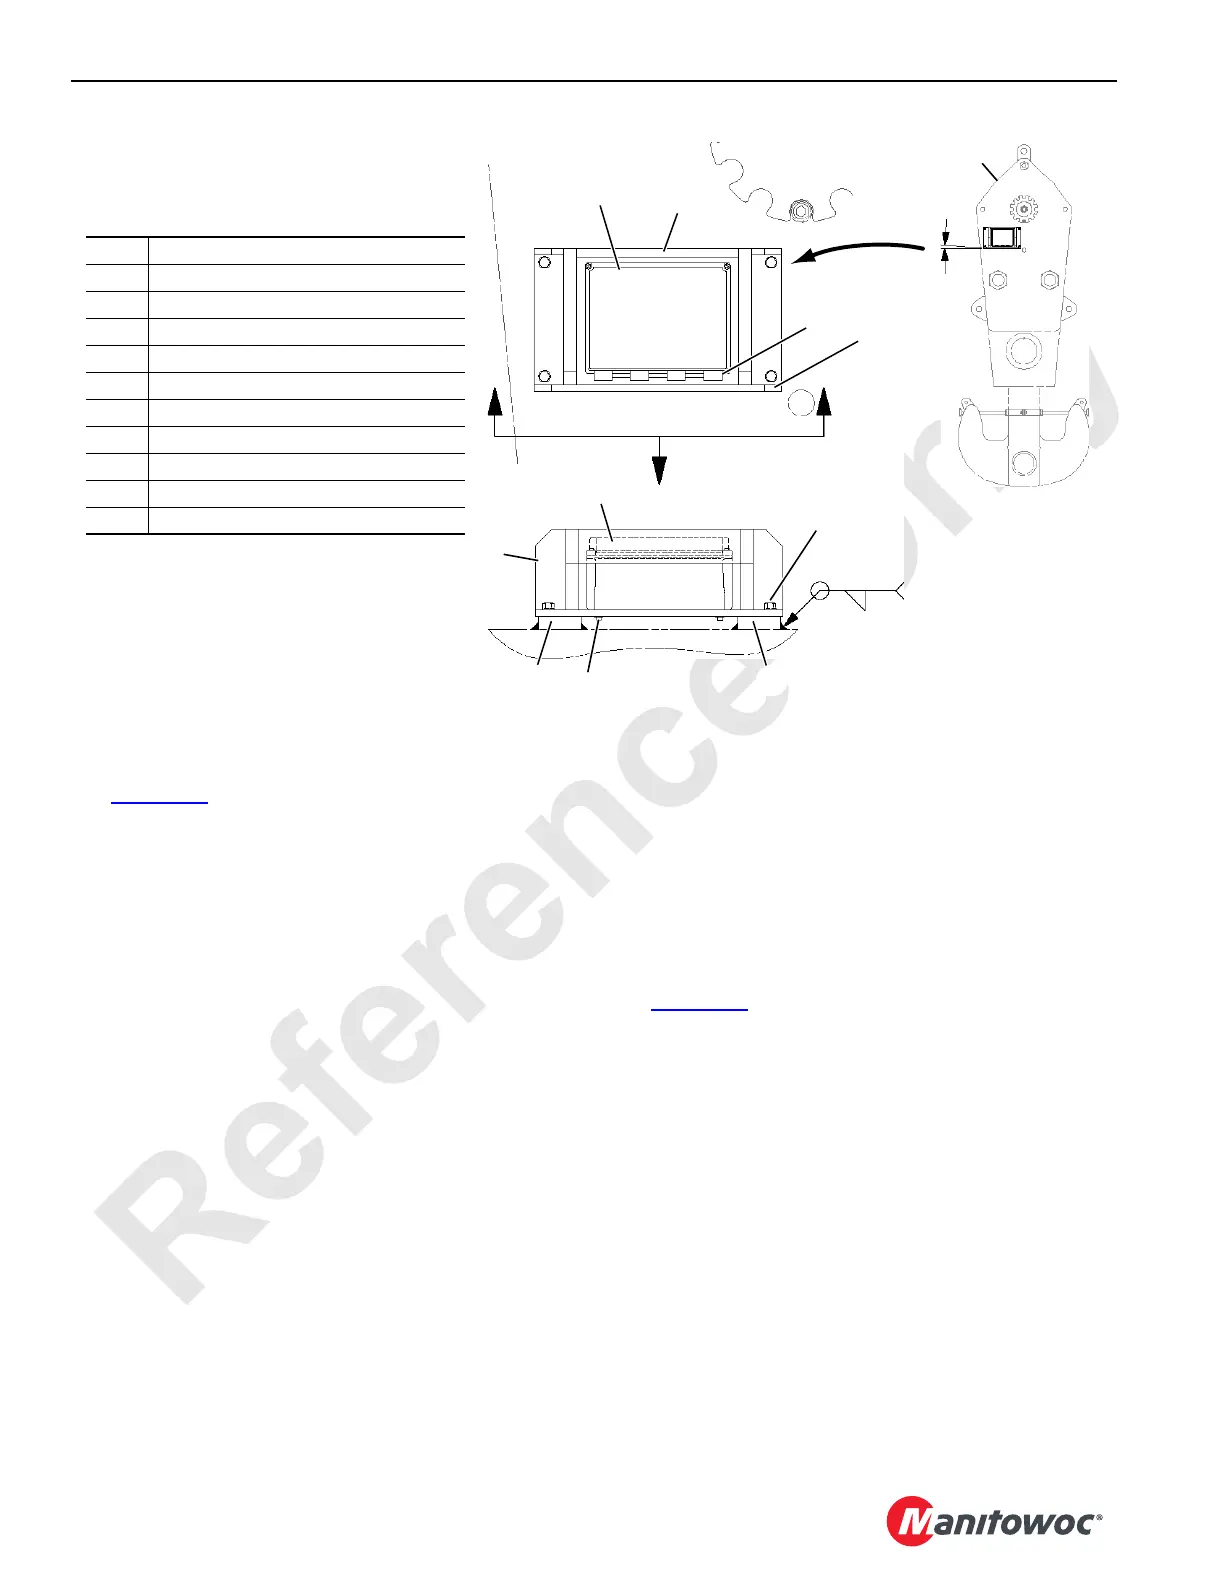
Install Block-Level Transmitter
See Figure 4-51 for the following procedure.
To prevent damage during shipping, the current production
block-level transmitter and bracket are shipped in the job
box.
The transmitter must be installed on the load block as
follows:
1. If not already done, fasten block level transmitter (1) to
bracket (2).
2. Fasten bracket (2) to mounting pads (4) on load block
(3).
• Large bracket flange (2a) must face down.
• Transmitter (1) must be on left side of load block (3)
as viewed from the operator’s cab once the load
block is reeved.
3. Make sure six D-cell batteries are installed in the
transmitter. Match the plus and minus of the batteries
with the polarity-indicator decals in the holder inside the
transmitter.
Mounting pads (4) are pre-installed on load blocks supplied
by Manitowoc.
To install the mounting pads on an owner supplied load
block, proceed as follows:
1. Locate an area on the side of the load block that has no
obstructions between the transmitter and the controller
in the boom or jib top.
2. The transmitter must be horizontal plus or minus 1º.
3. Size the weld to match the load block’s side plate
thickness — not less than 3/16 in (4,8 mm).
4. Use bracket (2) as a guide to locate mounting pads (4).
Connect Electric Cables
See Figure 4-48 for the following procedure.
1. If running, STOP ENGINE before connecting or
disconnecting electric cables.
2. Connect electric cable W18 from junction box to crane
connection (View A).
3. Connect the following cables to junction box on boom
butt (View B):
• W18 from adapter frame
• W86 from Drum 1
• W14 to cable reel
4. Connect W66 from Drum 2 to junction box on right front
of rotating bed (View C).
Item Description
1 Transmitter
1a Hinge — MUST FACE DOWN
1b Socket-Head Screw, #10 (4)
1c Washer, #10 (4)
2Bracket
2a Large Flange — MUST FACE DOWN
2b Cap Screw, 3/8 in (4)
2c Washer, 3/8 in (4)
3 Load Block
4 Mounting Pad (2)
1
2
3
Typical
1a
2a
2b
2c
1b
1c
2
1
1°
FIGURE 4-51
4 4
 Loading...


