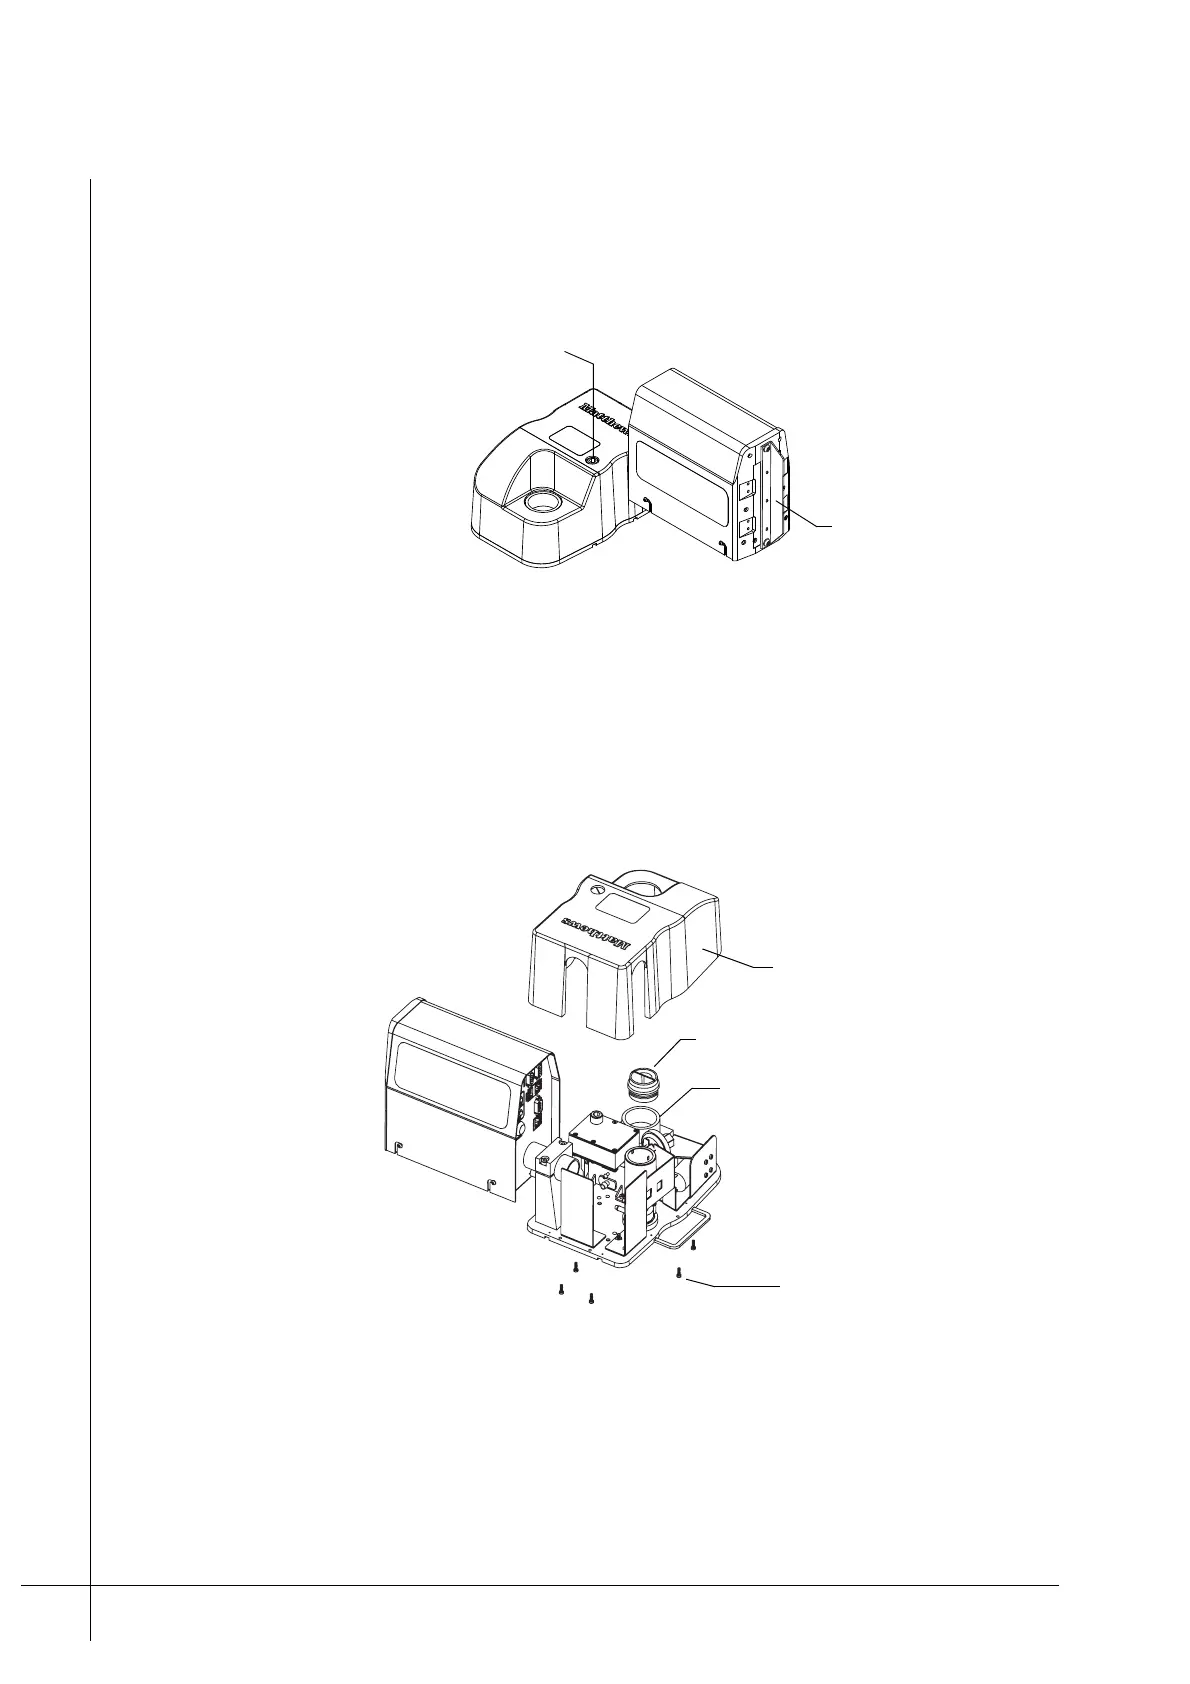
Installation – Print Head Set-up
T50/T100 PTM – User Guide – Version 2 Issue 1
14
1. Make sure that the Ink-Vent-Screw is closed and that the Nozzle-Protector-Plate is
correctly attached to the print head.
Caution: Failure to close the Ink-Vent-Screw and attach the Nozzle-Protector-Plate
will result in ink spillage or air becoming trapped in the system
Figure 8 - Changing the head set-up.
2. Disconnect all cables and make sure that there is no power supplied to the print head.
3. Unscrew and remove the Ink-Bottle from the Ink-Reservoir.
4. Screw the Ink-Reservoir-Cap in to the Ink-Inlet, so that no ink is spilt.
Caution: Ink spillage will occur if the Ink-Reservoir-Cap is not correctly inserted.
Figure 9 - Removing the Reservoir-Cover
5. Unscrew and remove the five screws that retain the Reservoir-Cover, as shown above.
6. Place the print head so that it is level. Unscrew the Ink-Reservoir-Cap and then remove
the Reservoir-Cover. Screw the Ink-Reservoir-Cap back in to the Ink-Inlet once the cover
has been removed.
Nozzle-Protector-Plate
Ink-Vent-Screw
Reservoir-Cover
Ink-Reservoir-Cap
Ink-Reservoir screws
Ink-Inlet