15
T50/T100 PTM – User Guide – Version 2 Issue 1
Installation – Print Head Set-up
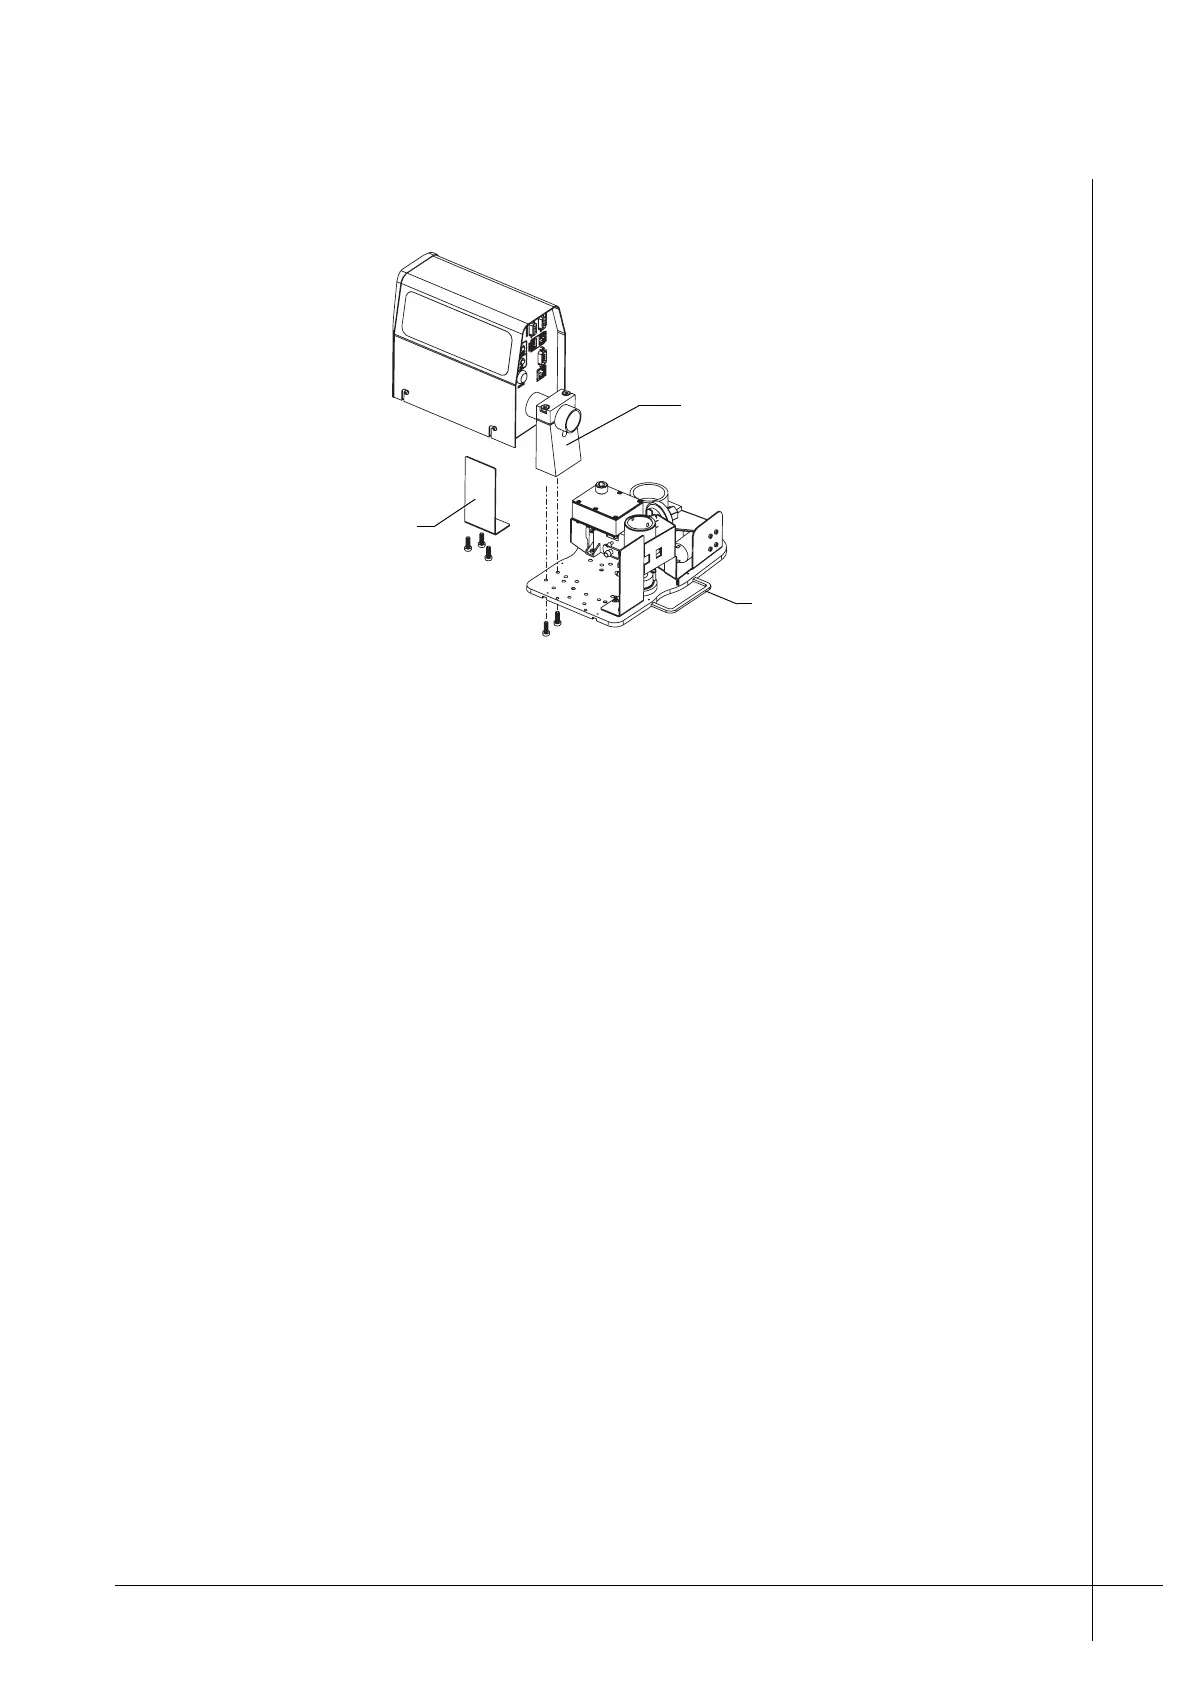
7. Unscrew and remove the Blanking-Plate from the desired head-mounting-position.
Figure 10 - Re-positioning the print head
8. Unscrew the Head-Retaining-Clamp’s two screws from underneath the Ink-Reservoir.
Make sure that the print head is held securely, it is heavy.
9. Carefully re-position the head in to the required position. Secure it with the Head-
Retaining-Clamp and its two screws.
Note: It may be required, in installations where the print target does not travel
horizontally, that the print head needs to be tilted. For further information refer to “Tilting
a Print Head” on page 17.
10. Make sure that both the cables and the tubing to the print head are positioned so that
they are free from risk of damage. Make sure that the tubing is not crushed or kinked.
Caution: If the ink tubing is kinked printing problems will occur.
11. Mount the Blanking-Plate in the position that the print head was originally. Use the three
screws to secure it.
12. Mount the Reservoir-Cover back on to the Ink-Reservoir and secure it with the five
screws.
Blanking-Plate
and screws
Head-Retaining-Clamp
Cable-Bar