Maintenance – Ink-Filter Replacement
T50/T100 PTM – User Guide – Version 2 Issue 1
32
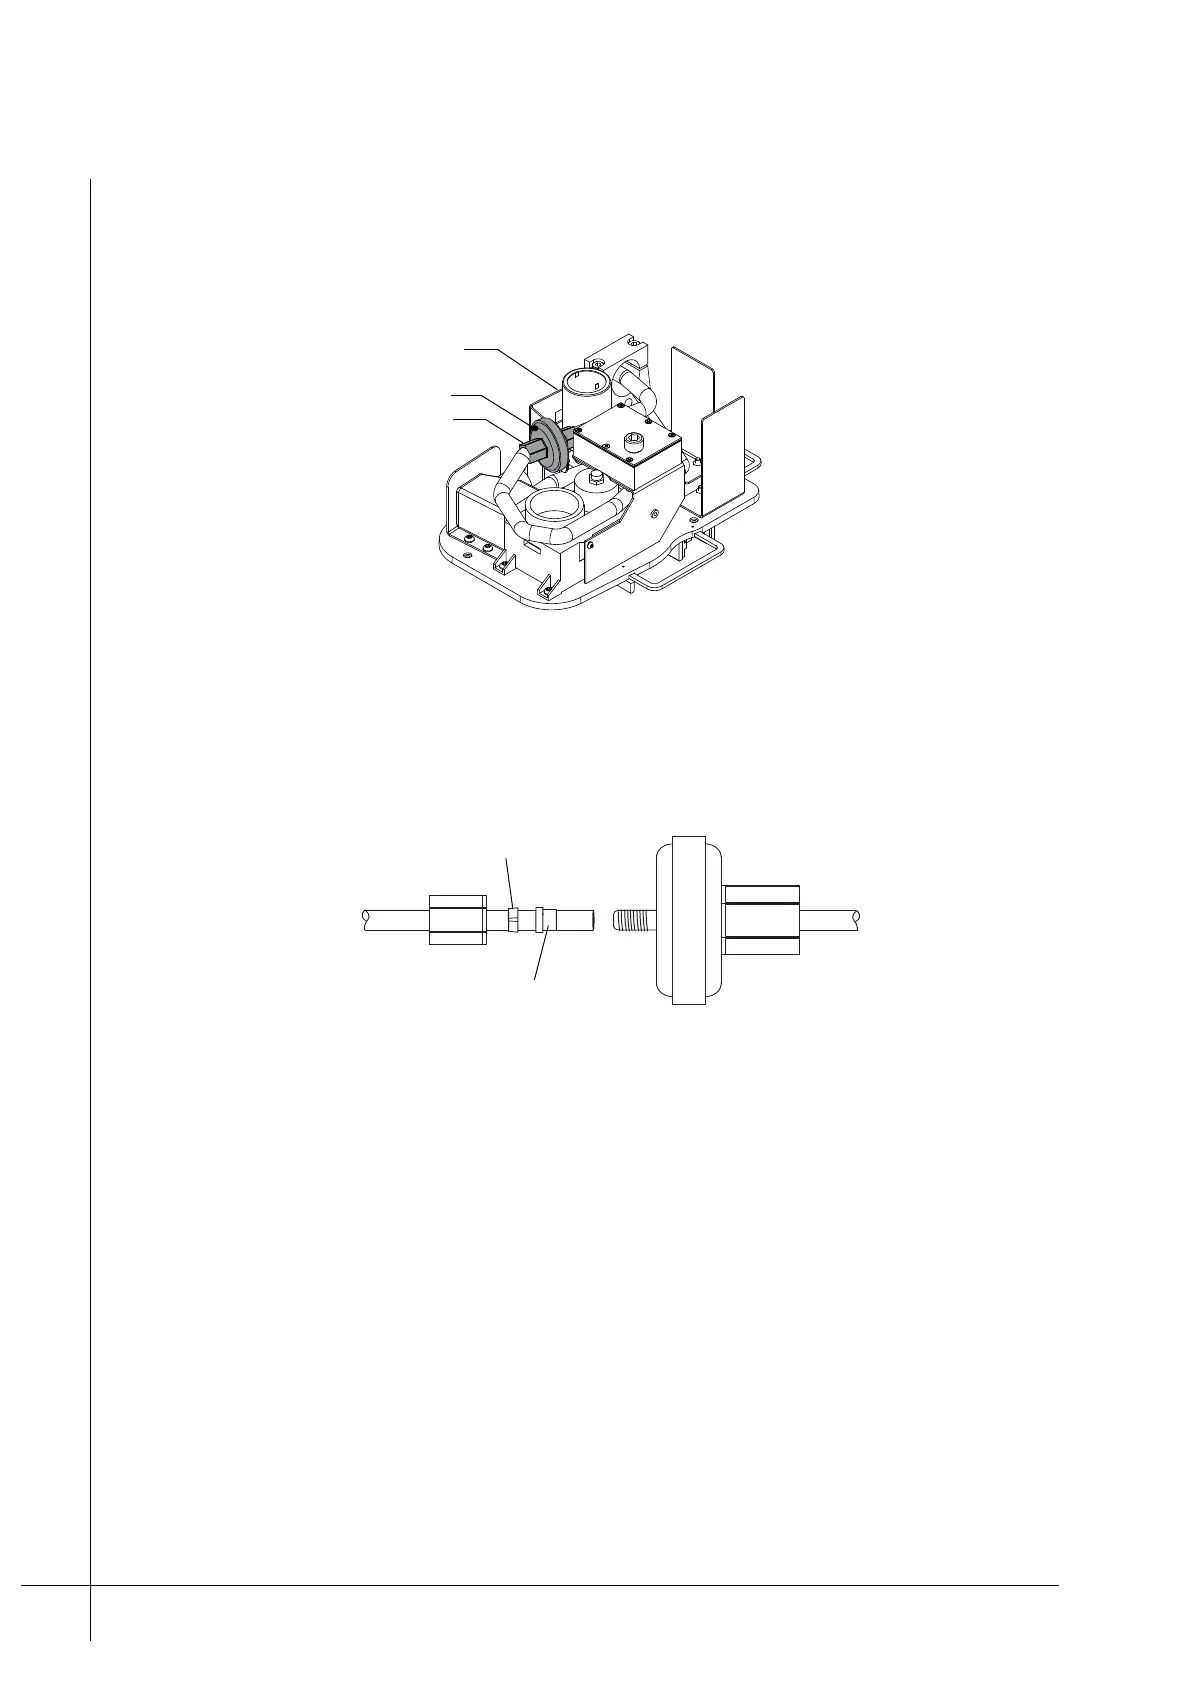
7. Remove the filter from its retaining bracket, then unscrew the Iink Filter’s two tube
retaining nuts. Some ink spillage will occur. Make sure that there are paper towels at
hand to absorb any spillage.
Figure 27 - Ink filter
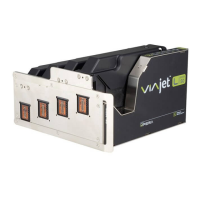
8. Screw the new filter on to the existing Tube-Retaining-Nuts, tighten the nuts with finger
pressure only. Make sure that the Compression-Rings and Spacers inside the Tube-
Retaining-Nuts are correctly positioned as shown.
Figure 28 - Iink Filter compression ring
9. Inspect the filter to ensure that it is connected correctly and then mount it back in to the
Filter-Retaining-Bracket.
10. Secure the Reservoir-Cover back on to the Ink-Reservoir.
11. Make sure that the PTM is correctly mounted as described under “Mounting the Print
Head” on page 16.
12. Turn the Ink-Vent-Screw, located on top of the Ink-Reservoir, fully anti-clock wise.
13. Unscrew and remove the Nozzle-Protector-Plate from the front of the PTM.
14. Unscrew and remove the Ink-Reservoir-Cap from the Ink-Inlet. Store it in a clean place
for future use.
Iink Filter
Tube-Retaining-Nut
Filter-Retaining-Bracket