CS033663DE ZP-CS01E TORKEL 900-SERIES
25
5 MAKING A TEST
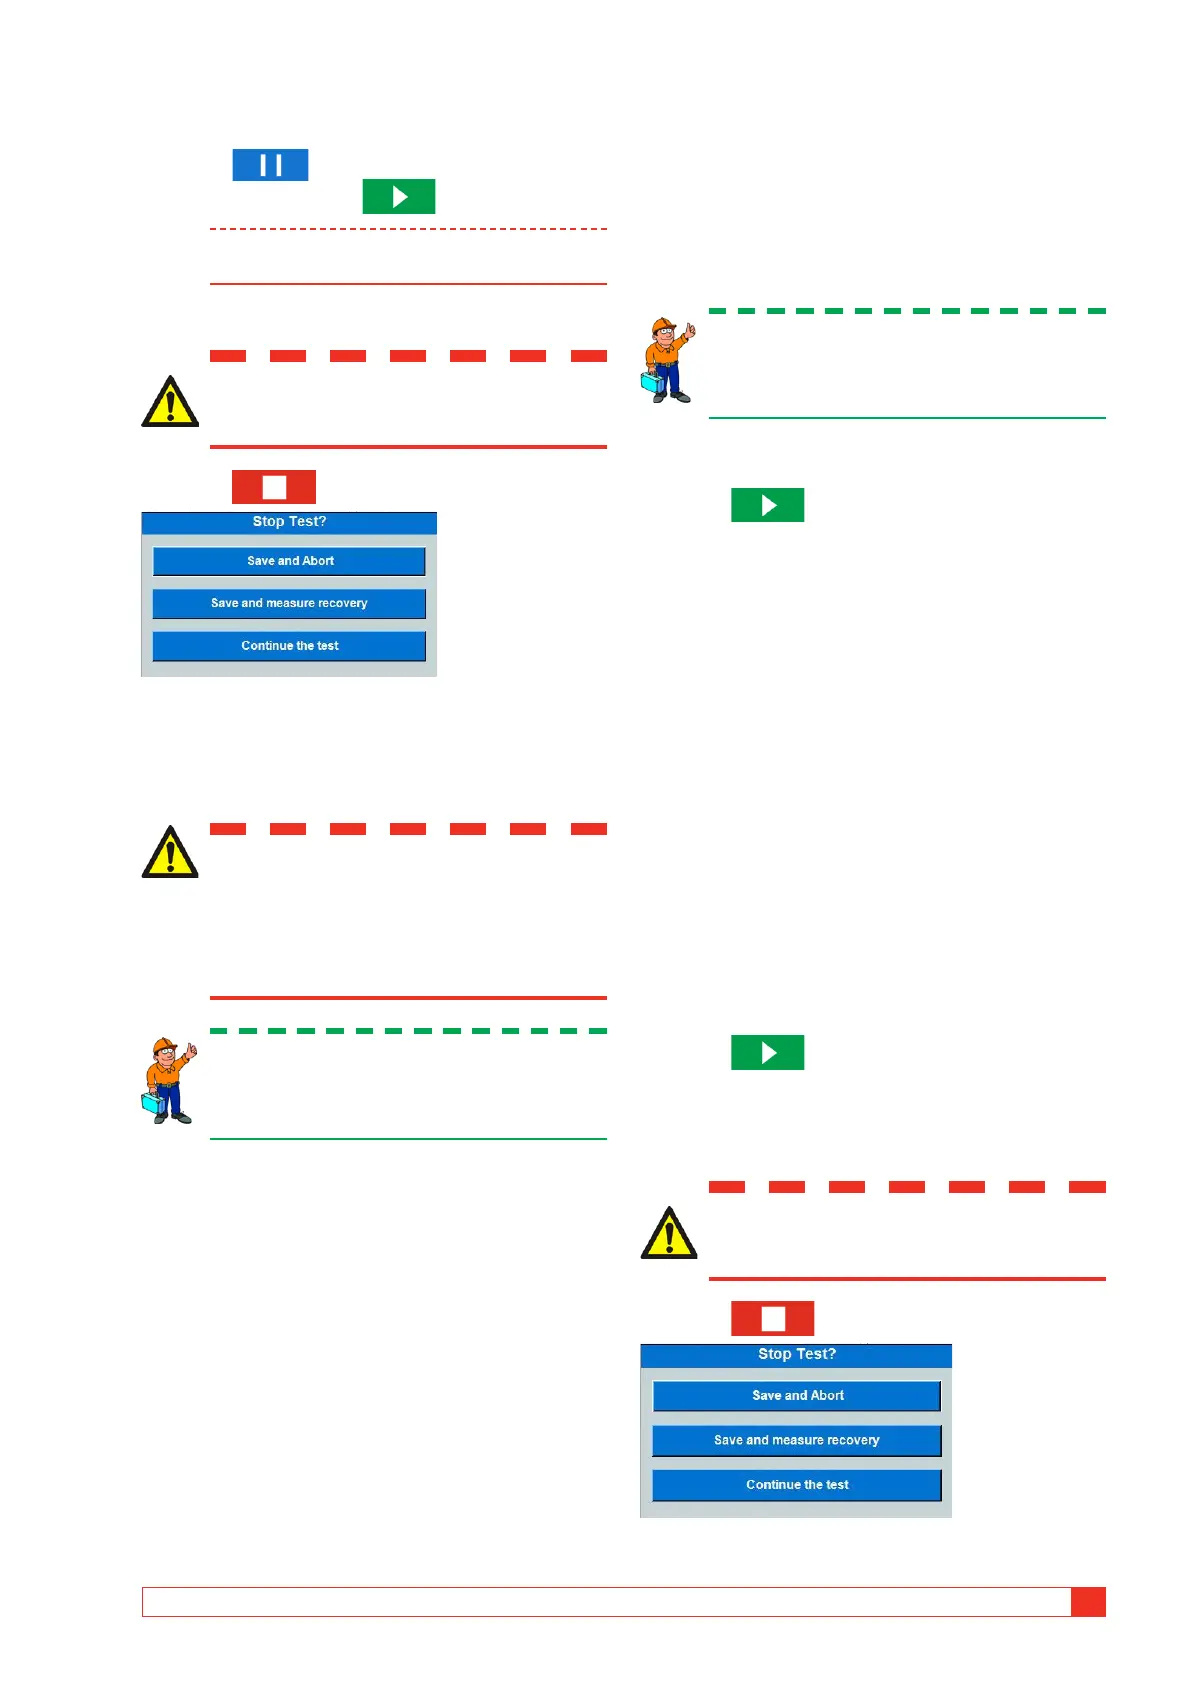
Pausing the test
1] Press
2] Restart by pressing
Note Any TXL Loads connected to TORKEL must be
restarted manually.
Ending the test
WARNING
Do not disconnect any cables until the test
is completed and stopped.
1] Press
2] Press "Yes".
3] Disconnect the cables in reverse order as
described in section "Connecting the current
cables to the battery" on page 20
WARNING
Do not connect a discharged battery to a
battery that has not been discharged. The
batteries must be charged to the same
potential (voltage) before they are con-
nected together.
Tip
You can select to make the charging test im-
mediately after a discharging test and keep all
connection as they are.
For viewing results and report see section "5.7 View-
ing results and reporting" on page 26.
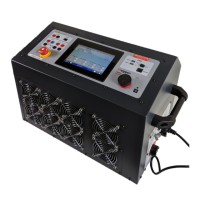
5.6 V Logger
TORKEL can log the voltage during charging of the
batteries.
Starting "V Logger" directly after a
discharge test
Tip
You can select to make the charging test im-
mediately after a discharging test and keep all
connection as they are.
1] Press"Save and start V logger".
This will be a separate new test.
2] Press
3] Start charging the batteries.
4] You can change the Warning and Stop limits
during the test.
Starting "V Logger" as a separate
test
Preparations
Follow the safety precautions set forth in section "2.2
Safety instructions" on page 8 and the prepara-
tions for testing in section "5.1 Preparations for test-
ing" on page 20.
Select "Test Method"
1]
Press "V Logger" button.
2] Make settings for warning and stop time, see
section "Warning and stop limit parameters"
on page 14.
3] Press
4] Start charging the batteries.
Ending the test
WARNING
Do not disconnect any cables until the test
is completed and stopped.
1] Press
2] Press "Yes".