22 PRM 10 E | Version 1.05 | EN
Operation of the machine
Functionality
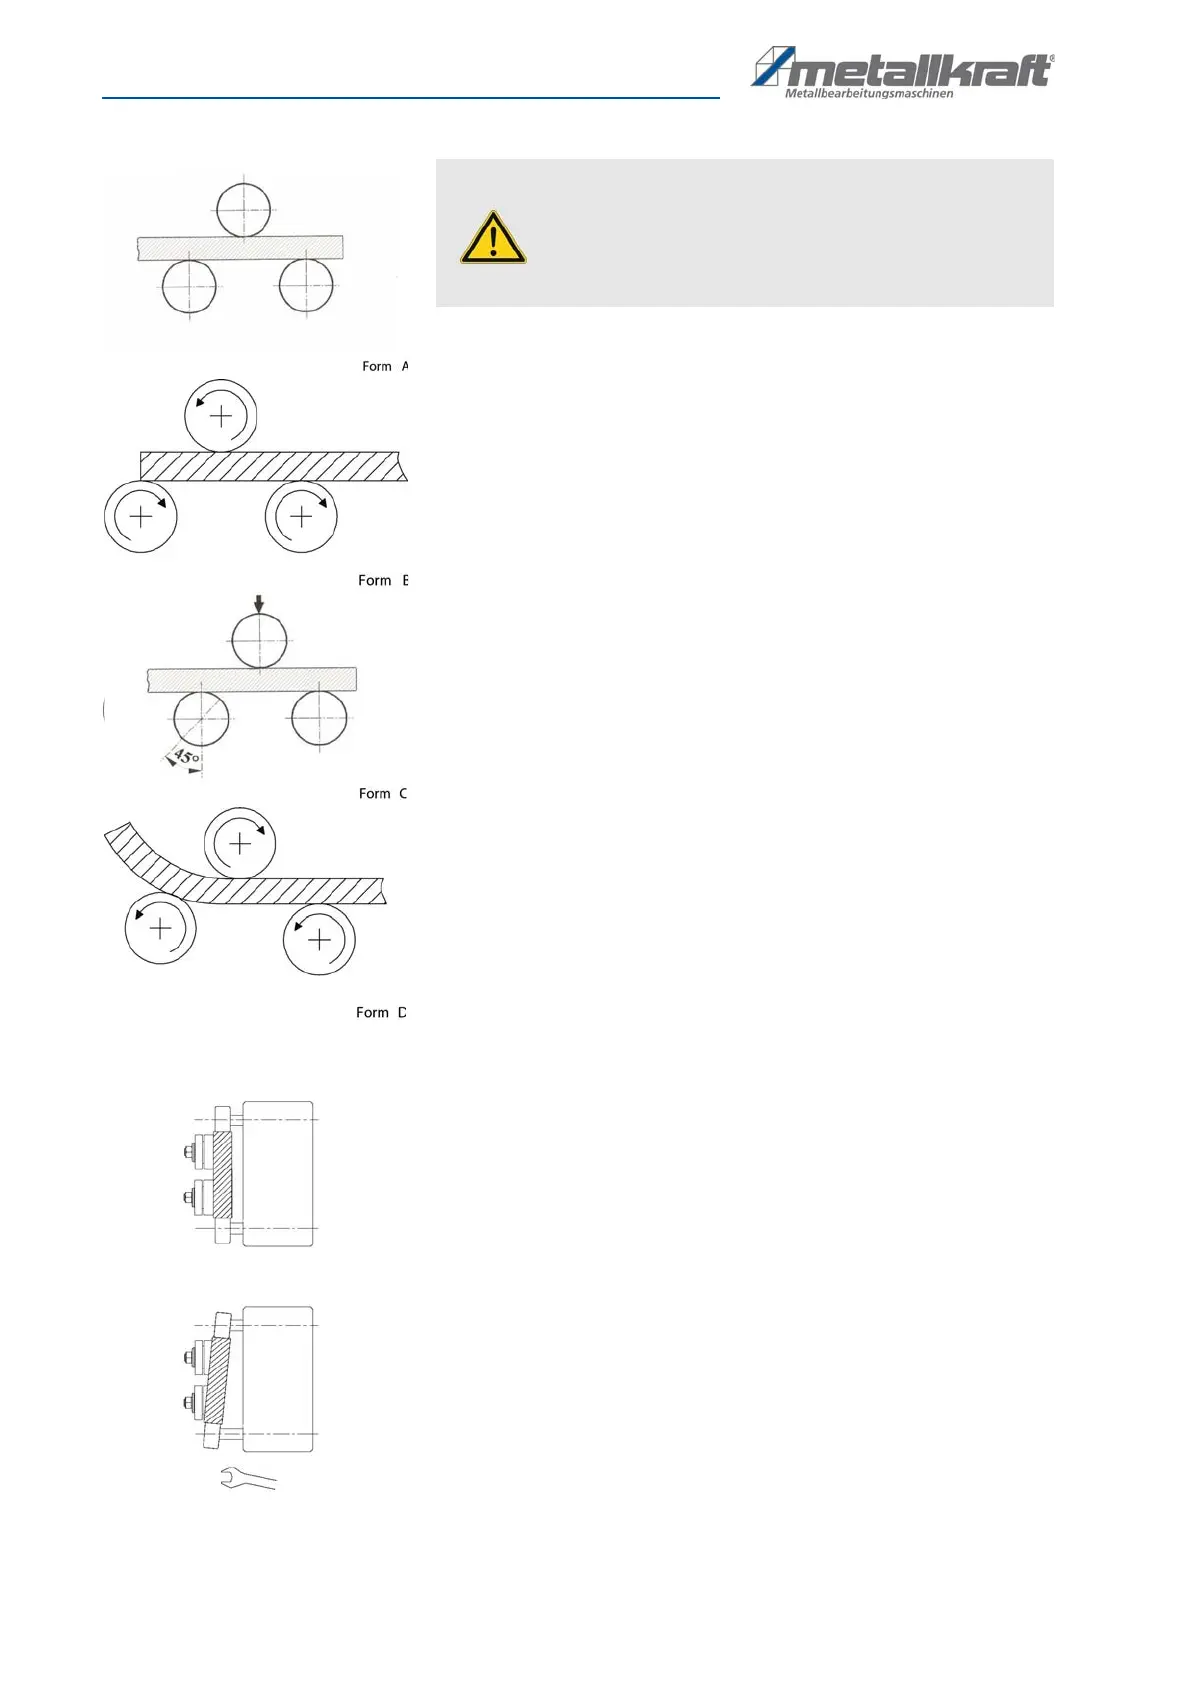
Step 1: Select suitable bending rollers for the material to be machined and
mount correctly.
Step 2: Connect the motorized ring bending machine to the mains.
Step 3: Turn the main switch from position "0" to "1". The motorized ring
bending machine is now operated via the control panel.
Step 4: Press the "START" key to start the motorized bending machine for the
bending process.
Step 5: Screw the upper roller upwards and set a distance between the upper
roller and the lower rollers so that the profile to be bent can be placed
between them (Fig. 12, Form A).
Step 6: Screw the upper roller upwards and set a distance between the upper
roller and the lower rollers so that the profile to be bent can be placed
between them (Fig. 12, Form A).
Step 7: Move the profile to be bent left and / or right. It must be clamped with
one end between the upper and lower rollers (Fig. 12, Form B).
Step 8: Lower the upper roller down to apply more ressure to the profile to be
bent and to slightly bend it (Fig. 12, Form C).
Step 9: Again, move the profile between the rollers and bend.
Step 10: To also pre-bend the other end of the profile, the steps just described
must be repeated.
Fig. 12: Bend profile
Check the radius. If the desired radius has not yet been reached, adjust it by
turning the upper roller up and down. Often several operations are necessary.
It must be done carefully so as not to exceed the desired level. Once the desi-
red radius has been reached, the entire profile can be bent.
Step 11: Due to the high bending stress, it may happen that the workpiece
warps to the left or right. To compensate for this delay use the guide
rollers.
Step 12: In order to bend a spiral or a circle, one of the two guide rollers must
be relayed further in order to achieve a deliberate deflection of the
material to the left or right.
Step 13: At the end of the bending process, press the STOP button and turn
the main switch from "1" to "0" to switch off the motorized bending
machine.
Fig. 13: Adjust side guide rollers
ATTENTION!
For bending pipes with wall thicknesses below 2 mm, it is
recommended to fill the pipes with sand to avoid kinking of
the pipes.
Do not turn the tubes when bending.