© Microhard Systems Inc. 179
Appendix B: IP-Passthrough Example (Page 2 of 2)
Step 3
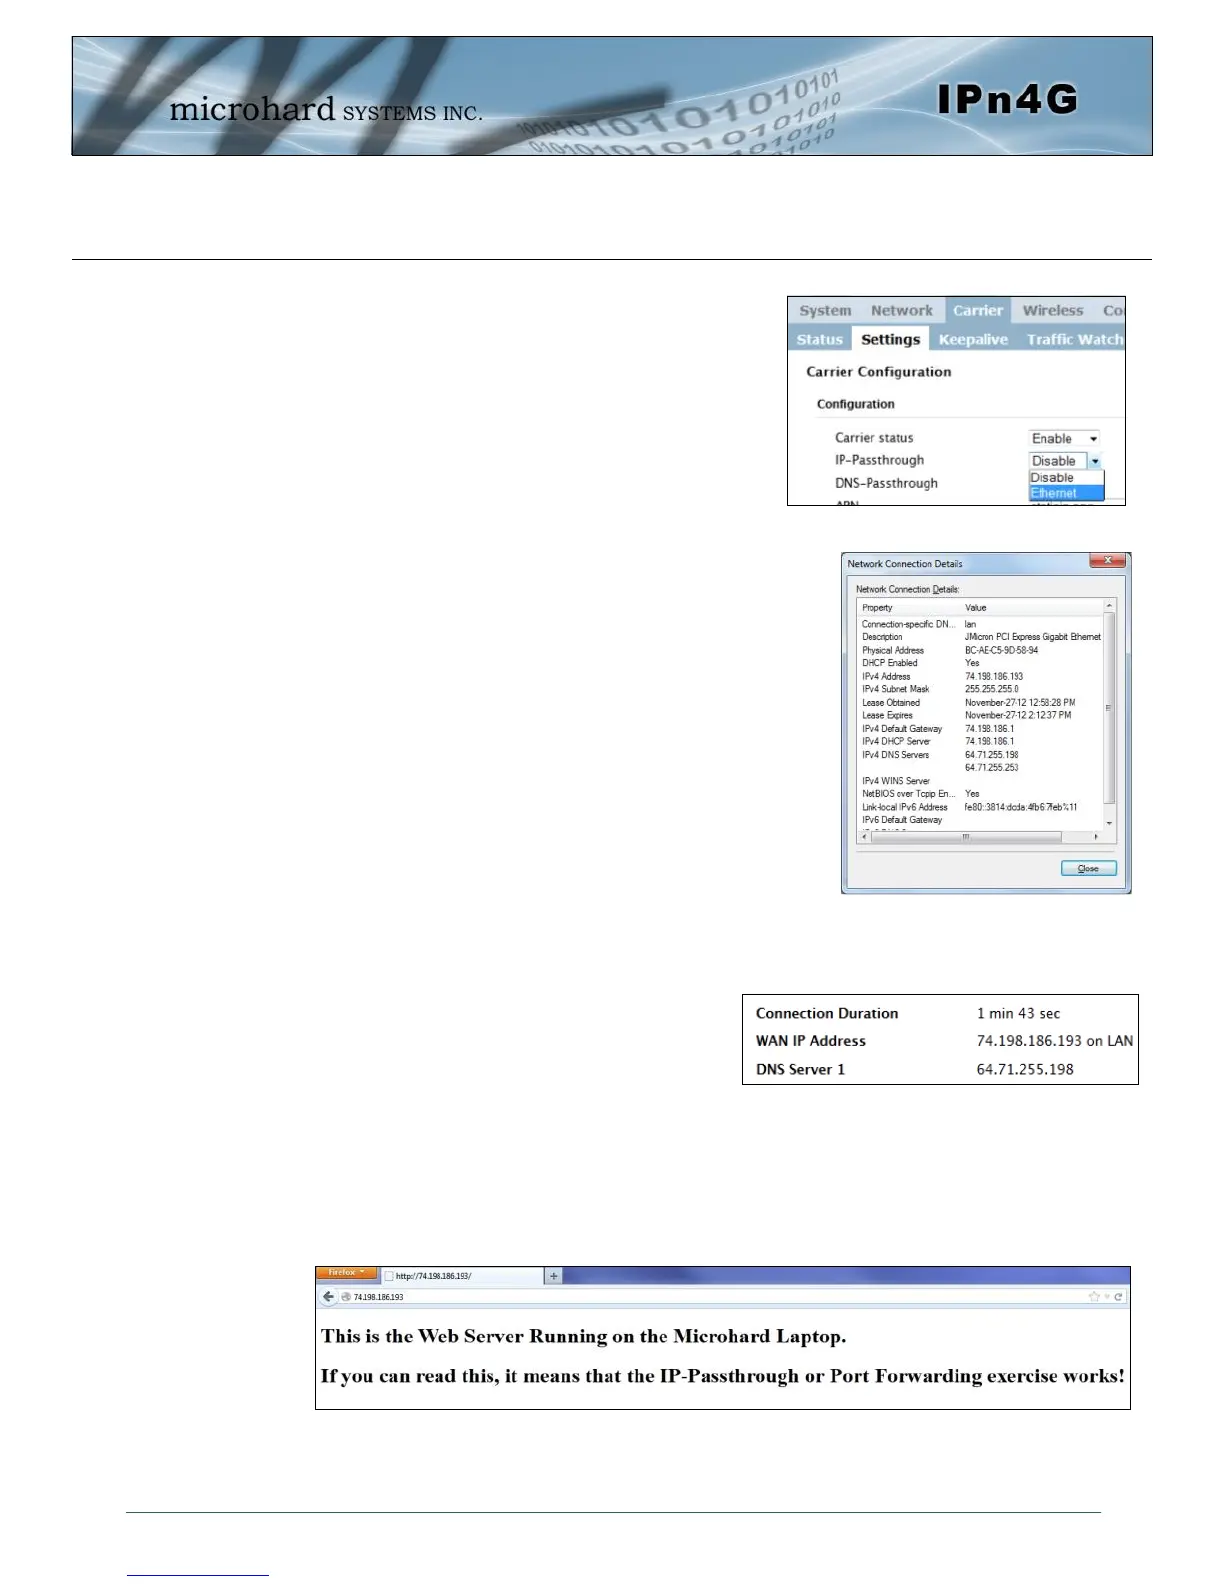
Now IP-Passthrough can be enabled on the IPn4G. Under the
Carrier > Settings tab, IP-Passthrough can be found. To enable this
feature, select “Ethernet” from the drop down box. Once the changes
are applied, whichever device is physically connected to the LAN
RJ45 port, will dynamically be assigned the WAN IP Address. In this
example, this would be 74.198.186.193.
The default IP address of 192.168.168.1 on the LAN is no longer
available, but it is still possible to access and configure the IPn4G on
the LAN side, by using the X.X.X.1 IP Address, where the first 3
octets of the WAN IP are used in place of the X’s. (e.g.
74.198.186.1, and remember the HTTP port in this example was
changed to 8080).
Step 4
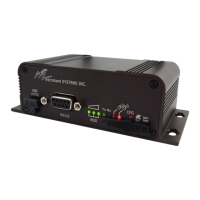
Attach the remote device or PC to the RJ45 port of the IPn4G. The end
device has to be set up for DHCP to get an IP address from the IPn4G. In
the test/example setup we can verify this by looking at the current IP
address. In the screenshot to the right we can see that the Laptop
connected to the IPn4G has a IP Address of 74.198.186.193, which is the IP
address assign by the cellular carrier for the modem.
Step 5 (Optional)
IP-Passthrough operation can also be verified in the IPn4G. Once IP-
Passthrough is enabled you can access the IPn4G WebUI by one of the
following methods:
Remotely on the WAN side (usually the internet), using the WAN
IP, and the port specified for HTTP operation (or, if enabled, by using the HTTPS (443) ports), in this
example with would be 74.198.186.193:8080.
On the LAN side, by entering in the first 3 octets of the WAN IP and .1 for the fourth, so in our example
74.198.186.1:8080.
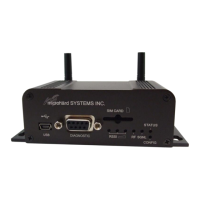
Once logged in, navigate to the Carrier > Status page. Under
WAN IP Address it should look something like shown in the
image to the right, 74.198.186.193 on LAN.
Step 6
The last step is to verify the remote device can be accessed. In this example a PC is connected to the RJ45 port of the
IPn4G. On this PC a simple apache web server is running to illustrate a functioning system. On a remote PC, enter the
WAN IP Address of the IPn4G into a web browser. As seen below, when the IP Address of the IPn4G is entered, the
data is passed through to the attached PC. The screen shot below shows that our test setup was successful.