© Microhard Systems Inc. 182
Appendix D: VPN Example (Page 1 of 2)
By completing the Quick Start process, a user should have been able to log in and set up the IPn4G to
work with their cellular carrier. By completing this, the modem is ready to be used to access the internet
and provide mobile connectivity. However, one of the main applications of the IPn4G is to access
connected devices remotely. In addition to Port Forwarding and IP-Passthrough, the IPn4G has several
VPN capabilities, creating a tunnel between two sites, allowing remote devices to be accessed directly.
VPN allows multiple devices to be connected to the IPn4G without the need to individually map ports to
each device. Complete access to remote devices is available when using a VPN tunnel. A VPN tunnel can
be created by using two IPn4G devices, each with a public IP address. At least one of the modems require
a static IP address. VPN tunnels can also be created using the IPn4G to existing VPN capable devices,
such as Cisco or Firebox.
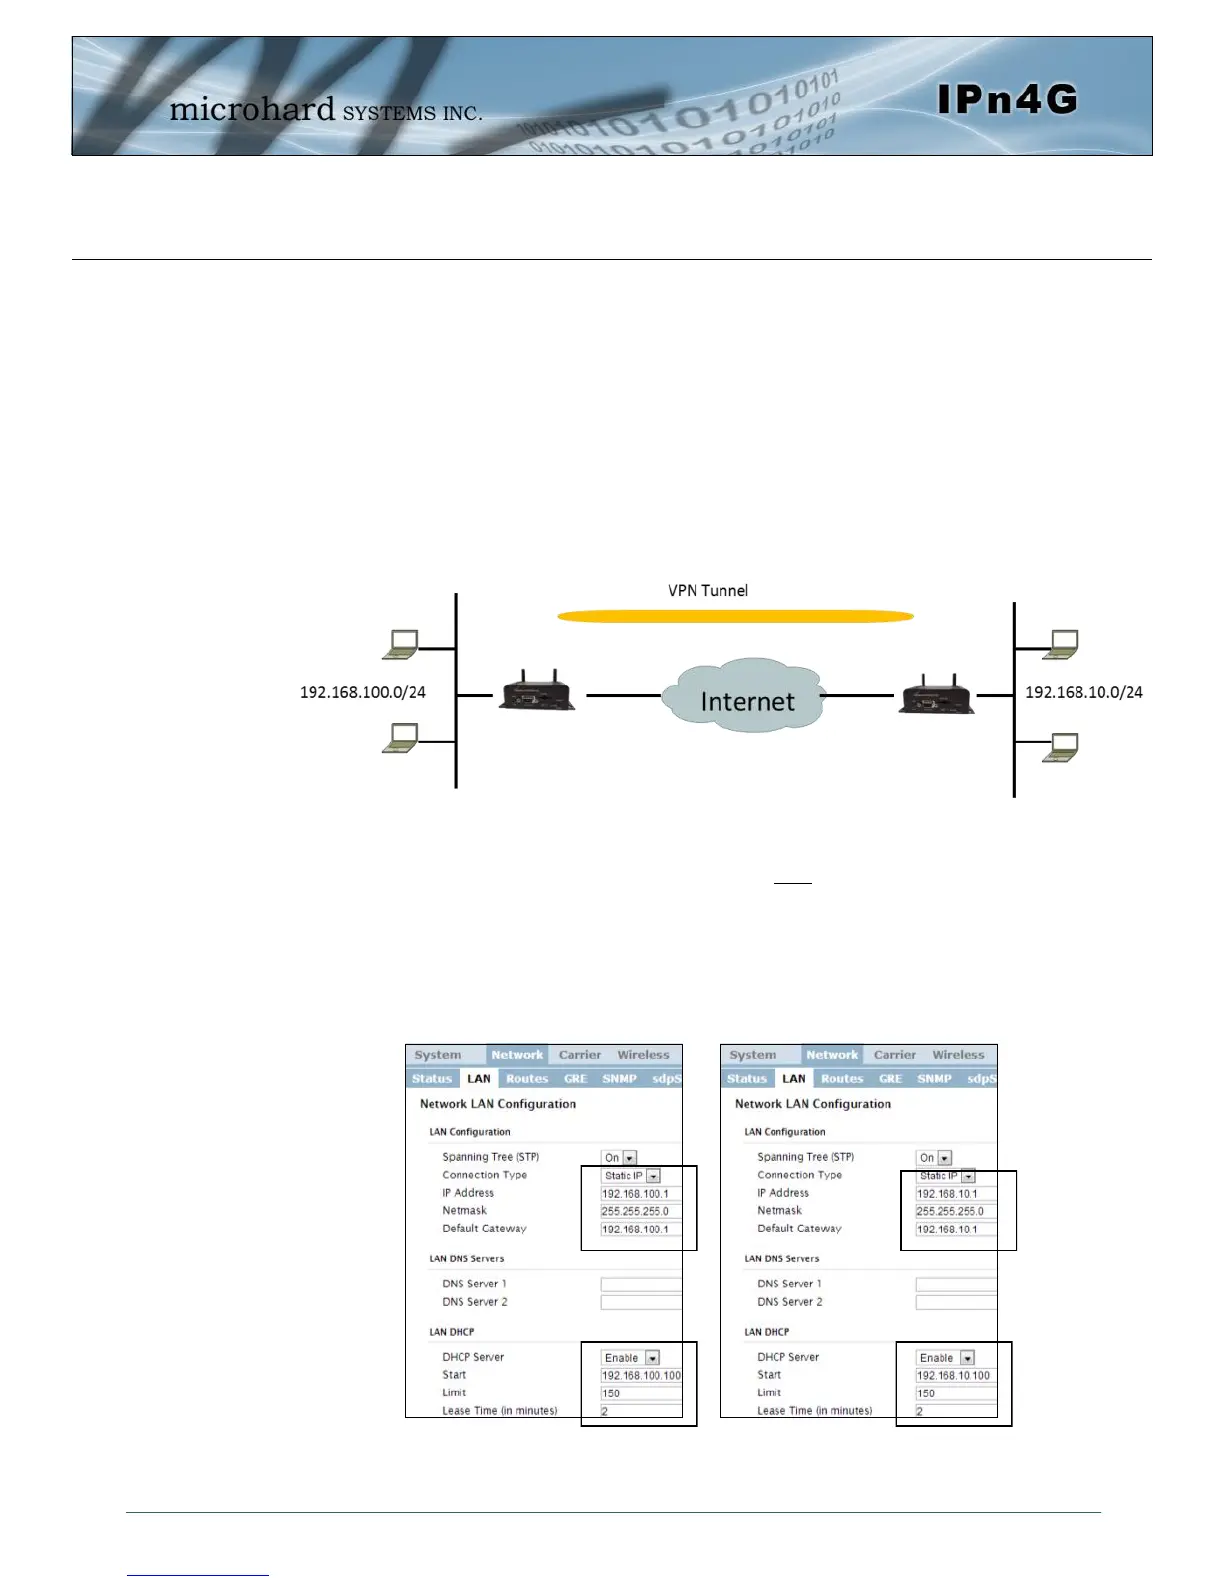
Example: IPn4G to IPn4G (Site-to-Site)
Step 1
Log into each of the IPn4Gs (Refer to Quick Start), and ensure that the Firewall is enabled. This can be found under
Firewall > General. Also ensure that either WAN Request is set to Allow, which allows traffic to come in from the WAN,
or that sufficient Rules or IP lists have been setup to allow specific traffic to pass through the IPn4G. Once that is
complete, remember to “Apply” the changes.
Step 2
Configure the LAN IP and subnet for each IPn4G. The subnets must be different and cannot overlap.
Site A Site B
IPn4G
WAN IP Carrier
Assigned: A.B.C.D
IPn4G
WAN IP Carrier
Assigned: E.F.G.H
Site A
Site B