Preva Installation/Service Manual, 00-02-1577, Revision E01
106
Necessary
Adjustment
The balance and friction of the Articulating Arm and the friction of the
Tubehead are initially set at the factory. During the installation process, check
the balance and friction. When moving the Tubehead, the Articulating Arm
should be steady in all positions and move before the Horizontal Arm.
Note: The mechanical adjustments should not be used to compensate for a
system that is not properly leveled on the wall.
Movement
The movement of the Tubehead is set in the factory and cannot be adjusted.
Adjustment
Note: If performing this adjustment as part of the initial installation of the
Preva, omit steps 1-3.
1. Remove the screw from the Control Unit front cover.
2. Carefully remove the front cover.
Note: If the Operator Panel is installed on the Control Unit, carefully keep
the Operator Panel together with the front cover.
3. Unplug the cable connectors and set the front cover aside.
4. Locate the brake assembly at the top of the Control Unit. The brake
assembly has a screw on either side of a clamping bar over the Horizontal
Arm pivot post.
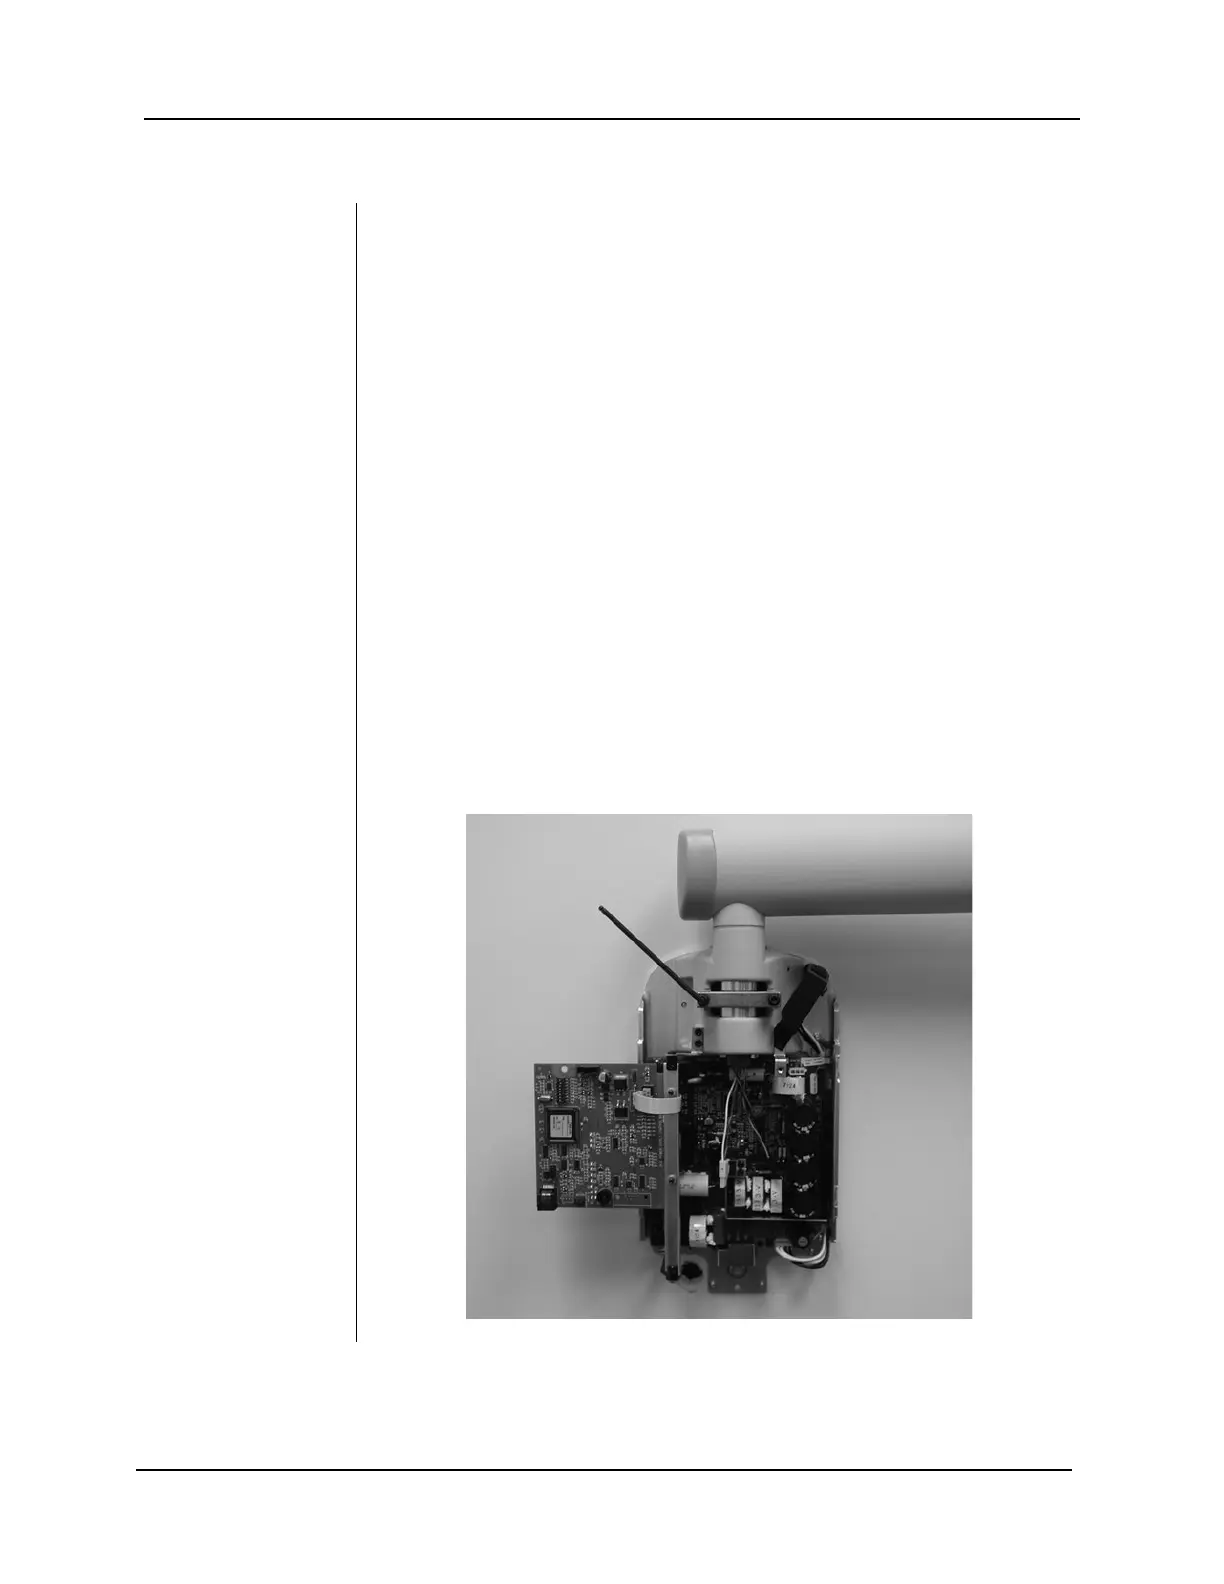
5. Using a 4 mm Allen wrench, as shown in Figure 99, tighten the screws
equally to apply adequate braking to the pivot post so that Horizontal Arm
begins to move after the Articulating Arm.
6. Replace and re-connect the front cover of the Control Unit. Replace the
screw on the front cover.
Figure 99
Tightening the
Brake