- 15 -
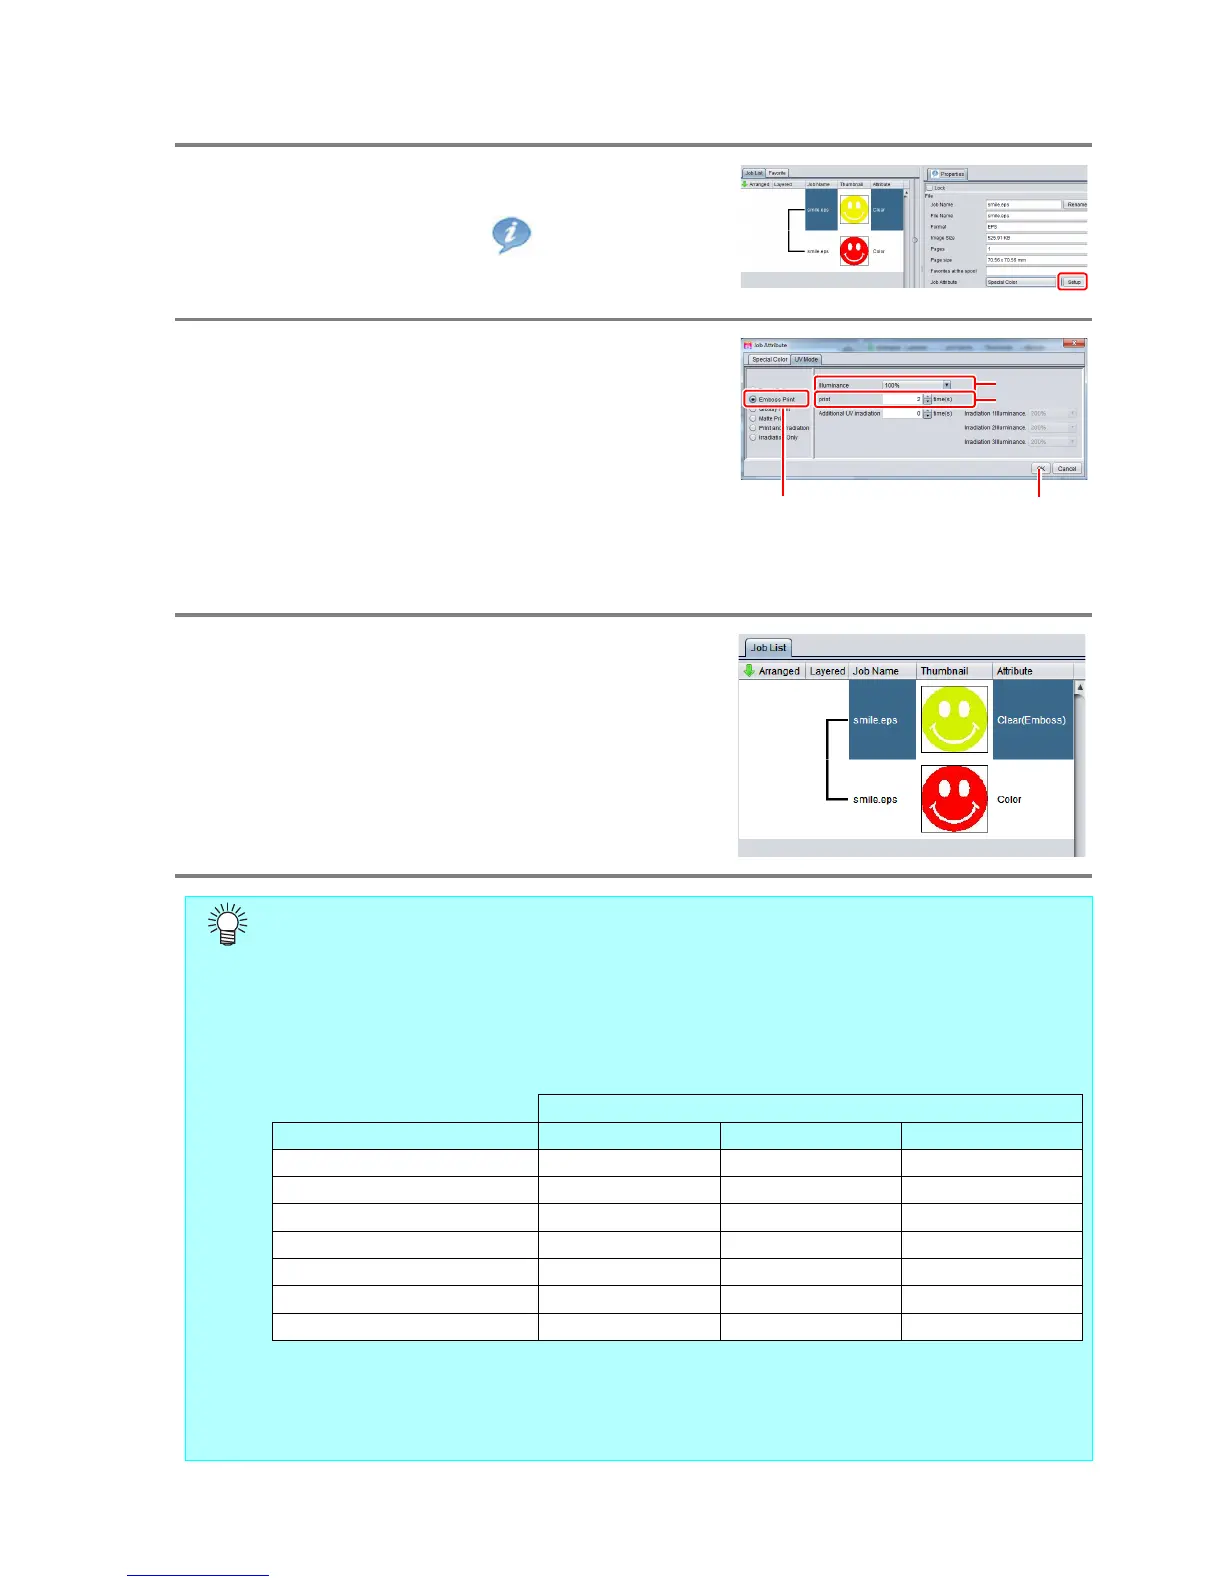
c. Setting Emboss Print
1.
In the job list, select the clear ink job.
• Click the “Properties” icon.
• Click the [Setup] button in the [Job Attribute] field.
2.
Select the [UV Mode] tab.
• Make the settings as follows.
(1) Select “Emboss Print” in the mode list on the left
side.
(2) [Illuminance]: Set “100%”.
(3) [Number of printings]: Set this according to the
thickness of the embossing. (See “Hint!” below
for rough calculation of the number of printings
for the thickness).
(4) Click the [OK] button.
3.
Thumbnail of attribute becomes
a“Clear(Emboss)”.
• After you have set Emboss Print, the clear ink job will be printed the specified number of times
after the color job is printed, regardless of the [Priority policy] settings on the [Composition]
screen.
• When print with high head gap, missing nozzle is likely to occur. Recommend the head gap
between 1.5mm and 2.0mm and the number of emboss printing up to 14 times.
• At an output resolution with 600x900 dpi, when you print the 100% density clear ink job with the
following specified number of times after the color job, the estimated emboss thickness is as
follows.
• When you specify Emboss Print, make sure that there is ample head clearance.
• If you set just Emboss Print, the finish will be matte. See P. 18 for the settings to make in order
to obtain a glossy print result.

 Loading...


