- 6 -
Printing methods
Data creation and printing procedures
In order to print, you must first create clear ink data and make the settings for it on RasterLink6, using the proce-
dure below.
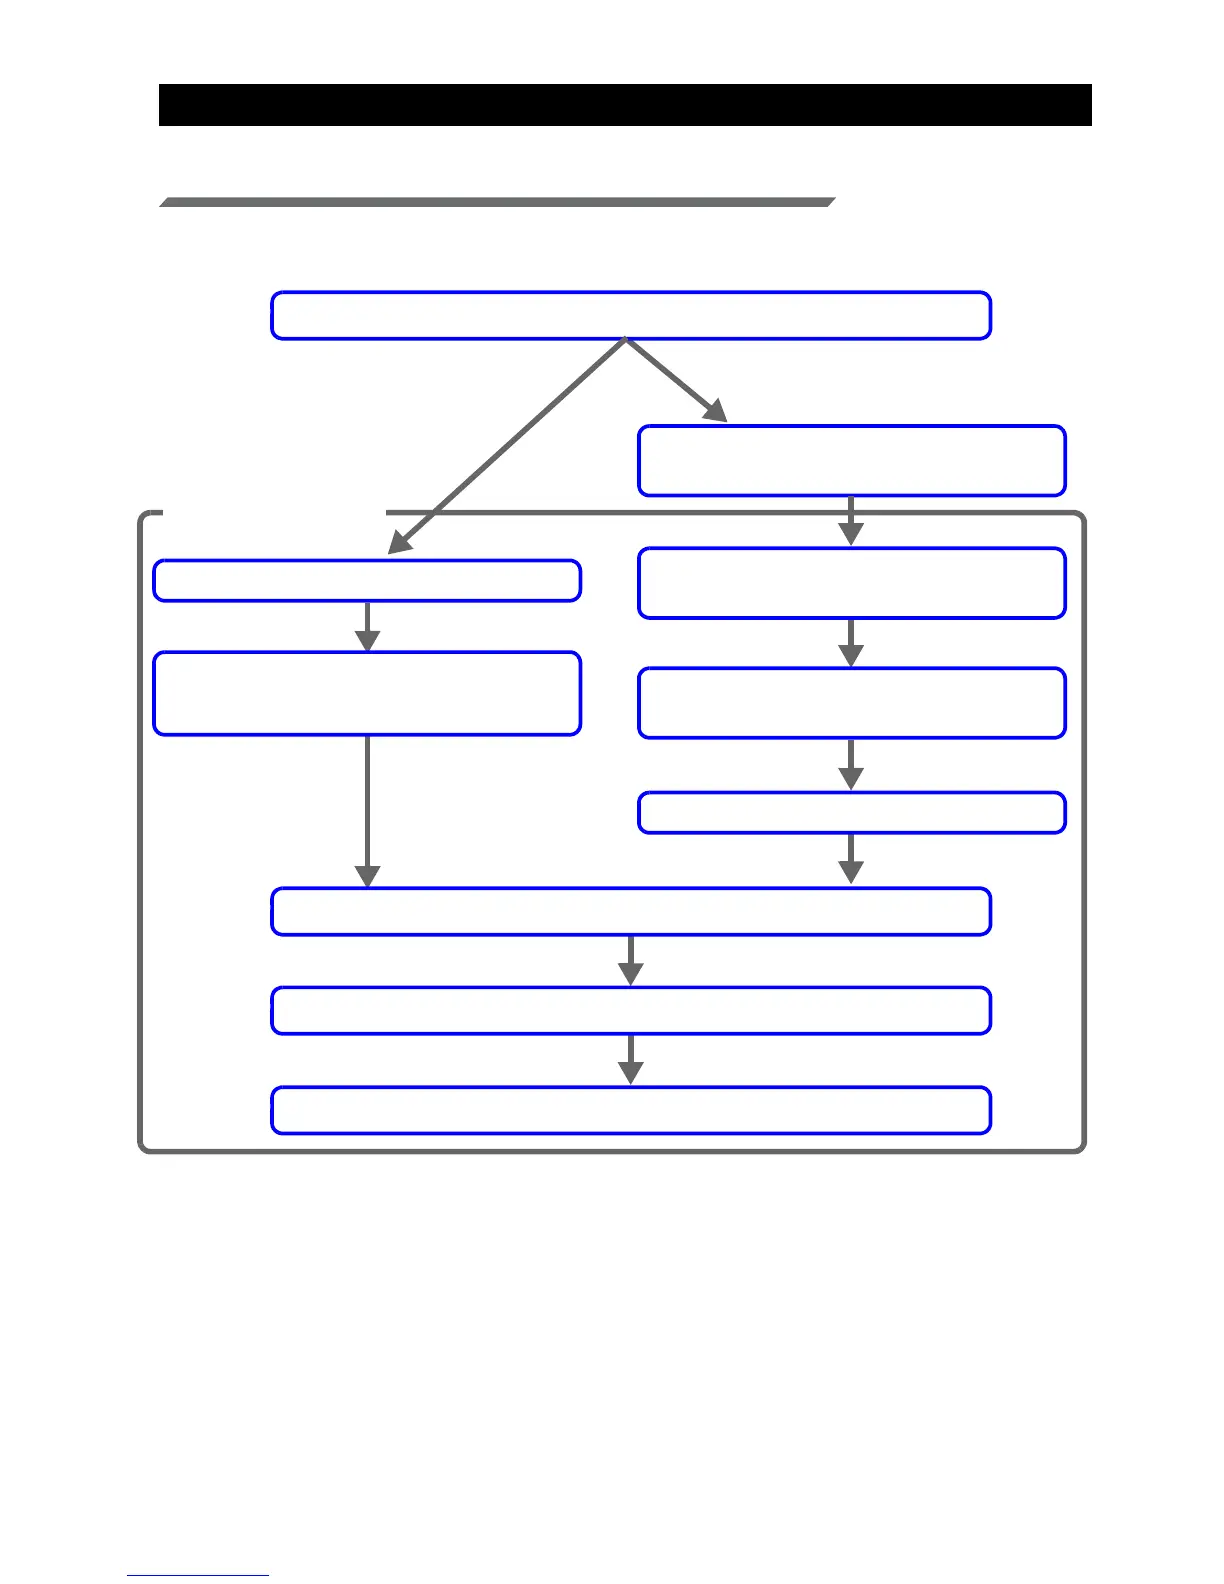
Decide the way the clear ink is to be printed
Use design software to create a special clear
ink image that uses 1 color only
Input the color image into RasterLink6
Use the “Special plate” function to create an
image for clear ink use, then composite it with
the color image
Input the created special image and the color
image into RasterLink6
Replace one color with the clear ink, using
mono color replacement
Composite the special image with the color image
Set the UV mode to match the clear ink application (Glossy, Matte or Emboss effect)
Make the printing condition settings
Execute printing
Setting on RasterLink6
Clear ink is to be printed to
match a color image
A special clear ink image is to be printed

 Loading...


