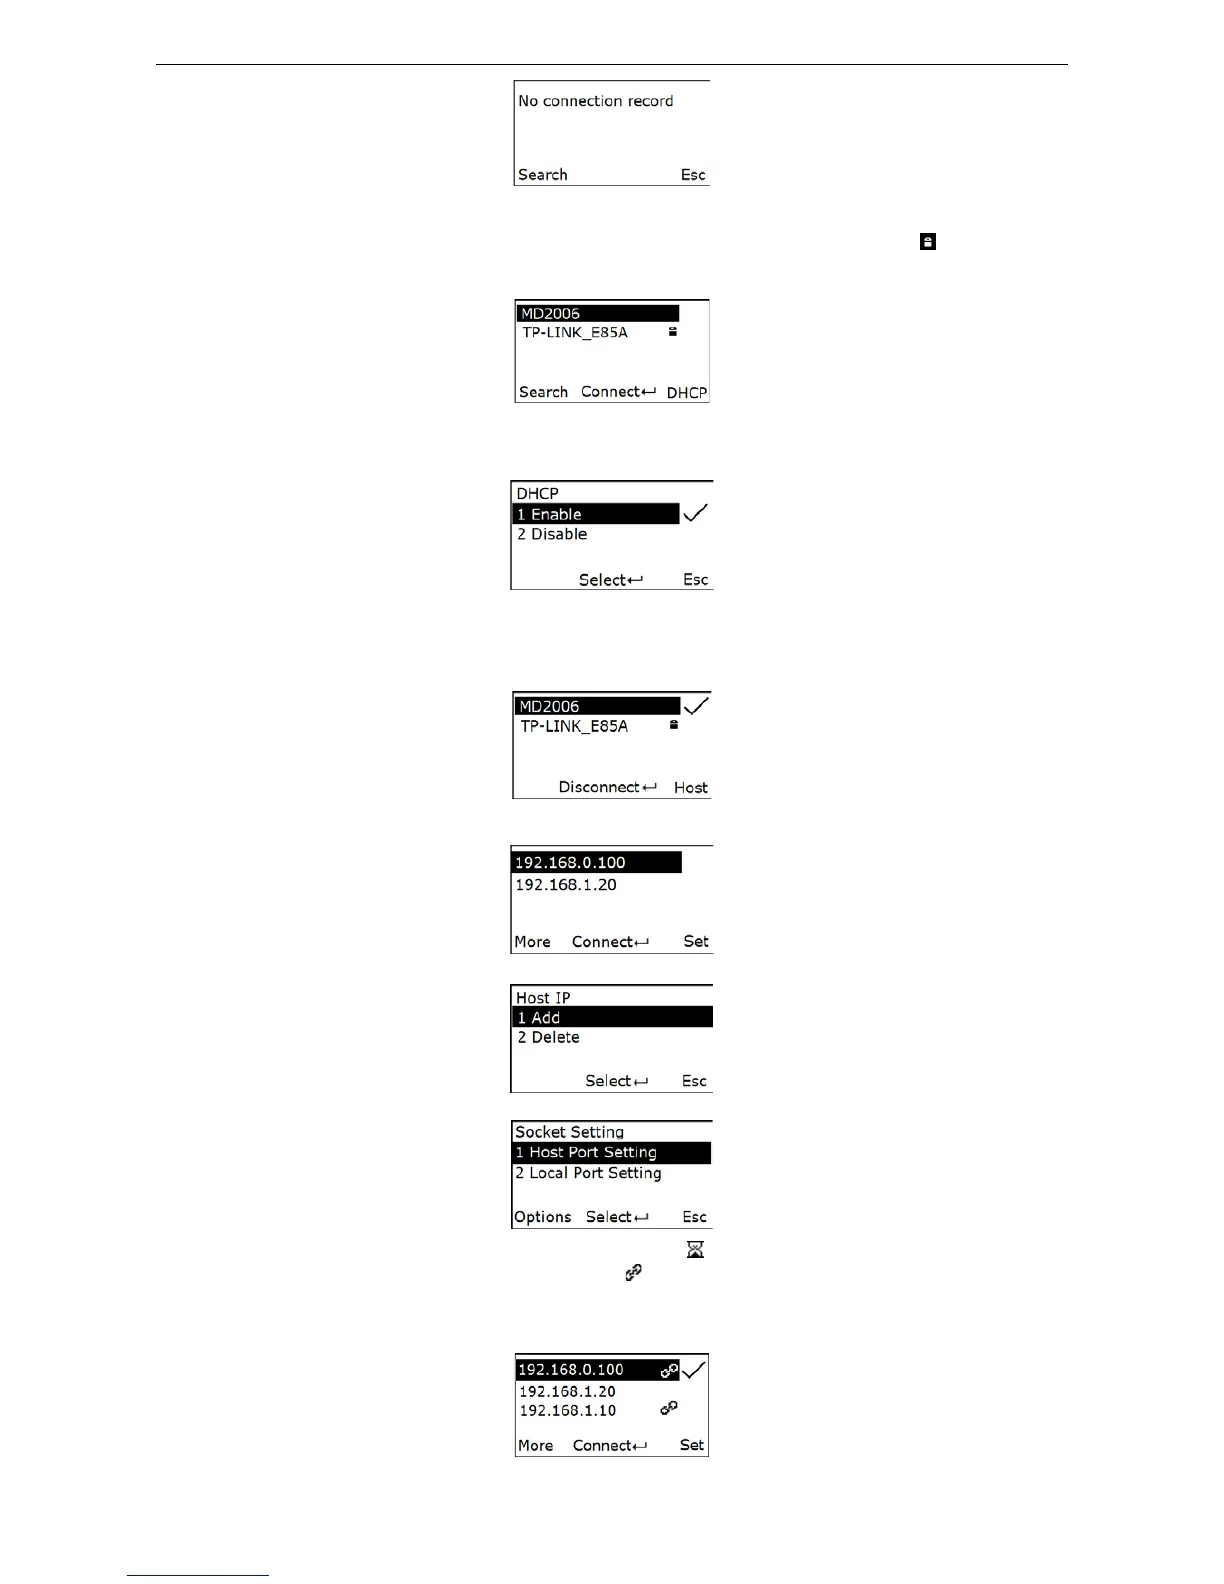
Step 2: Press Left-Soft Key to search for device.
Step 3: Wait for about 3 seconds, the terminal will list the serviceable WLAN around. “
” indicates that
the password-protected WLAN which needs the passphrase for accessing the wireless network. The
screen shows as follow:
Step 4: Press the Right-Soft Key to enter the DHCP setting menu, press the navigational key to select
whether enable DHCP, and press the Scan/Select Key to confirm. If disable the DHCP, you should
input the static address for the terminal. The screen shows as follow:
Step 5: Press the navigational key to select the target WLAN, and press the Scan/Select Key to connect
the WLAN. If connect a password-protected WLAN, you should input passphrase.
Step 6: The terminal use the icon “√” to indicate which WLAN has been connected. Press Scan/Select
Key to disconnect the WLAN. The screen shows as follow:
Step 7: Press Right-Soft Key to display the Host Lists Menu. In Host Lists Menu, press the
navigational key to select the target host IP. The screen shows as follow:
Press More to add/delete the hostIP
Press Set to set the socket.
Step 8: Press Scan/Select Key to bond with the target host. “
” indicate the connecting process.
If the terminal connects the host success, it will use “
” icon to indicate the link state, and use the icon
“√” to indicate the target communicating host. If it has been set up multiple communication channels for
bonding with the host(Up to 8 channels), press the navigational key to move the cursor, then press the
Scan/Select key to select the target communicating host. The screen will show information as follow: