AS3000™ Service Manual 0070-10-0683 2 - 3
Installation Guide Assembly
2.2.2.1 Attaching the Mounting Arms and User Interface
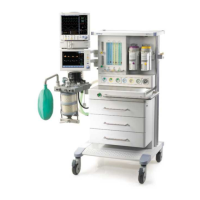
(see FIGURE 2-1)
1. Remove the mounting arms from small box and install them onto the AS3000 using a 3
mm allen wrench.
2. Remove the keys from the parts box, and unlock the AS3000 drawers and put parts
box into top drawer.
3. Remove the AGSS and Breathing System mount from the foam packaging, and install
them onto the AS3000.
4. Remove the User Interface and slide it onto the User Interface mounting arm.
5. Apply Loctite 243 to the User Interface cable jackscrews and jackposts. Then, connect
the User Interface cable to the User Interface. Ensure the jackscrews are securely
tightened.
2.2.2.2 Breathing System Connections
(see FIGURE 2-1)
1. Remove the foam and bag from around the Breathing System.
2. Ensure that the serial number tag attached to the bag arm matches the serial number
found on the package carton.
3. Install the Breathing System onto the arm on the left side of the AS3000 by attaching it
to the installed bracket.
4. Attach the Drive Gas Hose to the bottom port of the Breathing System
5. Attach the Heater cable into the port located on the bottom of the Breathing System
6. Install the O
2
Cell to the O
2
Interface
7. Attach the O
2
cell to the O
2
cable and insert the cell into its designated port on the
Breathing System.
8. Attach the Pneumatic Hose Assembly to the designated port on the rear of the Breathing
System.
9. Attach the AGSS Transfer Hose to its designated port on the bottom of the Breathing
System.
2.2.2.3 Anesthesia System Connections
(see FIGURE 2-1)
1. Attach the Fresh Gas Hose of the Breathing System to the CGO port on the system.

 Loading...