10-12 DICOM
(3) Click [OK] to send print task.
To print image for storage after an exam ends
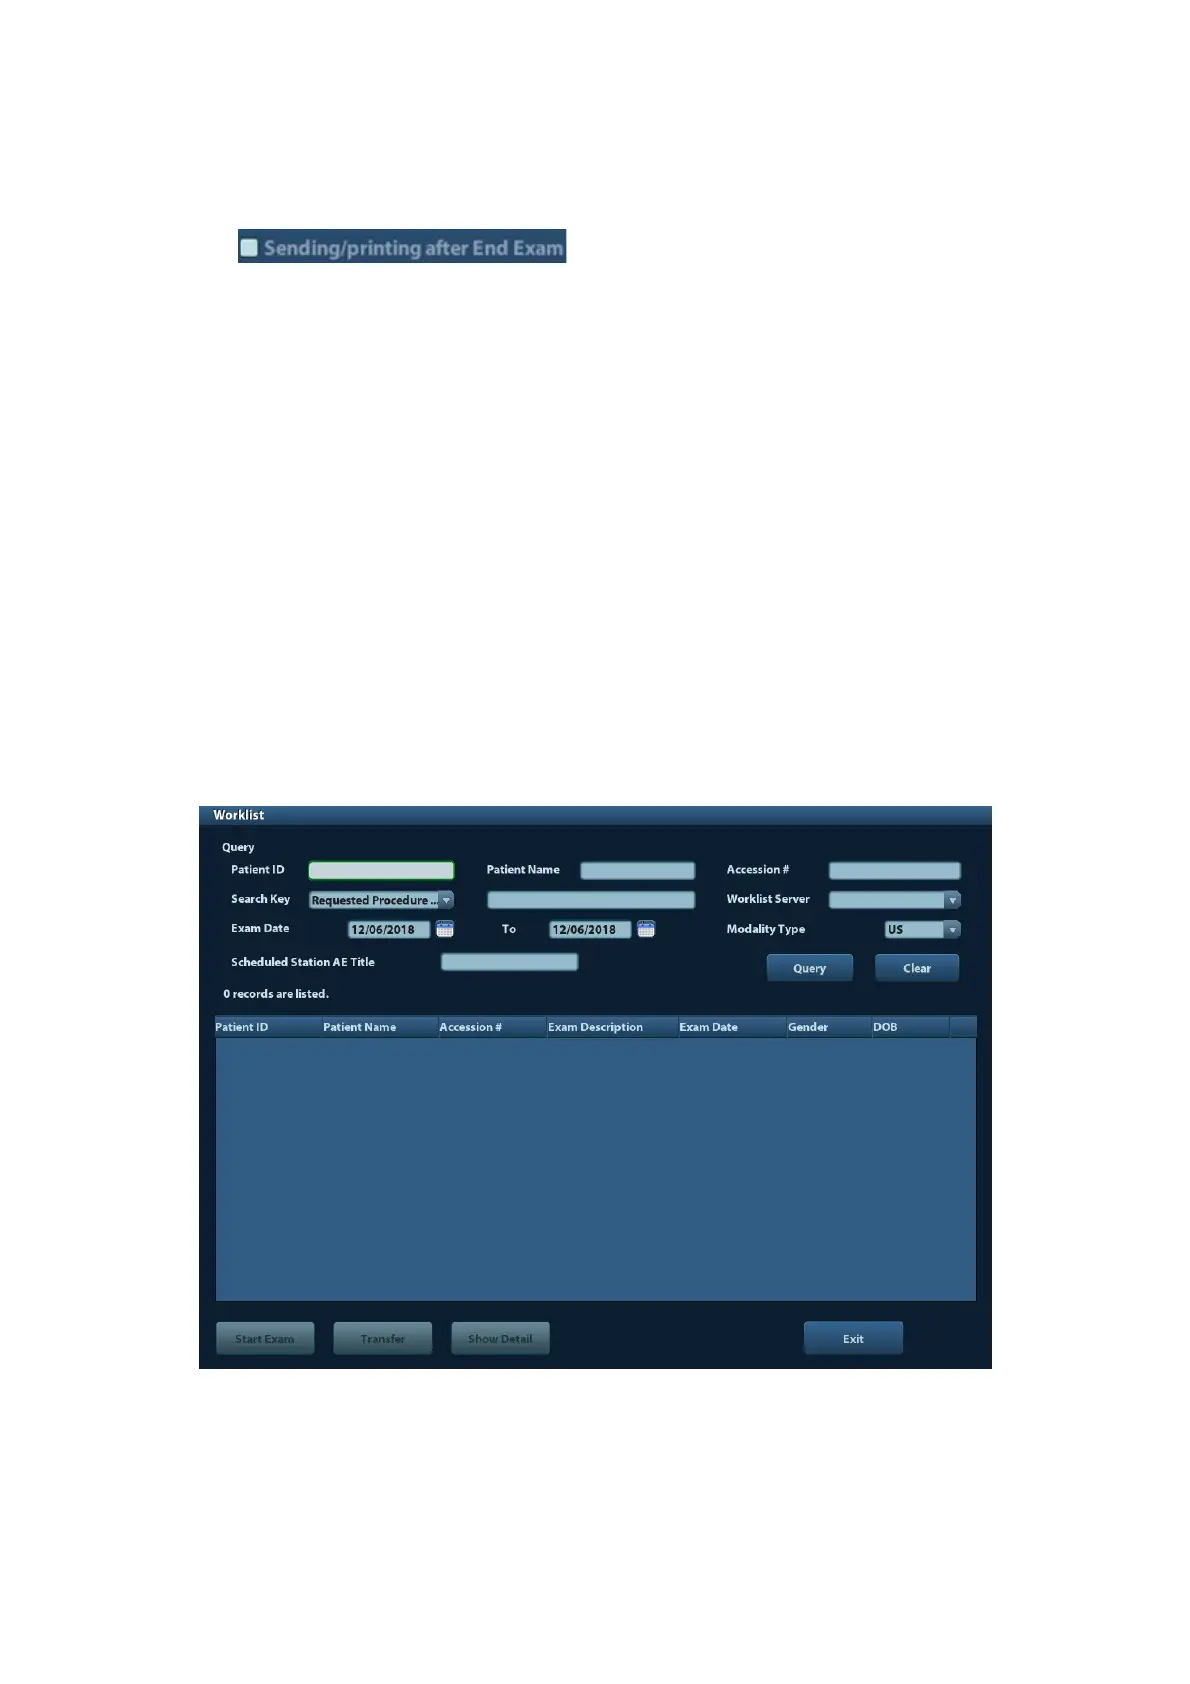
(1) Open “[Setup] → [System Preset] → [General]”, and then check
.
(2) Set a default print server.
a) Enter the DICOM Service Preset screen via “[Setup]→ [DICOM Preset] →
[DICOM Service]”.
b) Click [Print] to open the Print page.
c) Select a Print server in the Service List and click [Default]; you can see “Y” is
marked in the Default column.
d) Click [Exit] to exit the page and return to Setup menu, then click [Save] on the
Setup menu to make the preset to take effect.
(3) After finishing presets, you can perform image scanning, each time you press <End
Exam> on the control panel, the system will send the image to the default DICOM
print server for printing.
10.3.3 DICOM Worklist
After successfully connected DICOM Worklist server with ultrasound system, you can query
patient records from Worklist server, and then import the desired information to your system.
To query patient information via Worklist server:
(1) Press <Patient> to enter Patient Info screen.
(2) Click [WorkList] to enter the WorkList page.
(3) Retrieve Patient Information
a) Set query criteria among Patient ID, Patient Name, Accession #, Search Key,
Worklist Server or Exam Date. The default exam date is the current date.
b) Click [Query].