• A wrong cuff size and a folded or twisted bladder can cause inaccurate
measurements.
• Do not touch or apply external pressure against the cuff and air tubing
during NIBP measurement. This may cause inaccurate blood pressure values.
• Use care when placing the cuff on an extremity used for monitoring other
patient parameters.
9.7 Performing Measurement
This section describes the procedure to start manual, auto, STAT, and sequence
measurement. For BP Averaging, see 9.9 BP Averaging. For Orthostatic BP measurement,
see 9.10 Orthostatic BP Measurement.
9.7.1 Performing Manual Measurement
To perform manual measurement, follow this procedure:
1. Prepare the patient and place the cuff as instructed in 9.6 Preparing for NIBP
Measurement.
2. Select to set the patient position and measurement site.
3. Select to start the measurement.
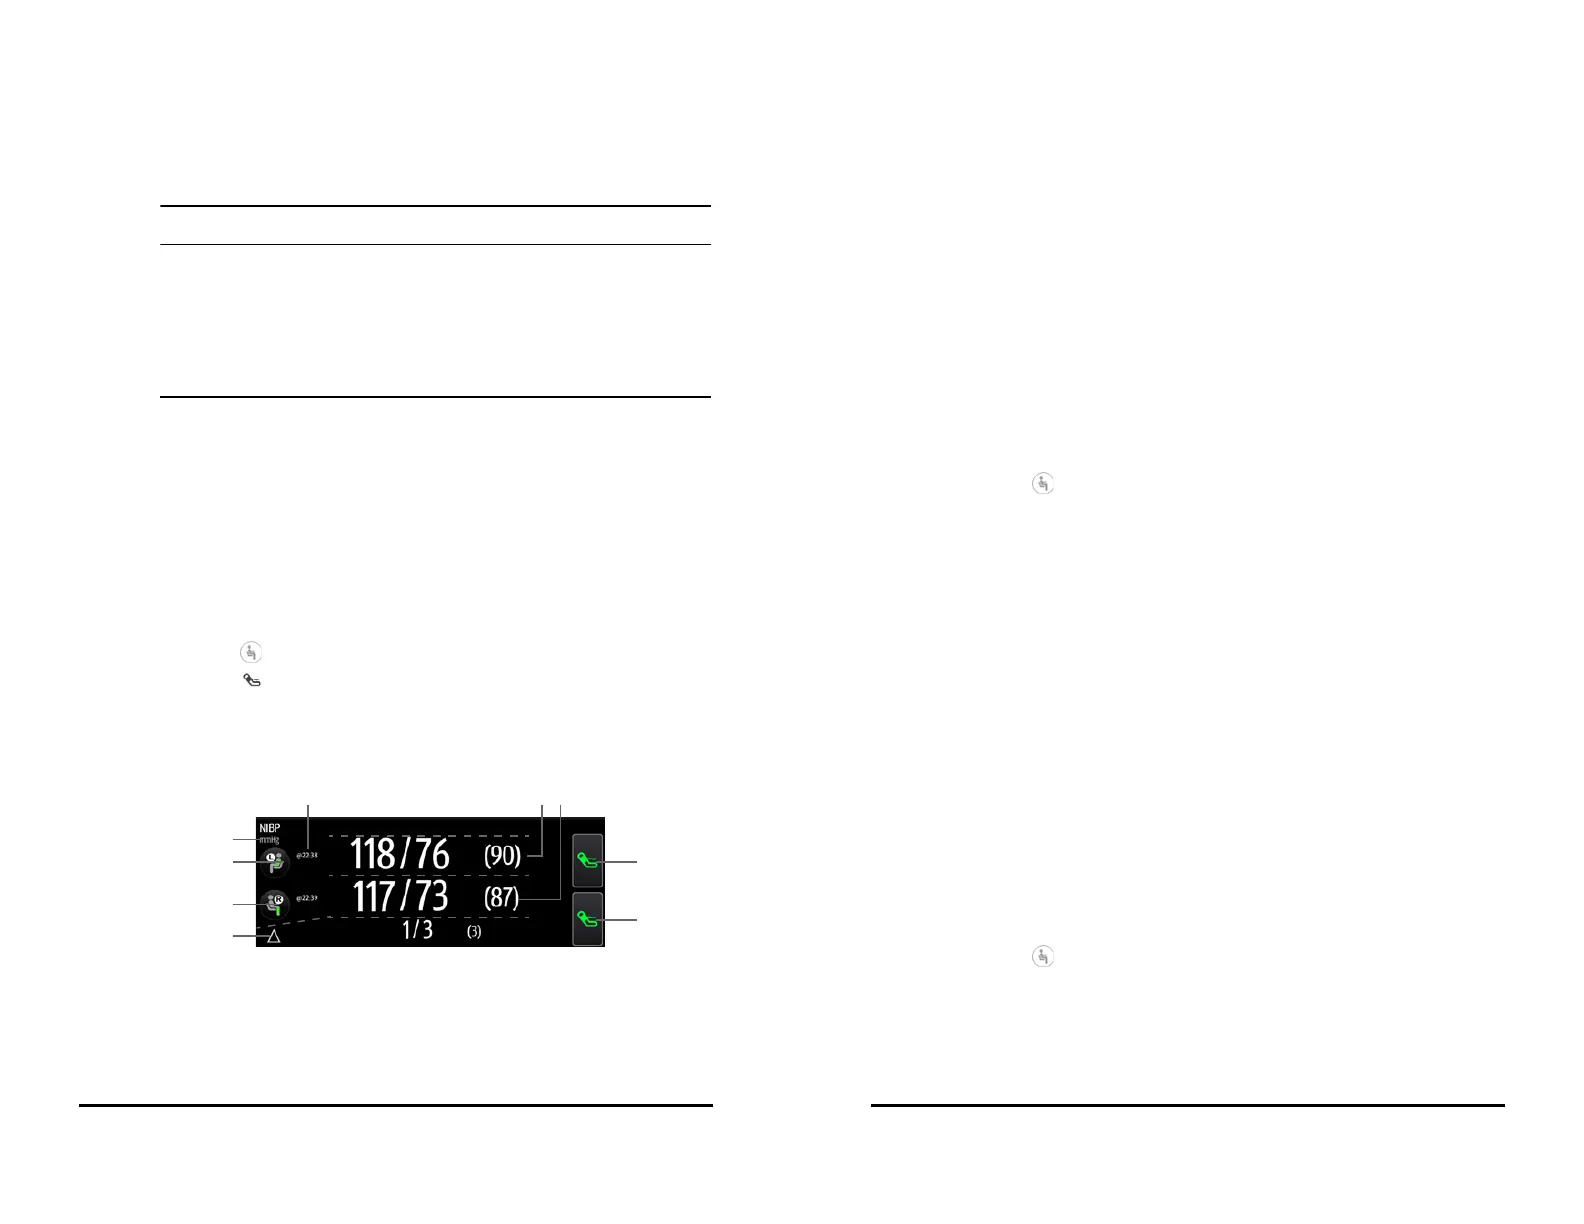
In Spot Check mode, you can perform two times of measurement as a group for clinical
evaluation. For setting of measurement times, see 9.8.8 Setting Measurement Times.
Below is an example of NIBP screen if Measurements is set to Twice:
(1) The last measurement time
(2) NIBP unit: mmHg or kPa
(3) Patient position and site of the first measurement
(4) Patient position and site of the second measurement
9 - 8 VS 8/VS 8A Vital Signs Monitor Operator’s Manual
9.7.2 Performing Auto Measurement
To perform auto measurement, follow this procedure:
1. Prepare the patient and place the cuff as instructed in 9.6 Preparing for NIBP
Measurement.
2. Select a workflow under Continuous Monitoring.
3. Select to set the patient position and measurement site.
4. Select the NIBP numeric area to enter the NIBP dialog.
5. Set Interval to an appropriate duration.
6. Set Start Mode to Interval or Clock.
◆ Clock: after the first measurement, the monitor automatically synchronizes
NIBP automatic measurement with the real time clock. For example, if
Interval is set to 20 min, and NIBP auto measurement is started at 14: 03,
the next measurement will be taken at 14: 20, and then at 14:40, 15:00, and
so on.
◆ Interval: after the first measurement, the monitor automatically repeats
measurement at set interval. For example, if Interval is set to 20 min, and
NIBP auto measurement is started at 14:03, the next measurement will be
taken at 14:23, and then at 14:43, 15:03, and so on.
7. Select Start NIBP.
9.7.3 Performing STAT Measurement
To perform STAT measurement, follow this procedure:
1. Prepare the patient and place the cuff as instructed in 9.6 Preparing for NIBP
Measurement.
2. Select a workflow under Continuous Monitoring.
3. Select to set the patient position and measurement site.
4. Select the NIBP numeric area to enter the NIBP dialog.
5. Select STAT.
(5) Differences between the two groups of measurements: displayed in the form of Sys/
Dia (Mean)
(6) Start/Stop the second measurement
(7) Start/Stop the first measurement
(8) Values of the second measurement: displayed in the form of Sys/Dia (Mean)
(9) Values of the first measurement: displayed in the form of Sys/Dia (Mean)