CAUTION: Pressing the Menu Button
while using Combine will take you back
to the Discrimination Menu and all
changes made with Combine will
be lost.
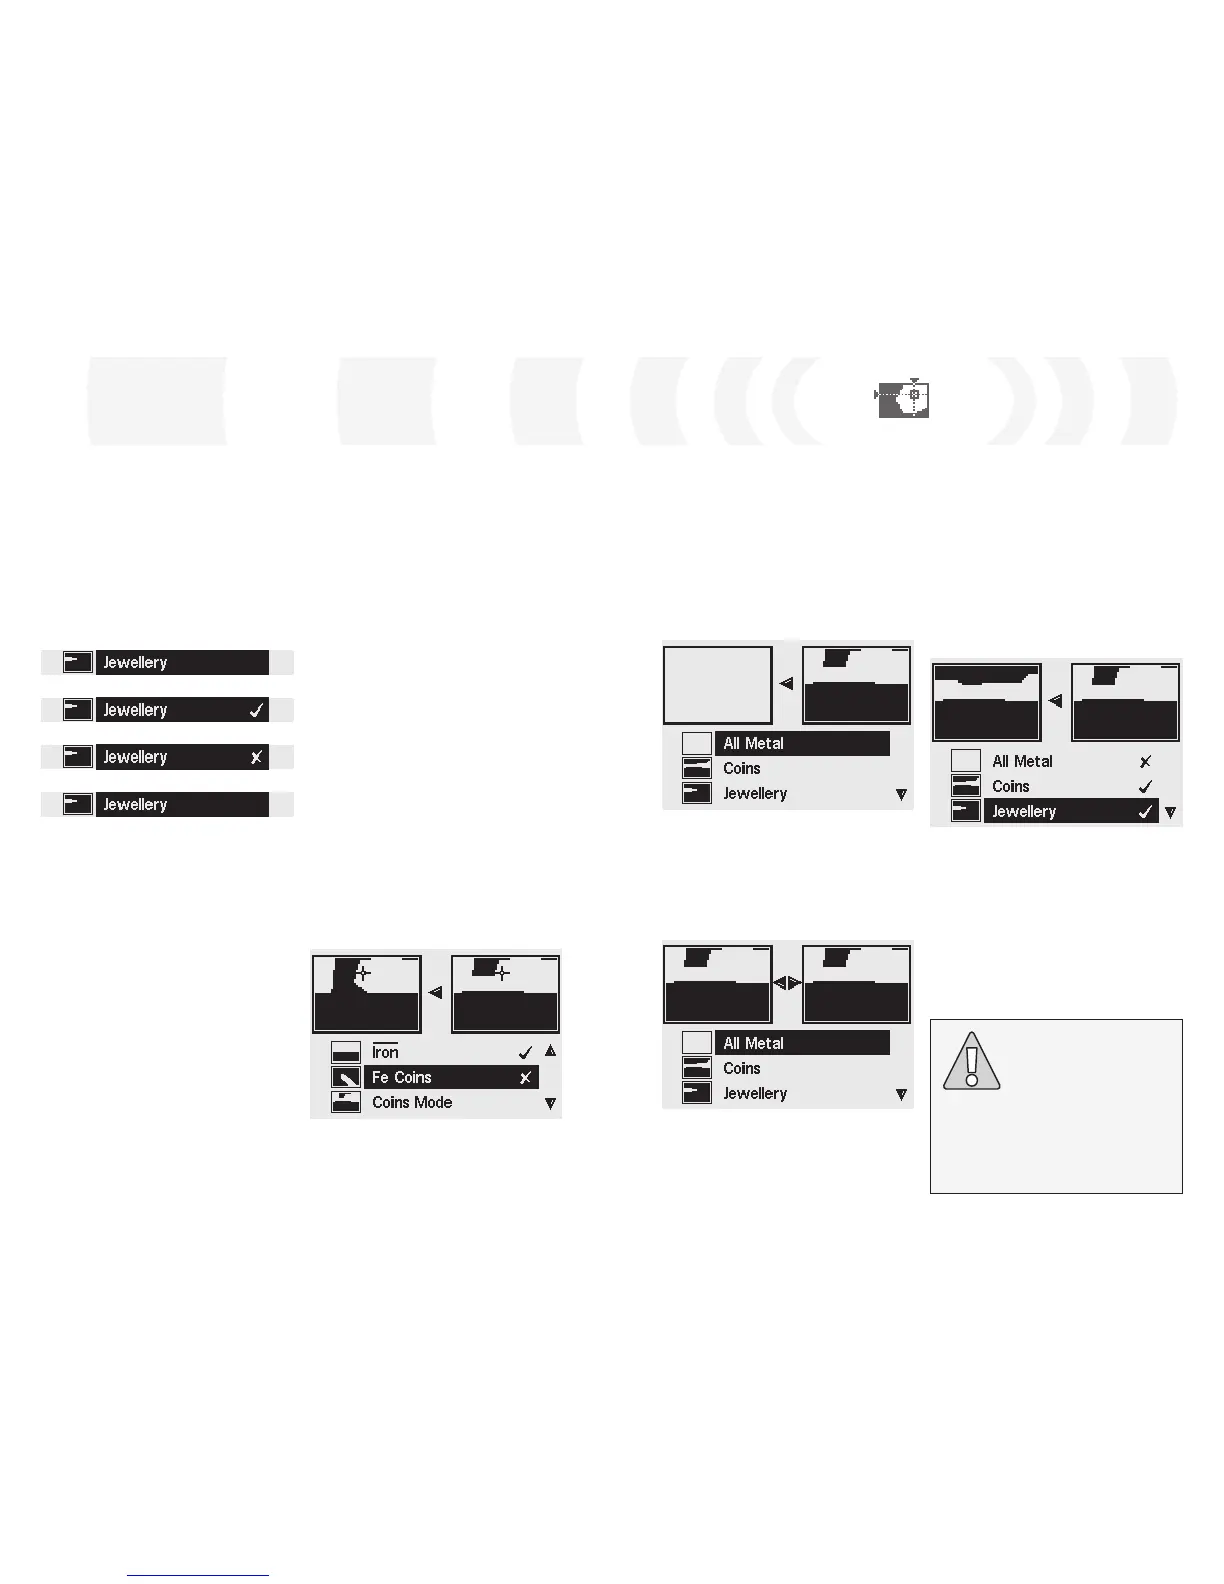
Discrimination Menu
To Combine Discrimination Patterns:
1 Press the Menu button
2 Scroll across to Discrimination (using the
Right or Left Navigation button)
3 Scroll down to Combine (using the Down
Navigation button)
4 Press either the Left or Right Navigation
button to enter the Combine list of Pattern
5 The two Smartfind Windows at the top of
the screen are the Active Pattern (right)
and the Combine Pattern (left). Press the
Left Navigation button to copy the Active
Pattern to the Combine Pattern
7 Once you have finished Combining, press
the Detect button (or QuickMask button
if you wish to load the pattern into
QuickMask)
8 Answer ‘Yes’ to the dialogue box to return
to the Pattern/Digital (or QuickMask) Screen
with your new Discrimination Pattern
loaded into Smartfind
6 Scroll down to the desired Pattern and
press the Accept/Reject button once to add
that Pattern to your Combine Pattern. Press
the Accept/Reject button twice to subtract
that Pattern from your Combine Pattern. A
third press will remove the Pattern from the
Combine Pattern
While a Discrimination Pattern is selected,
press the Left or Right Shift button to inverse
that pattern. The Accept/Reject button still
only modifies the white area of the pattern.
For example, if ‘Coins’ is inverted, accepting
the pattern will accept the white areas,
therefore leaving you with an ‘all metal’
pattern. If the pattern is rejected, the white
areas are visible in the Combine Pattern, thus
creating a pattern that rejects everything
except the common Target IDs of coins.
Another useful feature of Combine is the
ability to compare Target IDs in both the
Active Pattern (right Smartfind Window) and
the Combine Pattern (left Smartfind Window)
simultaneously. If you detect a target while
in Combine a crosshair will appear in both
windows. By doing this you can see whether
your new Combine Pattern is rejecting a
desirable target, or accepting an undesired
target, and you can then modify your
Combine Pattern further to get the right
discrimination.
The Accept/Reject button is used to modify
the flashing area of a selected Discrimination
Pattern. The first press accepts, the second
press rejects, and a third press cancels any
accepting or rejecting of that pattern applied
to the Combine Pattern.
It is important to plan how you will create
or modify a pattern using Combine, as the
last pattern accepted/rejected overrides any
previously accepted/rejected patterns if the
areas overlap. For example, if you reject the
‘All Metal’ pattern, then accept ‘Coins’ but
finish by rejecting ‘Crown Caps’, the area of
‘Crown Caps’ that overlaps ‘Coins’ will still be
rejected. Therefore, if you want to combine all
of these patterns you should apply rejected
patterns first, and accepted patterns last.
Selected
Accepted
Rejected
Cancelled