Sensitivity Menu
Sensitivity
Range: Manual or Auto
Factory Preset: Auto
E-Trac has three internal signal channels (high,
medium and low) used to identify targets.
E-Trac continually measures the magnetic
ground interferences that affect these
channels and adjusts the level of Sensitivity
individually for each channel, to provide the
most stable Target ID for each channel.
Most ground types cause some interference
and E-Trac uses this to adjust the detector to
the correct Auto Sensitivity. Auto Sensitivity
may not work well on a beach, as they do not
typically contain magnetic materials.
Note: Minelab recommends beginners use E-Trac
in the Auto Sensitivity mode, unless detecting on
a beach, where Manual is recommended.
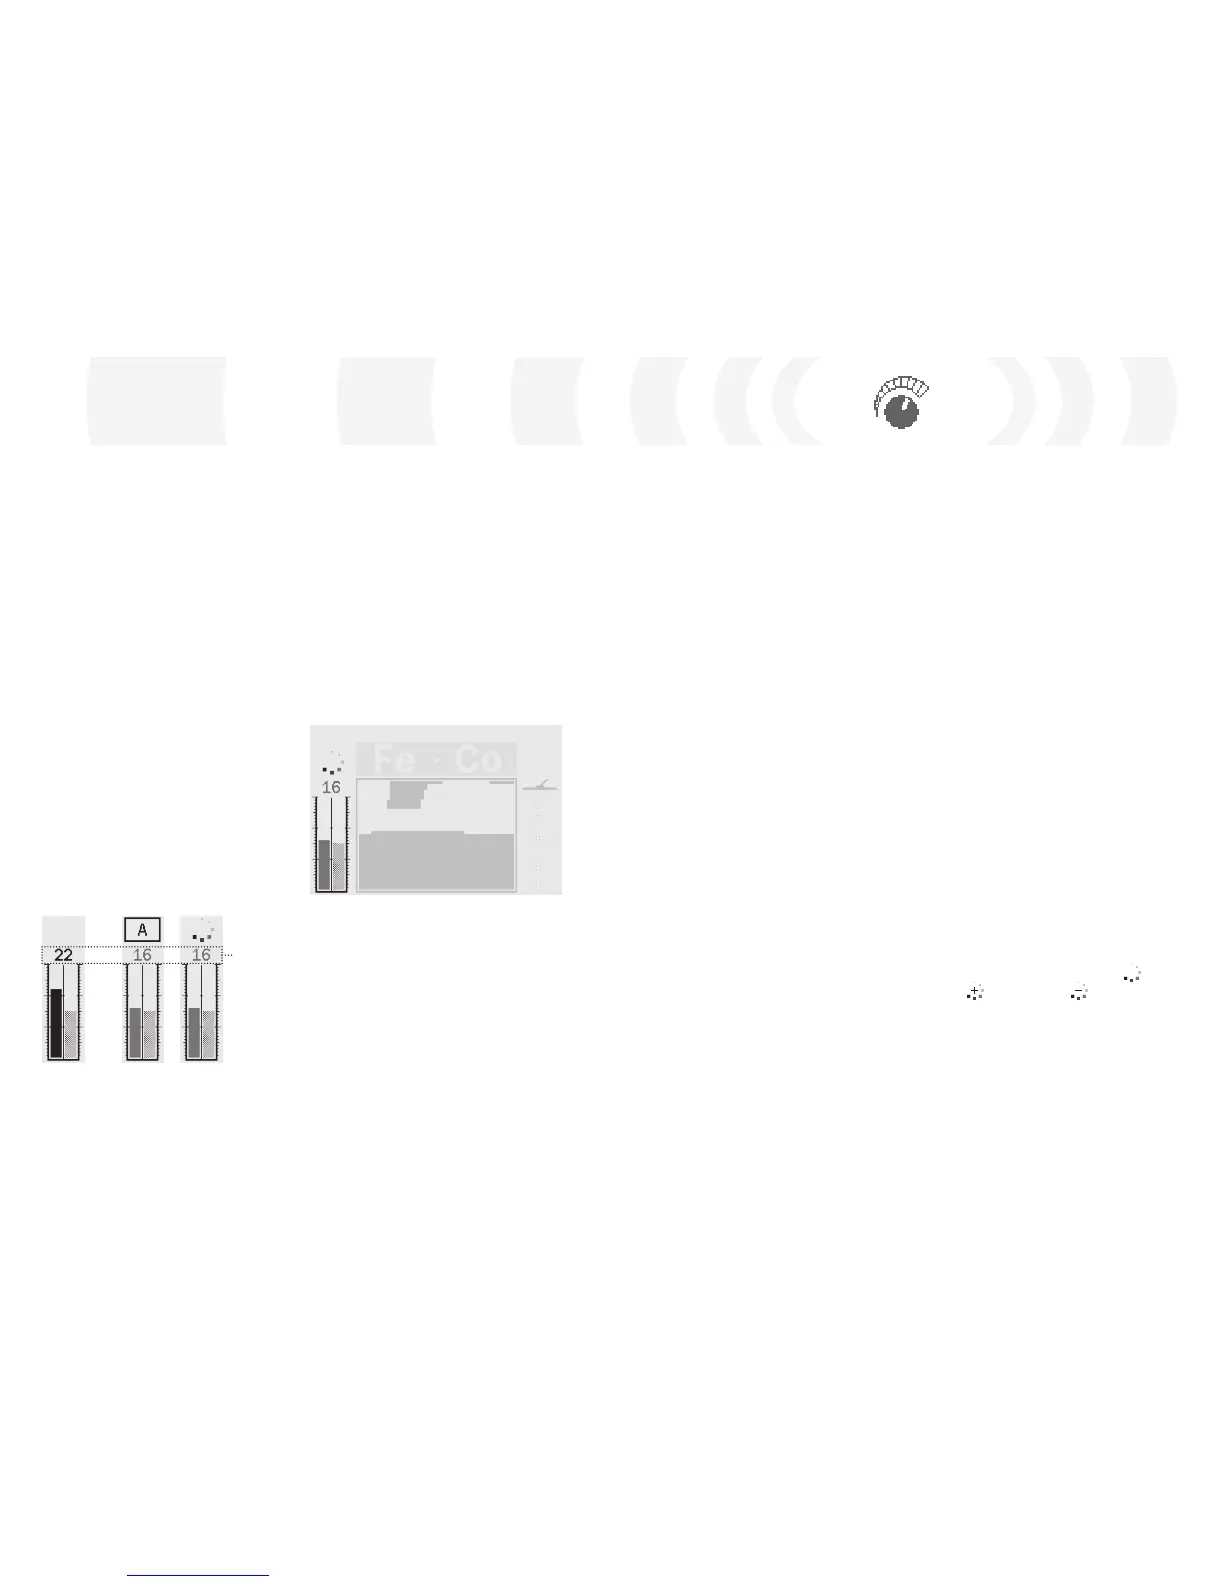
The Sensitivity Gauge has two indication
bars in both Auto and Manual and a numeric
Sensitivity value above the gauge, as
shown below.
Auto Sensitivity
The left bar and the numeric value indicates
the highest Sensitivity Level that either the
high, medium or low channel is operating in.
The right bar indicates the ‘Suggested’
Sensitivity Level. This is an average Sensitivity
Level of the high, medium and low channels.
Each channel is set to a different level of
sensitivity individually by the detector to
provide the most stable Target IDs.
Auto Sensitivity
Range: –3, –2, –1, A, +1, +2, +3
Factory Preset: A
The Sensitivity can be increased by +3 levels
or decreased by –3 levels. This feature allows
you to be more aggressive or conservative
while in Auto.
Increasing the Auto Sensitivity Level by +1,
+2, or +3 sets the Auto Sensitivity higher on
each channel than the automatic setting by
the number of levels you select. You may
prefer this if you do not mind a few false
signals, if it means detecting very faint target
signals. It also tends to reduce the accuracy
of Target IDs.
Decreasing the Auto Sensitivity Level by –1,
–2, or –3 sets the Auto Sensitivity lower on
each channel than the automatic setting by
the number of levels you select. You may
prefer this if you do not want to dig very
small targets and false signals. It also tends to
improve the accuracy of Target IDs.
When changed, the numeric value above the
Sensitivity Gauge will increase or decrease by
the number of steps you select and display
your setting. The Auto Sensitivity animation
above the gauge will change from to
either if increased or if decreased.
This is to indicate you have made a change.
To adjust the Auto Sensitivity Level in
the Pattern/Digital Screen:
1 Press the Up Navigation button to
increase Sensitivity.
2 Press the Down Navigation button to
decrease Sensitivity.
Manual Auto
Sensitivity
Level
Manual Sensitivity
The left bar and the numeric value indicate
the Sensitivity Level that you have set.
The right bar indicates the ‘Suggested’
Sensitivity Level the same as it does in Auto.
The important difference between Auto and
Manual is that all of the channels are set to
the same level in Manual and if set too high
may cause unstable Target IDs.
For example, if the Suggested Sensitivity
determined by the detector is 15 and you
set Manual Sensitivity to 20, all channels are
set to 20. If one channel is affected by the
ground conditions then Auto would normally
reduce the level for this channel. In Manual it
is not reduced and stays at 20 so the ground
interference may cause false signals and
unstable Target IDs.
For example, if E-Trac determines the
Sensitivity levels for each channel to be
High:20, Medium:15 and Low:10, the left hand
bar and the numeric value of the Sensitivity
Gauge will display 20. The Suggested
Sensitivity, the right hand bar, will display
the average of all three channels, which
will be 15.