Edit Screen
By selecting the Edit option in the
Discrimination Menu, you will enter the Edit
Screen. You can use the various functions
of the Edit Screen to modify an existing
Discrimination Pattern, or create your own.
Any changes made to a Discrimination
Pattern may then be saved for future use, via
the Discrimination Menu (p. 43).
If you enter the Edit Screen from the Pattern/
Digital Screen, the Edit Screen will display the
same Discrimination Pattern you were using
in those screens.
In addition to the Edit Modes, E-Trac provides
four Frame Sizes with which to edit the
Discrimination Pattern. Pressing the Left Shift
button scrolls through the Frame Sizes.
The Frame Sizes are:
Small
This Frame Size will modify a 1x1 FE-CO area
of the Discrimination Pattern.
Medium
This Frame Size will modify a 3x3 FE-CO area
of the Discrimination Pattern.
Large
This Frame Size will modify a 5x5 FE-CO area
of the Discrimination Pattern.
All Pattern
This Frame Size will modify all of the
Discrimination Pattern. All Pattern can be
used to either clear (accept) the Disc. Pattern
or reject the Disc. Pattern.
The size of the Edit Frame sets how ‘loosely’
the target’s ferrous and conductivity
characteristics are recorded. The Large Edit
Frame is better for accepting desired targets.
The Small Edit Frame is better for rejecting
undesired targets and minimising the risk of
masking desired targets.
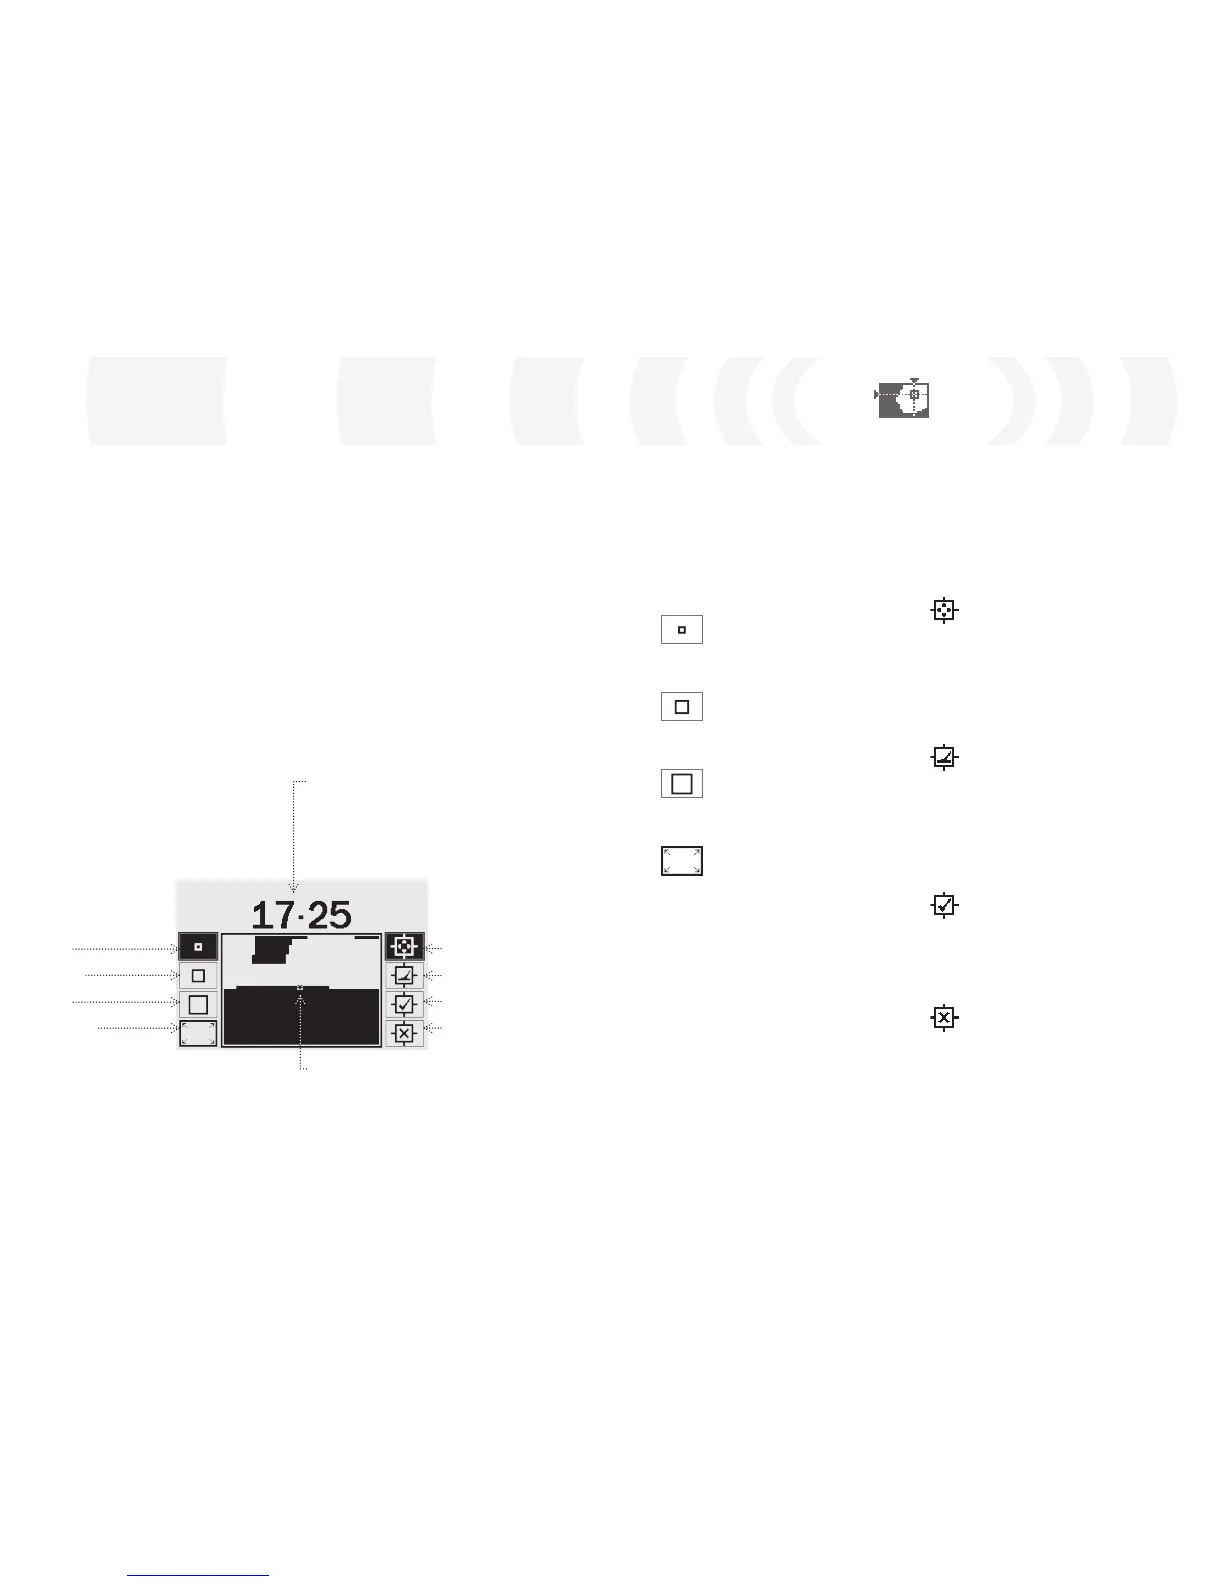
Ferrous– Conductivity
Numbers
The FE-CO numbers of
the Edit Frame position.
Edit Frame Sizes
Pressing the
Left Shift button scrolls
down the Frame sizes:
Small
Medium
Large
All Pattern
Edit Frame
Using the Navigation
buttons, you can position
the Edit Frame anywhere
within the Disc. Pattern.
In combination with the
Accept/Reject button,
any part of the Disc.
Pattern can be modified.
Edit Modes
Pressing the
Right Shift button scrolls
down the Edit Modes:
Manual
Auto Latch
Auto Accept
Auto Reject
E-Trac has four different Edit Modes for
Discrimination editing. Pressing the Right Shift
button scrolls through the Edit Modes.
The Modes are:
Manual Mode
When operating in this Edit Mode, you can
manually move the Edit Frame around the
Discrimination Pattern. By using the Accept/
Reject button you can edit areas of the
Discrimination Pattern to either accept (white
areas) or reject (black areas) certain targets.
Auto Latch Mode
When operating in this Edit Mode E-Trac
automatically selects the ferrous and
conductivity coordinates of a detected target.
This allows you to either accept or reject the
target from the Discrimination Pattern using
the Accept/Reject button.
Auto Accept Mode
When operating in this Edit Mode, the
Discrimination Pattern will be automatically
modified to accept the Ferrous and
Conductivity coordinates of a detected target.
Auto Reject Mode
When operating in this Edit Mode, the
Discrimination Pattern will be automatically
modified to reject the Ferrous and
Conductivity coordinates of a detected target.
Note: Refer to pp. 46–50 for further information
on Edit Modes.
Discrimination Menu
If you enter the Edit Screen from QuickMask,
the Edit Screen will display the QuickMask
Discrimination Pattern.
The Smartfind Window in the centre of
the Edit Screen displays the Discrimination
Pattern. The Edit Frame Size options are to the
left, the Edit Mode options are to the right.
Tip: Changing the Trash Density setting (pp.
72–3) from High to Low can stabilise the FE-CO
coordinates of a detected target while using any
‘Auto’ Edit Modes.