12
Area Component Checks and remedies
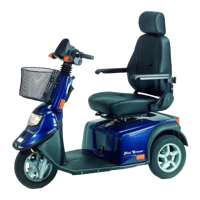
Chassis, seat,
shrouds.
Shrouds. Check to ensure that the plastic shrouds
are in good condition. Parts with sharp and
projecting edges should be replaced. The
same applies to shrouds with an operational
function such as the splash guard and the
battery shroud (water in the controls). Clea-
ning, see below.
Other mechanical compo-
nents.
Check that the other components are in
good condition and function properly.
Controls in PCB. Check to ensure this is dry and in good
condition.
Check to ensure that all plug connections
are properly installed.
Cables, plugs. Check to ensure that the cables are properly
installed and do not protrude so that they
can catch on anything or can be pinched.
Check that plug connections are properly
locked.
Battery straps. Check that they are fi rmly secured.
Batteries. Check to ensure that the battery cases are
not cracked, that they are in good condition,
and that the battery connections are pro-
perly installed.
Battery capacity. Check with a battery tester. If this indicates
that new batteries should be installed make
sure to pair these with a precision of 0.1 V.
Apply a little acid-free Vaseline to the bat-
tery poles before connecting them.
Battery charger. Check that the pilot lamp on the battery
charger switches to CHARGING when it is
connected to the scooter.
If necessary check charging voltage during
charging. This should be approximately
28.8 V.
Charge the batteries overnight. Remove the
charger and measure battery voltage after
approximately 15 minutes. This should be
about 27.6 V for new batteries.
Check to ensure that the scooter is una-
ble to drive while connected to the battery
charger.
Electrical compo-
nents.
Batteries, charger.
(see section 6).