21
10.0 Trouble-shooting
The list below shows various defects that our experience indicates may arise. The possible cau-
ses of these are shown as well as suggestions for remedying them.
DEFECT POSSIBLE CAUSES REMEDIES
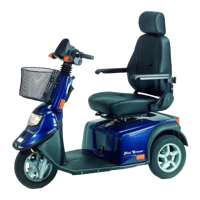
Mini Crosser won’t move.
No light in battery indicator.
Key not turned to start.
Batteries run down. .
Control fuse blown.
Main fuse blown.
Turn key and wait 5 seconds
before activating the throttle.
Charge batteries.
Change fuse.
Contact your supplier.
Mini Crosser won’t move.
Light in battery indicator.
Mini Crosser has been overloa-
ded.
Handbrake on.
Defect in electronics.
Batteries run down.
Charge plug not removed.
Wait approx. 1 min. (with the
scooter switched off) before
driving on (see page 10, Driving
the Mini Crosser T).
Release handbrake.
Contact your supplier.
Contact your supplier.
Remove charge plug.
Driving speed too slow. Speed selector set at slow
Electronics overloaded.
Too little air in tyres.
Switch to faster speed.
Stop and wait a few seconds
before re-starting.
Pump tyres to correct pressure.
Range per charge too small. Defective batteries.
Low temperature.
Defective charger.
Too little air in tyres.
Wrong charging procedure.
Charge batteries and check
that green light on charger is on
before use.
Contact supplier.
Pump tyres to correct pressure.
Read instructions for use.
Charge light not on when
charger connected to mains
and Mini Crosser. Read
charger instructions.
No current in switch.
Defective cable.
Turn switch on.
Contact supplier.
Light on charger not on to
show charging complete,
even though charging has
lasted 10-12 hours.
Read charger instructions.
There has been a power cut.
Charger is post-charging.
Defective charge plug.
Re-connect charger and charge
again.
Check again ½ hour later.
Contact your supplier.
Push charge plug in completely
and re-charge.