4.
INSTALLAZIONE • INSTALLATION
ENGLISHITALIANO
- 68 -
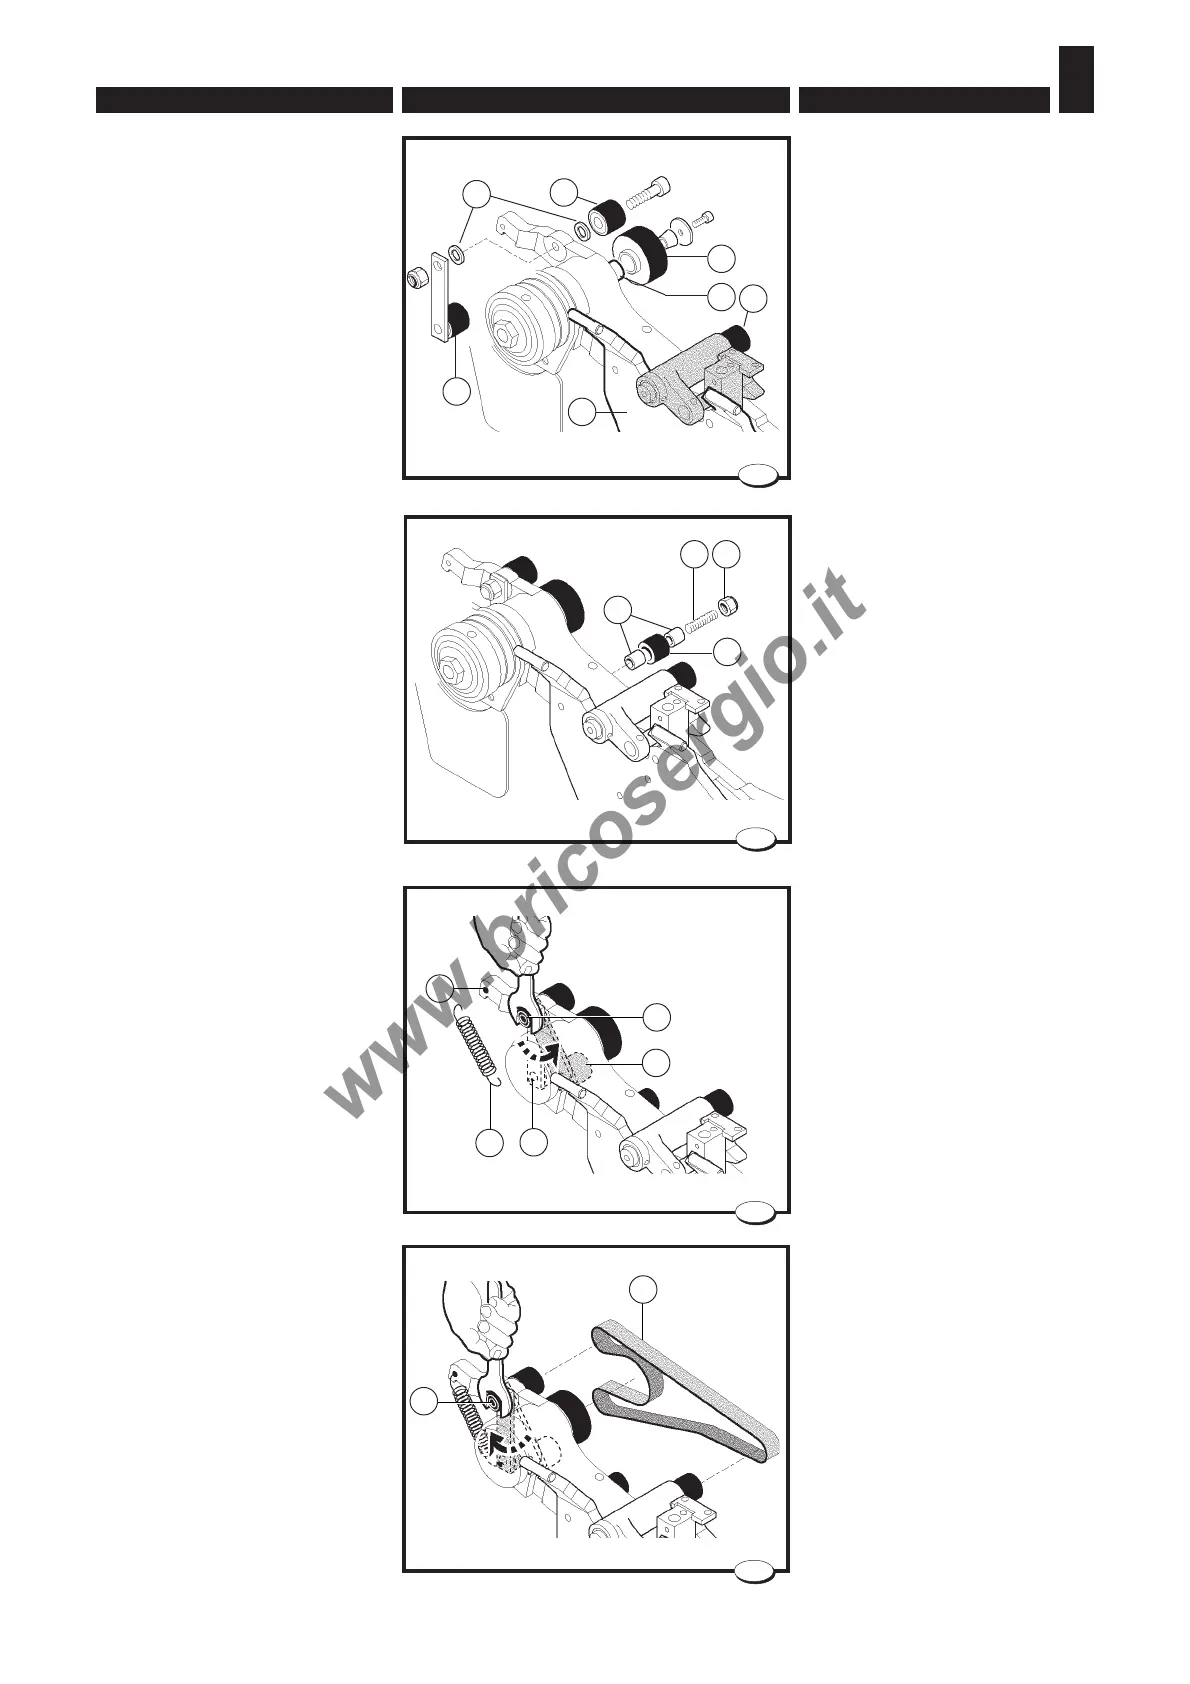
- montare la puleggia C nell’albe-
ro sega D;
- montare la puleggia E e il grup-
po staffa - puleggia F interpo-
nendo, se necessita, i distanziali
G in modo che le pulegge E e F
siano perfettamente allineate
con la puleggia C;
- avvitare la vite H fino a battuta;
- inserire i due distanziali L e la
puleggia M;
- serrare i componenti tramite il
dado N.
- Agganciare la molla R nei fori S;
- ruotare il supporto P come indi-
cato in figura e serrare il dado T.
- Montare la cinghia Q e allentare
il dado T.
028.017.0.tif
- Install the pulley C in the saw
shaft D;
- Fit the pulley E and the bracket-
pulley unit F into place fitting, if
necessary, the spacers G in
such a way that the pulleys E
and F are perfectly aligned with
the pulley C.
- fully tighten the screw H;
- insert the two spacers L and the
pulley M;
- tighten the components with the
nut N.
- hook the spring R into the holes
S;
- turn the support P as indicated
in the figure and tighten the nut
T.
- Mount the belt Q and loosen the
nut T.
24
L
H N
M
028.019.0.tif
26
Q
T
028.018.0.tif
25
S
S
R
P
T
028.016.0.tif
23
G
F
E
C
D
A
B