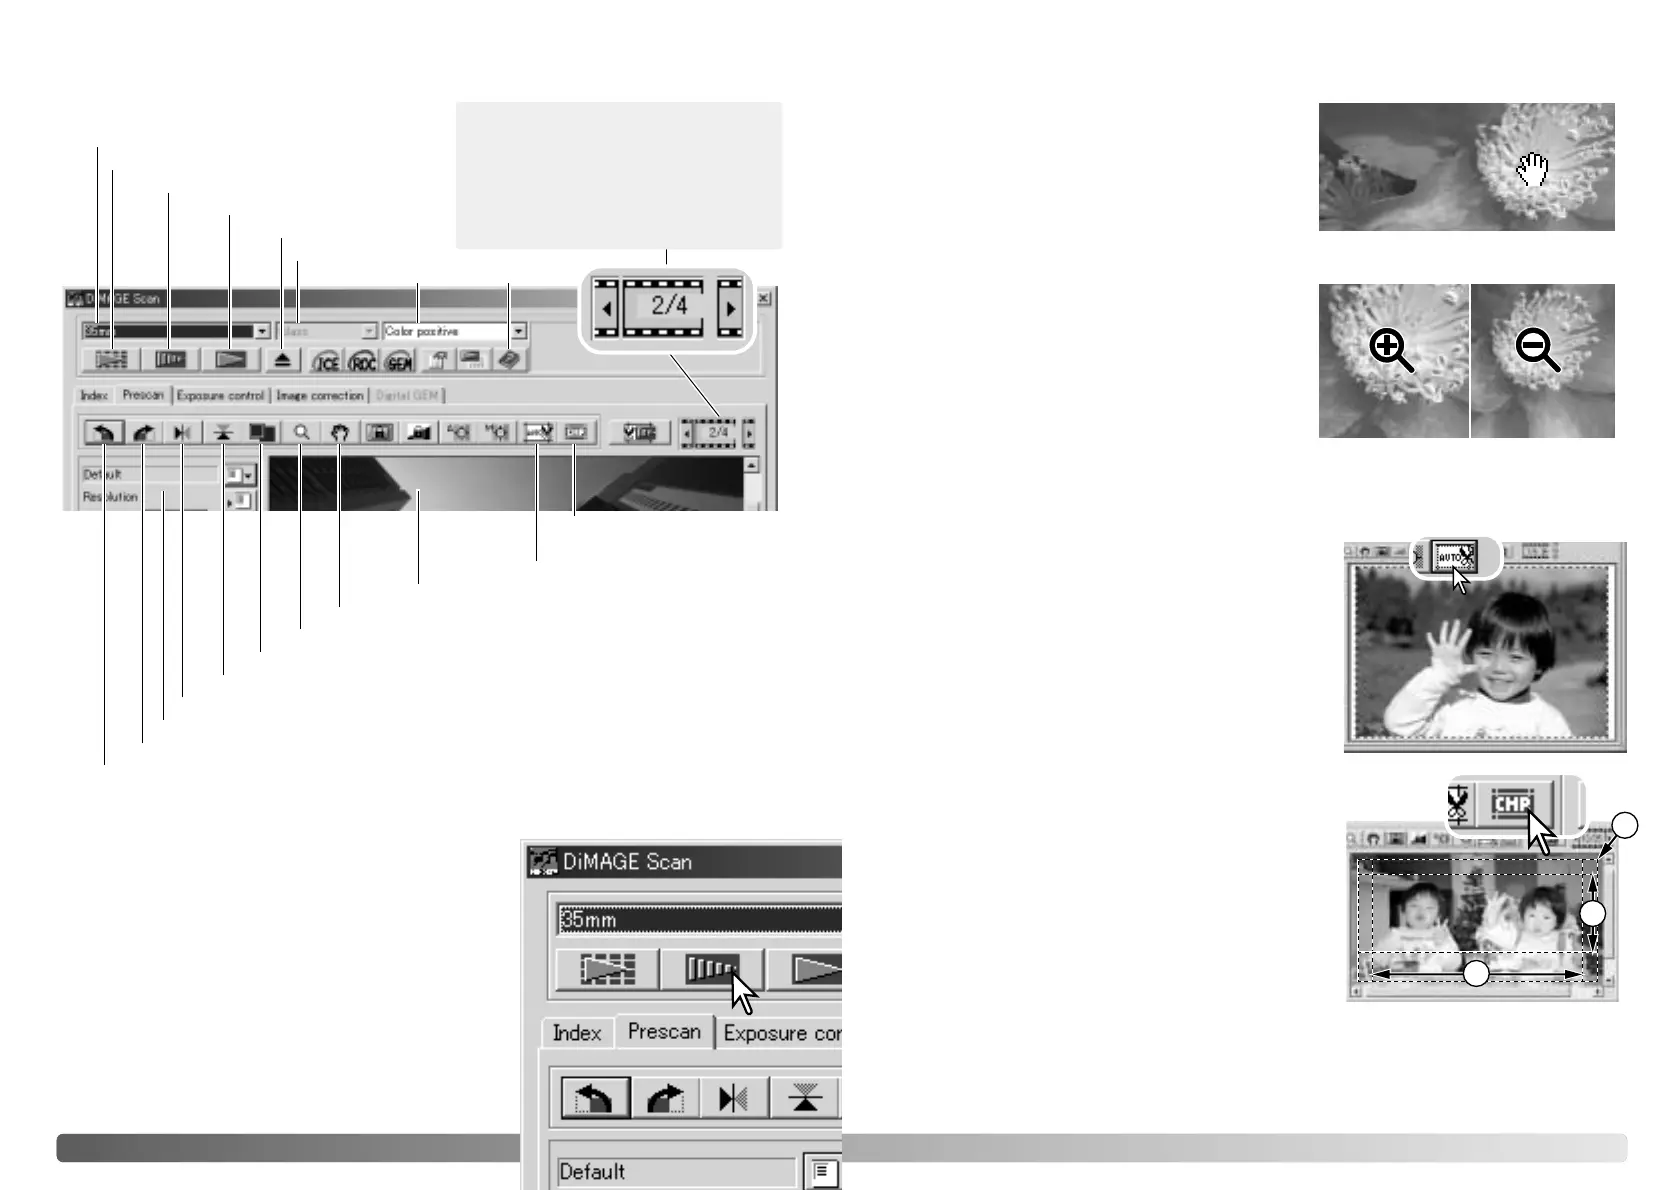
Auto cropping eliminates the blank space around
the image area. Clicking the auto-cropping button
cycles through its three positions: crop to outside
edge of the image area, crop to inside edge of the
image area, and entire scan area. The cropping
frame is indicated by a marquee (dotted line). The
cropping area can also be adjusted manually (p.
38). When using the image-correction tools, only
the cropped area is displayed.
1918 B
ASIC SCANNING
Main window and prescan tab
Film format
Film type
Index scan button (p. 16)
Prescan button
Scan button (p. 20)
Help
Rotate-left button (p. 17)
Rotate-right button (p. 17)
Flip-horizontally button (p. 17)
Flip-vertically button (p. 17)
Fit-to-window button (p. 17)
Scan-setting window (p. 20)
Magnifying button (p. 19)
Grab button (p. 19)
Auto-cropping button (p. 19)
CHP button
(for APS film) (p. 19)
Making a prescan
When using an index scan, select the index frame to
be prescanned. Click the prescan button in the main
window. Double clicking on the index frame will also
activate the prescan even if no thumbnail is displayed
in the frame; the prescan window will be displayed
automatically.
When using a single-frame medium-format film
holder, click the prescan button in the main window.
Grab tool
Magnifying tool
The display image can be enlarged or reduced.
Click the magnifying button on the tool bar. Click
on the image to enlarge. To reduce, hold down
the control (Windows) or option key (Macintosh)
and click on the image. When the image has
reached the magnification limit, the plus or
minus sign in the magnifying icon will disappear.
This tool cannot be used with the fit-to-window
function (p. 17).
When an image is larger than the display area,
the grab tool can be used to scroll the image.
Click the grab button on the tool bar. Click and
drag on the image to scroll. This tool cannot be
used with the fit-to-window function (p. 17).
Enlarge Reduce
Auto cropping
CHP button (APS film)
Eject button
Holder type
Prescan display area
Scanner models that accept optional APS adapters
can use the CHP button to crop an image to one of
the APS formats. Clicking the CHP button cycles
the cropping frame through the C, H, and P APS
framing formats. The cropping area can be moved
by placing the mouse pointer within the marquee
(dotted line) and then clicking and dragging. The
cropping area can also be adjusted manually (p.
40). When using the image-correction tools, only
the cropped area is displayed.
This display indicates the frame
number of the displayed image and
the number of images in the holder.
Click the arrows to load the previous
or next image.