58 ADVANCED IMAGE PROCESSING
Amount: to adjust the contrast of the mask between
0% and 500%. If the value is too high, pixilation will
be apparent; the image becomes noticeably rough or
grainy. 150% to 200% is recommended for high-
quality printed images.
59
Unsharp mask
The unsharp mask sharpens edges in the image without affecting overall image
contrast. This mask can be used with soft or slightly out-of-focus images. The effect of
the unsharp mask is very subtle, but makes a significant improvement to the overall
appearance of the image.
Drag the sliders or enter values in the text
boxes to adjust the parameters of the mask.
The full effect of the unsharp mask cannot be
evaluated in the prescan image. It can only be
judged in the final scan.
The result of the unsharp mask differs with
image resolution. Make several scans with
slight changes to the output resolution until
the intended result is produced. Clicking the
reset button restores the default settings.
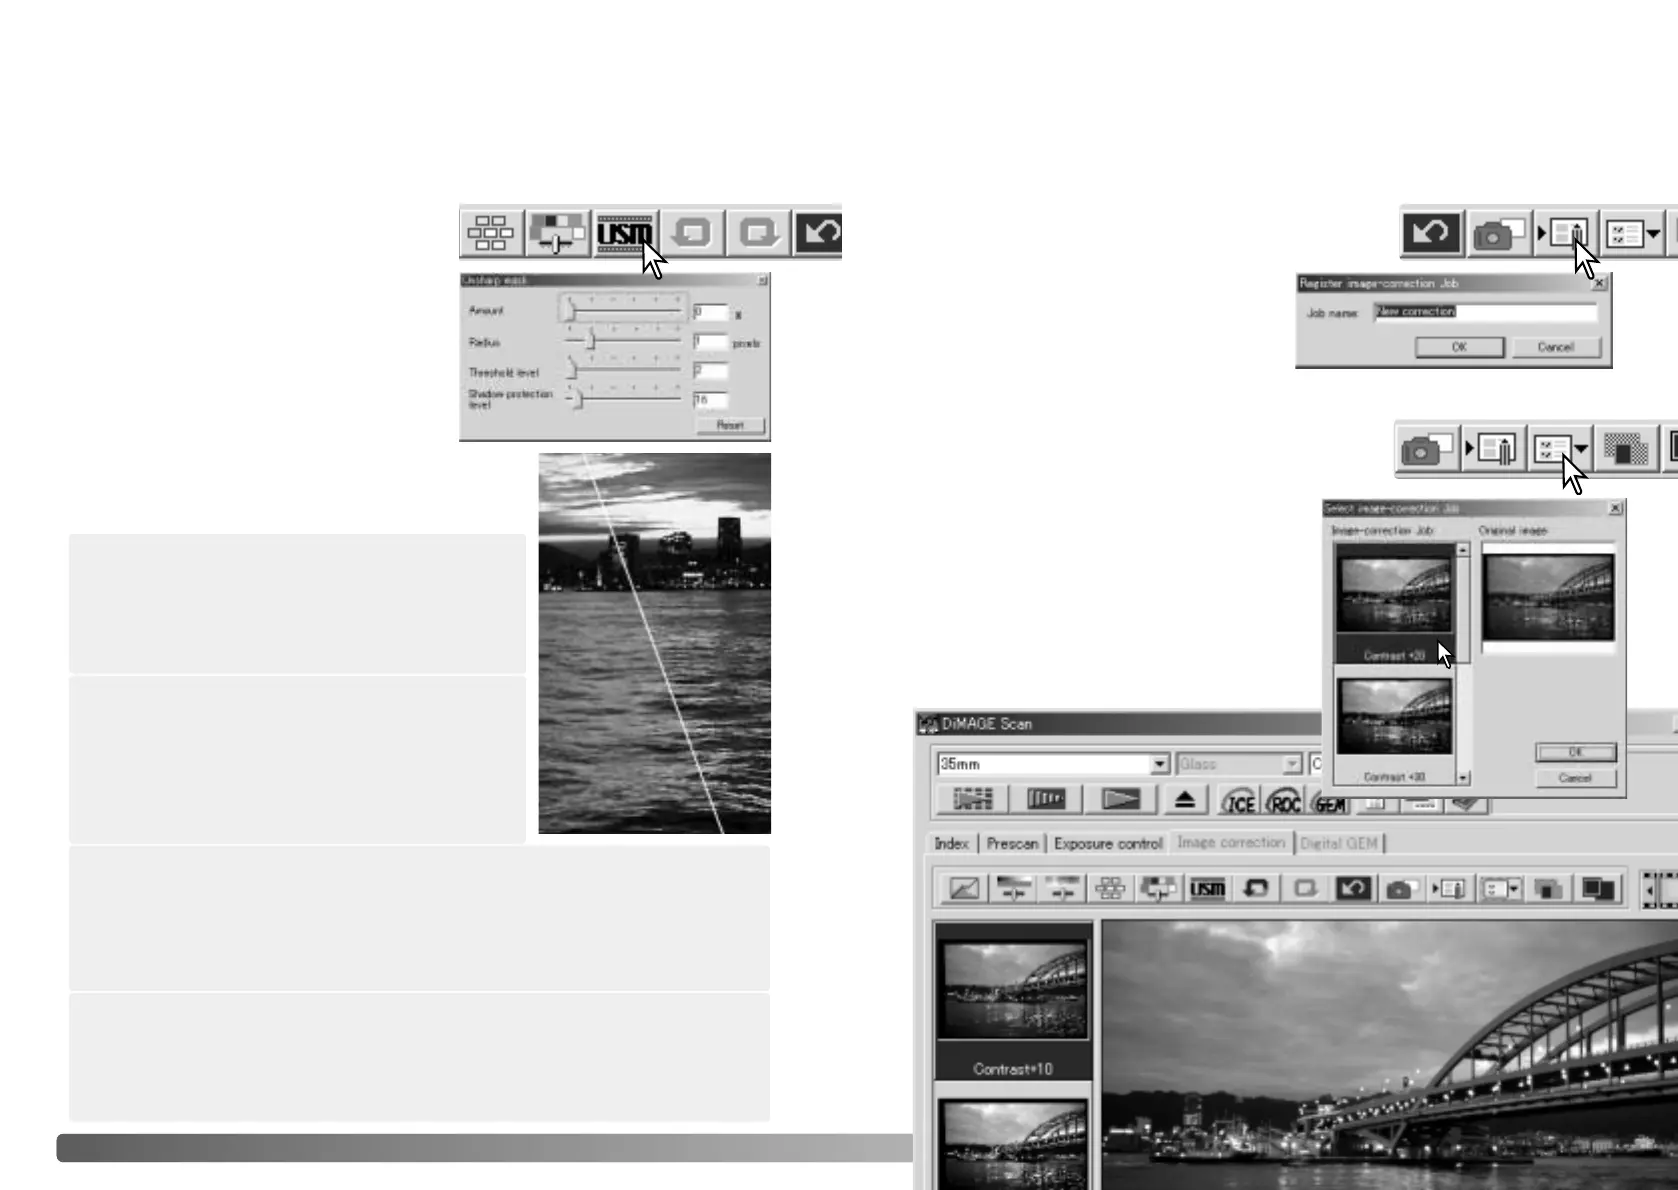
Saving image corrections
Loading image-correction Jobs
All corrections applied to an image can be saved as an image-correction Job. The Job
can be loaded into the utility at any time and applied to different images. This is a time-
saving function when a large number of images need too be processed with the same
correction settings.
Click the save image-correction Job button to save the
current image-correction settings.
Enter the Job name. Click OK to save the
settings.
Click on an image-correction Job thumbnail to
select it. Click OK to apply the Job to the
displayed image. Jobs are loaded into the
snapshot display area. Multiple Jobs can be
loaded.
To delete a Job, open the load window and
highlight the Job to be deleted. Press the
keyboard delete button to erase the file.
Display the image to be corrected in the image-correction
tab. Click the load image-correction Job button to load a
saved image-correction settings.
Click the unsharp-mask button to open the
unsharp-mask dialog box.
Original image
With mask
Shadow protection level: to limit the sharp subject pixels in the shadows. The
level can be adjusted in integers between 0 and 255. The default setting is 16.
When the luminance level is greater than the shadow protection level, that pixel is
recognized as a sharp pixel.
Radius: to increase the edge sharpness of the
pixels. The radius can be adjusted between 0.1 and
5. The default setting is 1. Changes to the radius are
more apparent on printed images than images
displayed on a monitor. A level of 1 to 2 is
recommended for high-quality printed images.
Threshold level: adjusted in integers between 0 and 255. The default setting is 2.
If the difference between the surrounding pixels is greater than the threshold level,
that pixel is recognized as a sharp subject pixel. When the level is set to 0, the
whole image is corrected. The threshold level can separate smooth or even areas
from edges and detailed areas to be sharpened.