6. Remove the lower case using the same method for the battery compartment
cover; insert the case opener in the space between the white and the orange part
and drop the clips. Pay attention to not damage the plastic material.
7. Remove the upper case with the same method described above; the upper case
is attached with the reinforcement sheet.
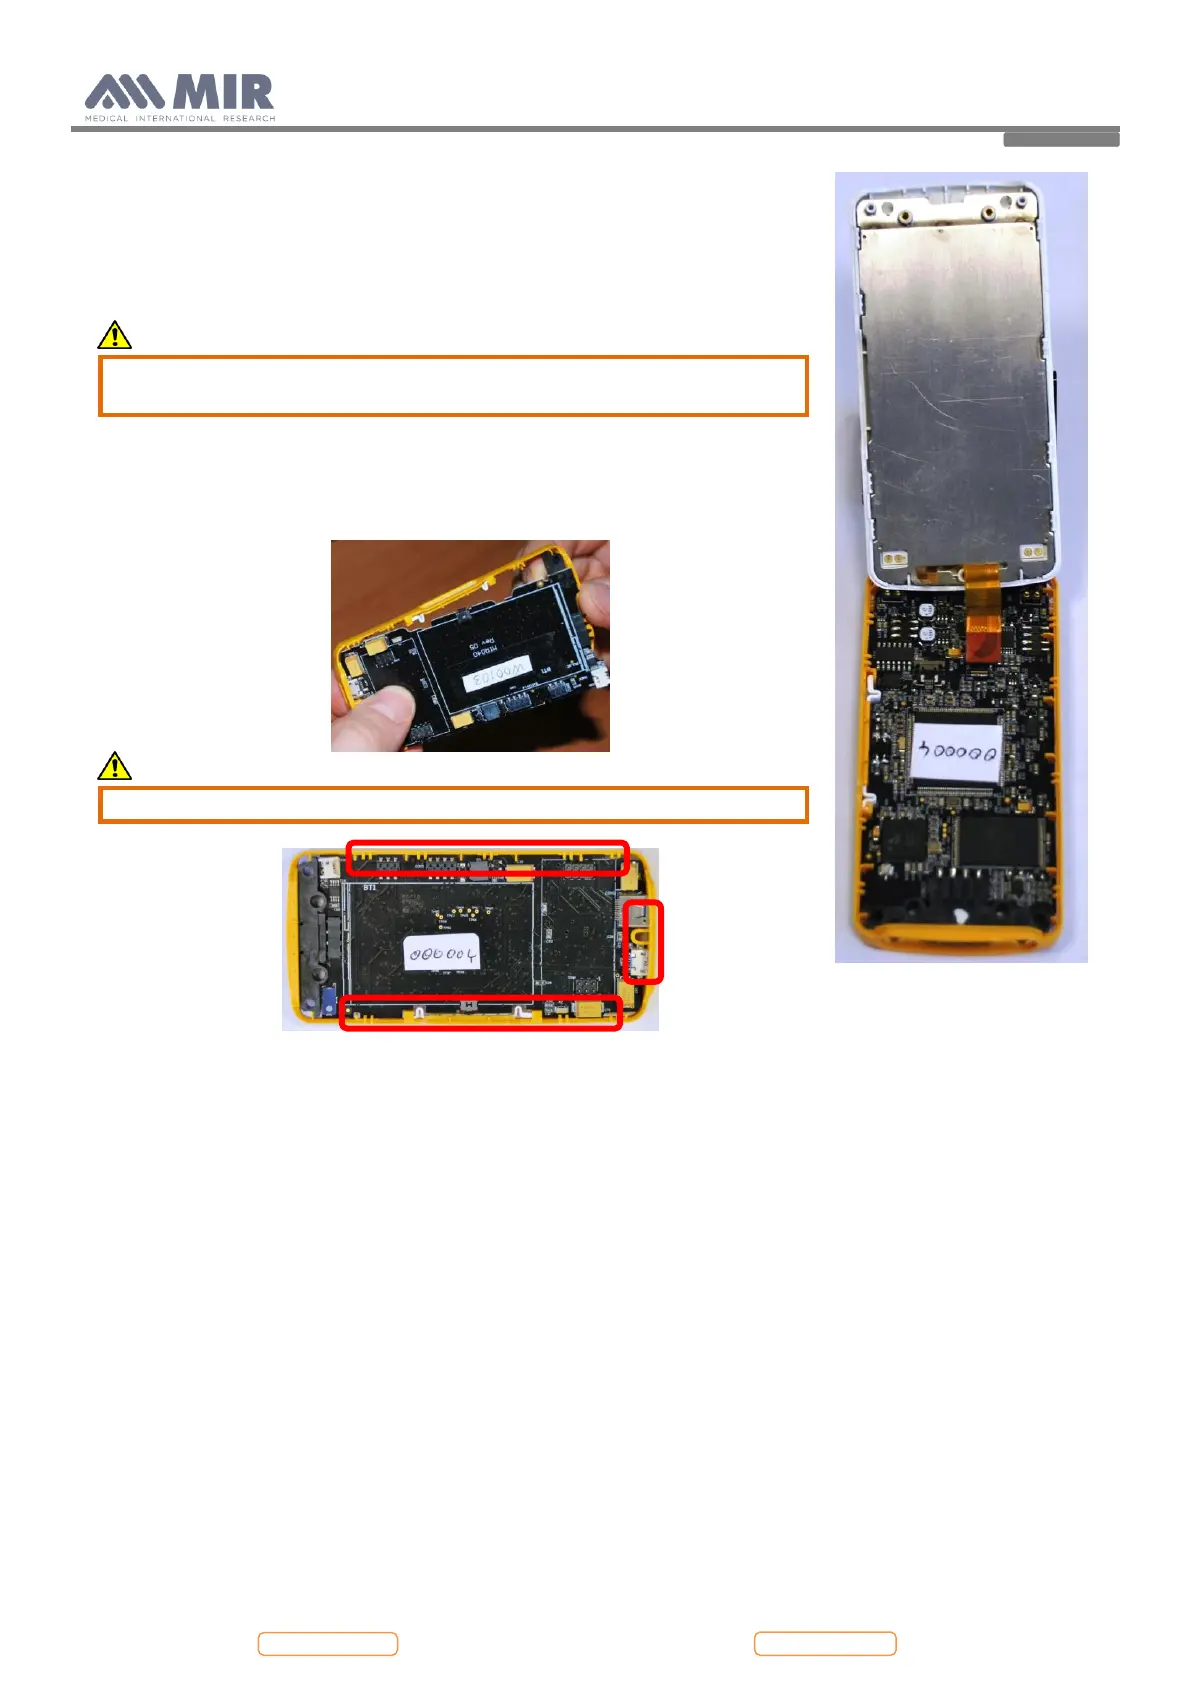
Caution
Pay attention to the display flat cables connected to the main PCB and
passing through the reinforcement sheet.
Disconnect the two cables from the PCB.
8. The PCB now is only inserted in the middle case (orange). To remove the PCB
take the PCB with both hands and operate a horizontal movement to separate
the case and the PCB (see the following images).
Caution
During this phase do not break the elements shown below