- 8 -
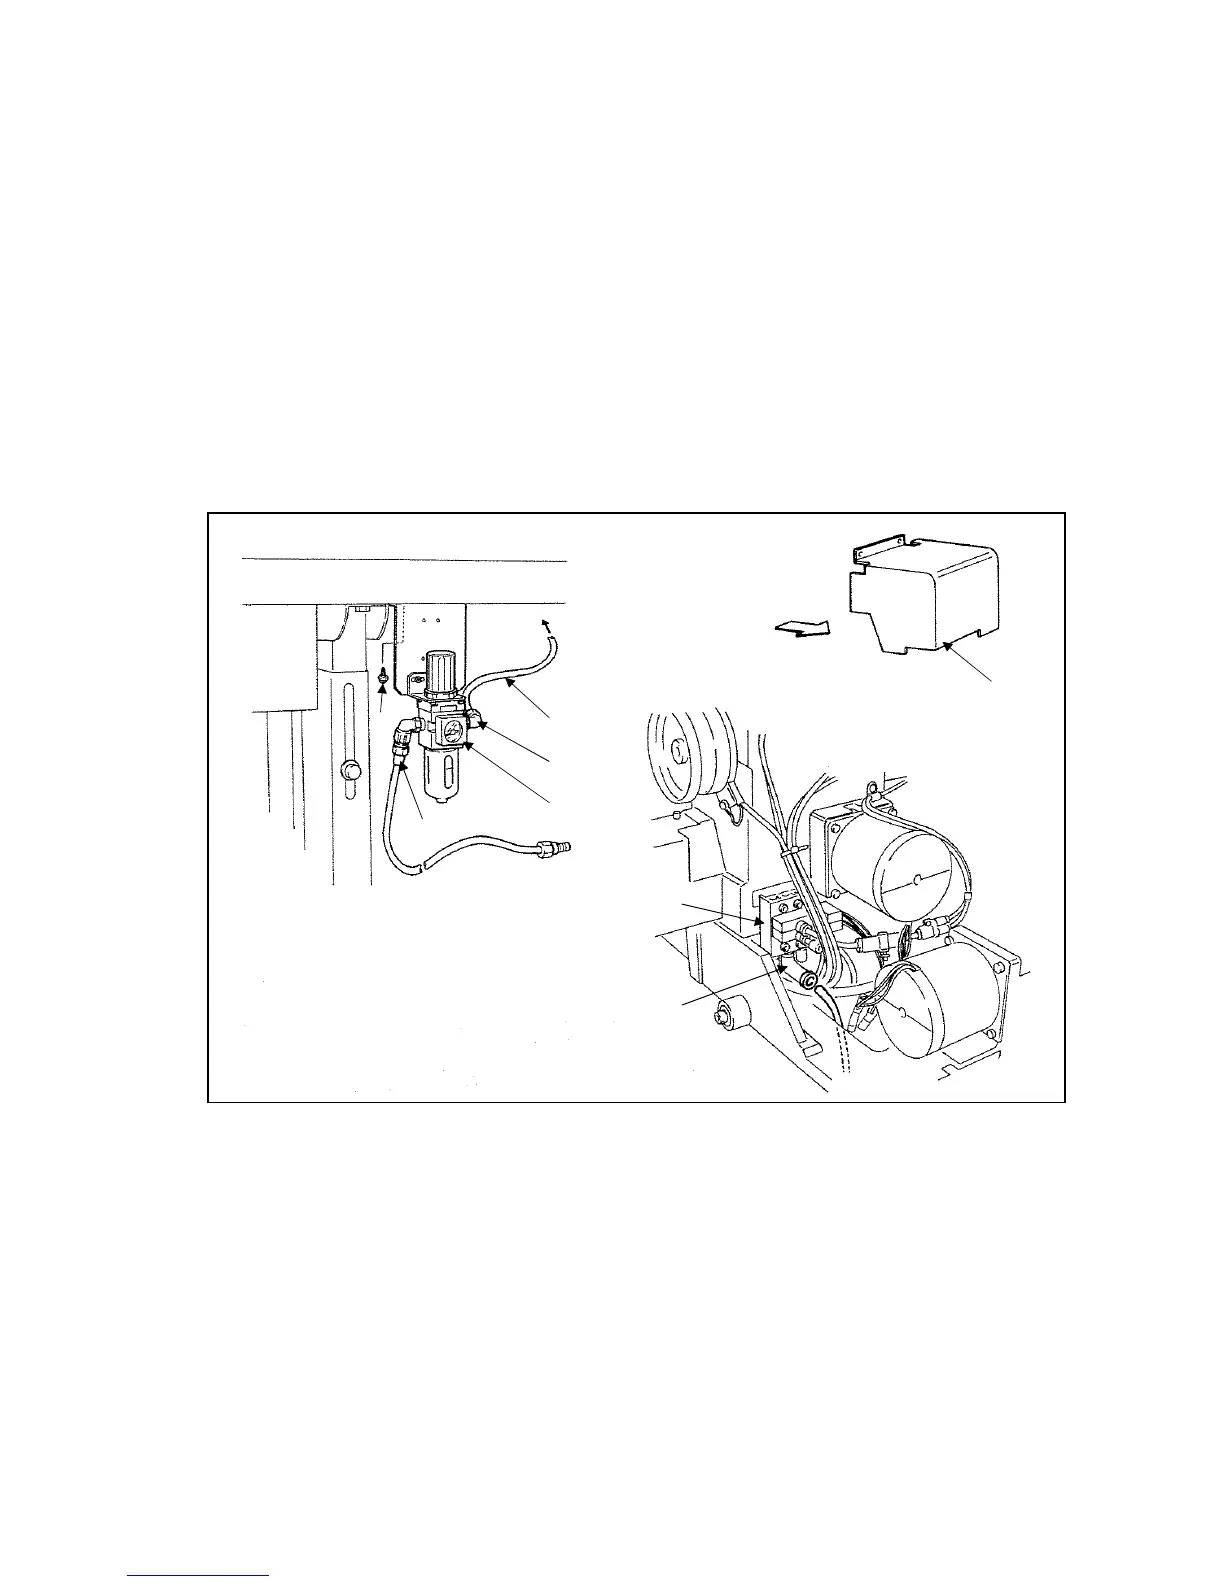
3-11 Connection of the air tube
1) Remove the stepping motor cover (No.1).
2) Attach the air presser regulator assembly (No.2) underneath the table with the wood screws (No.3).
The prepared holes are provided for the wood screws on the rear surface of the table.
3) Cut the part of size φ 8 air tube (No.4) enclosed in the accessory box into about 1 meter length then,
insert one end of this air tube into the manifold air fitting (No.6). The manifold is jointed with the
magnet valves (No.5) and located at the left side surface of the sewing machine head.
Beside, pass the other end of the air tube (No.4) through the cut out hole of the table top then, insert it
into the air outlet fitting (No.7) of the cut out hole of the table top then, insert it into the air outlet fitting
(No.7) of the air presser regulator (No.2).
4) Insert the one end of the resting air tube (No.4) into the intake air fitting (No.8) of the air coupling to be
adopted with the air supply source provided in your factory.
One of the air couplings is enclosed in the accessory box.
2)
7)
4)
8)
3)
1)
5)
6)
 Loading...


