- 30 -
7-9-2 Assembling and readjustment of the thread trimmer mechanism
If take the trimmer mechanism apart and assemble it again, please refer to the following instructions
for the readjustment.
7-9-2.1 Attaching the knife bracket and the knife mounting unit
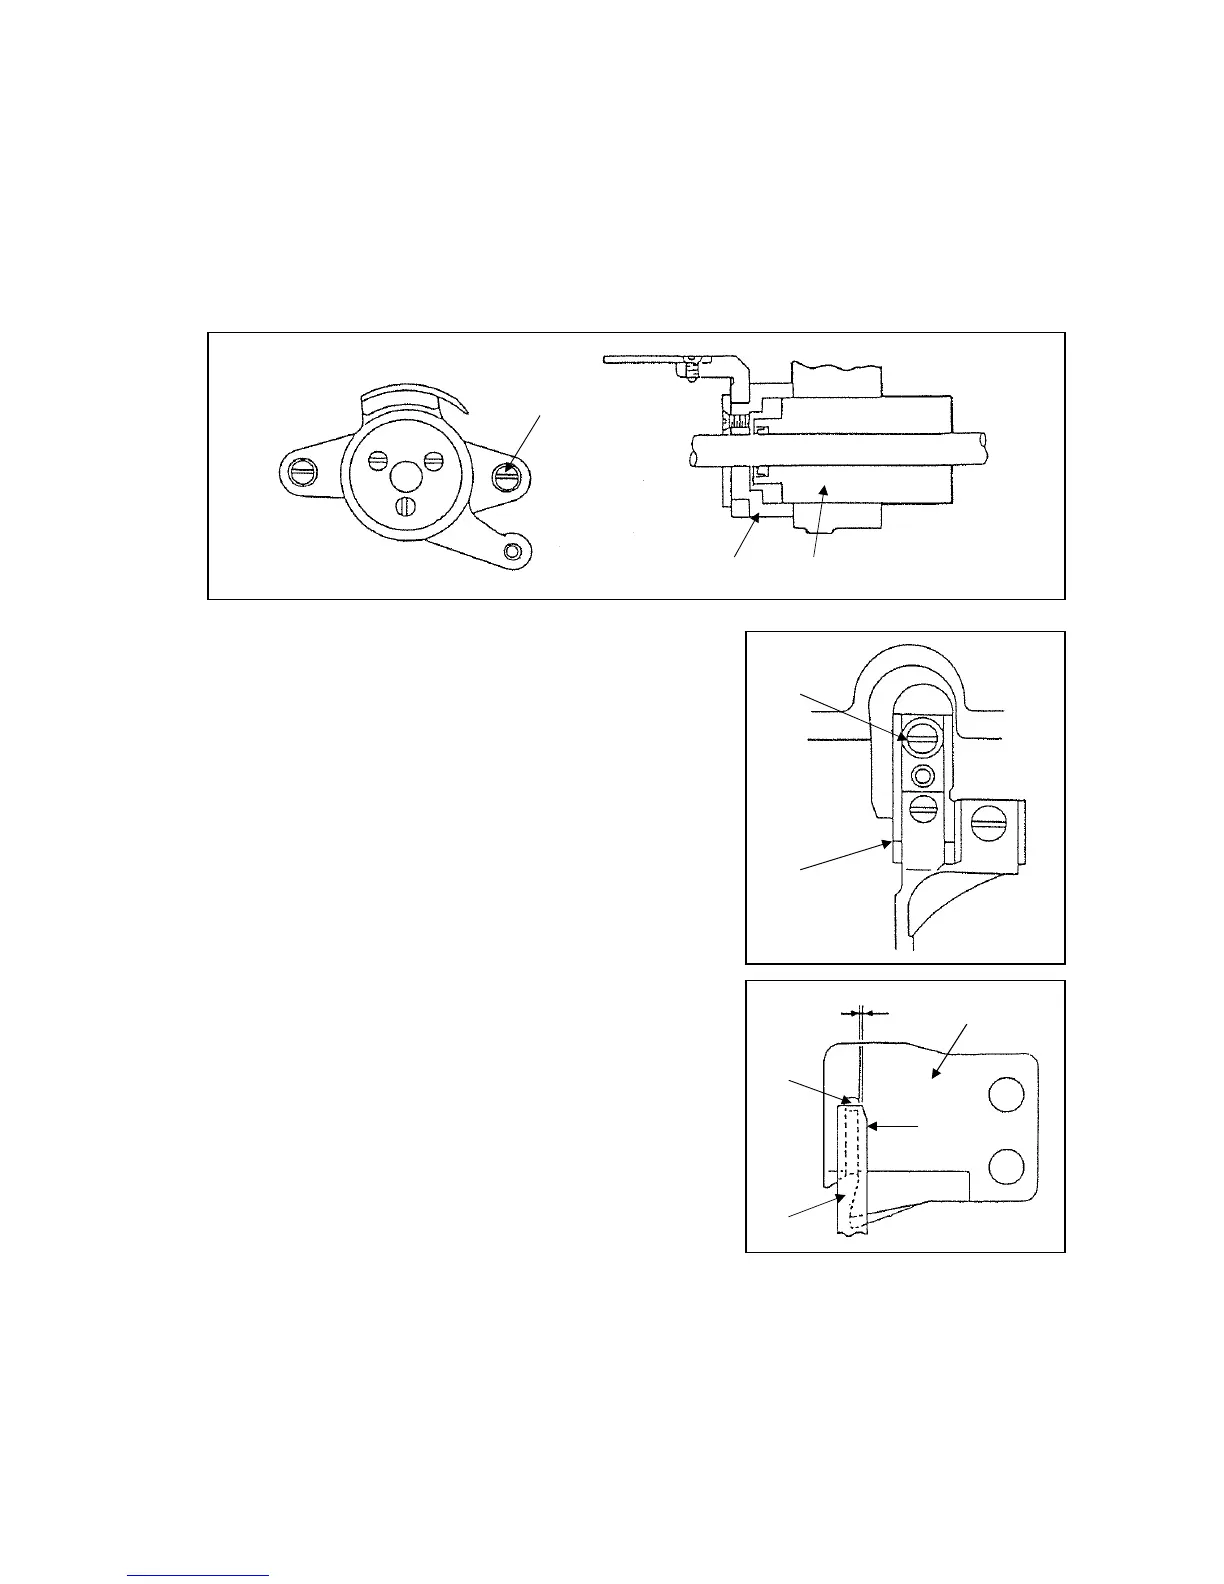
1) Knife bracket
Under the condition that the rotating hook and the hook positioner are removed, put the knife
bracket (No.1) on the lower shaft left bushing (No.2) and fix it with the two set screws (No.3).
3)
1) 2)
2) Knife mounting unit
Under the condition that the rotating hook and the hook
positioner are removed, attach the knife mounting unit
(No.1) with the set screw (No.2).
2)
1)
3)
2)
4)
1)
0.3mm
7-9-2.2 Mutual relation among the movable and stationary knife
edge
1) Rotate the movable knife (No.1) by hand when it is
engaged with the stationary knife (No.2), there is 0.3mm
space between the movable and stationary knife edges.
This is standard condition.
2) If this space is too wide, it causes a thread tail from the
needle to be pulled out after the automatic thread
trimming. And if it is too narrow, it causes the failure of the
trimming.
For avoiding these incidents, please adjust this space
precisely.
3) For this adjustment, suitably move the knife bracket or
the knife mounting unit mentioned at above 7-9-2.1.
 Loading...


