- 25 -
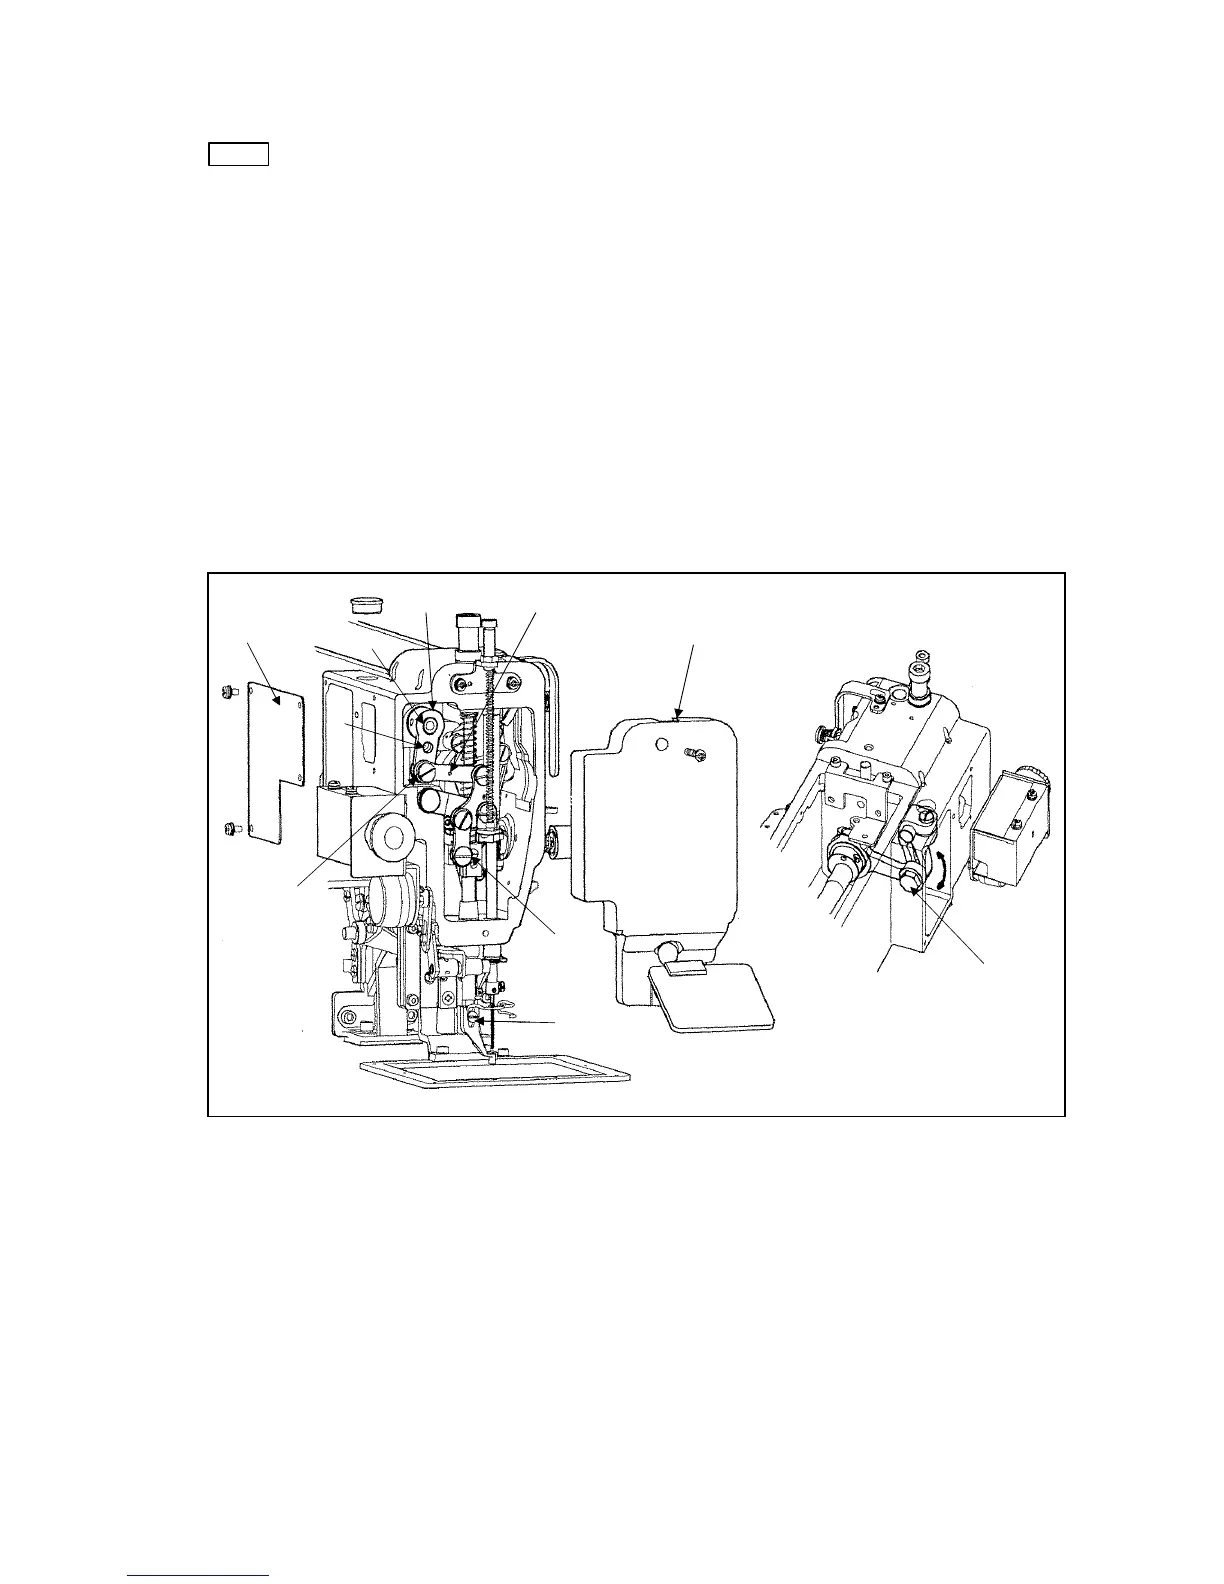
7-5-2 Adjustment of the presser foot lift during the sewing
NOTE
The presser foot lift during the sewing can be adjusted 0 and 2 to 10mm.
1) The presser foot lift during the sewing becomes 4 to 10mm at the condition which the connection of
the link (No.2) and the lever (No.3) with the shoulder screw (No.1) is as shown on the figure and
becomes 2 to 4mm if the connection is made with A hole, and it becomes 0mm if the connection is
made with B hole..
2) The stepping lift is adjusted 4mm when the sewing machine is shipped from the factory.
3) For the adjustment at the each range of the presser foot lift, remove the cover (No.4) then, loosen
and move the adjust bolt (No.5).
4) If the link (No.2) connection is changed to A or B hole, the presser foot position is also changed. So
reset the presser foot position with adjusting the position of the presser foot bar or the presser foot
itself with loosing their set screws (No.6) or (No.7).
5) Regarding the running noise and the vibration, the higher lift effects worse. So adjust the presser
foot lift during the sewing as small as possible.
6) After the adjustment, put the cover (No.4) and the face plate (No.8) back on the original location.
4)
1)
6)
7)
3) 2)
B
A
8)
5)
 Loading...


