49MCP15-500.7
MAINTENANCE - CONTINUED
Cooling Coil Drain Pan and Drain System
The drain pan, trap, and drain pipe must be cleaned regularly to
avoid blockage that can reduce or stop water flow as follows:
1. At the beginning of the cooling season, inspect and clean
the entire cooling coil cabinet and condensate drain pan to
remove contaminants.
2. Inspect and clean the condensate drain trap and piping.
The use of a cleanout opening at the top of the trap (see
Figure 8.2) can help facilitate this maintenance.
3. Fill the trap with water to ensure proper operation and
replace the cap on the cleanout opening to close the
system.
4. During the end of cooling season shutdown of the system,
disconnect and remove all water from the trap and drain to
prevent freeze damage. If local building codes permit, the
trap may be filled with an antifreeze solution.
5. If the unit is used year round, regularly inspect and clean
the cooling coil cabinet, condensate drain pan, and trap/
drain system to ensure proper function.
6. Depending on climate, freeze protection of the trap may be
required during non-cooling days.
Refrigeration System Coil Maintenance
1. Periodically, inspect the coils (evaporator, condenser, and
hot gas reheat if applicable) for signs of corrosion and
leaks. Repair and replacement of the coil and the
connecting piping, valves, etc., must be performed as
needed by a qualified technician.
2. Should the coil surface need cleaning, caution should be
exercised in selecting the cleaning solution as well as the
cleaning equipment. Improper selection can result in
damage to the coil and/or health hazards. Cleaning
solutions must not be corrosive or cause damage to copper
tube/aluminum fin, or all aluminum coils. Clean the coil
from the leaving air-side so that foreign material will be
washed out of the coil rather than pushed further in. Be
sure to carefully read and follow the cleaning fluid
manufacturer’s recommendations before using any
cleaning fluid.
Note: The condenser coil is constructed of aluminum
materials and contains refrigerant under high pressure. Do
not use acidic solutions to clean the coil, as it could lead to
corrosion.
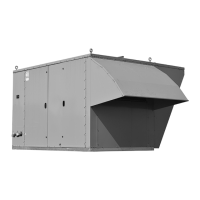
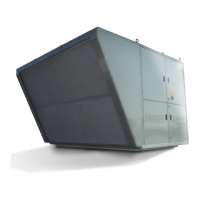
Inlet Hood
If the unit is equipped with an outside air inlet hood, check to
ensure the inlet screen behind the hood is clean and free of
debris.
Duct Furnace
When providing annual maintenance for the duct furnace, keep
the unit free from dust, dirt, grease and foreign matter. Pay
particular attention to:
1. The power exhauster discharge opening and the
combustion air inlet louvers.
2. The main burner orifices (avoid the use of hard, sharp
instruments capable of damaging surfaces for cleaning
these orifices). To check the main burner orifices, see
Manifold Assembly Removal section on the next page.
3. The heat exchanger should be checked annually for cracks.
If a crack is detected, the heat exchanger should be
replaced before the unit is put back into service.
4. The gas valves and piping should be checked annually for
general cleanliness and tightness.
5. The gas controls should be checked to ensure that the unit
is operating properly.
6. If equipped with the standard efficiency (81%) gas heat
option:
a. Inspect and clean the condensate drain tray located
under the heat exchanger tube openings.
b. Inspect and clean the condensate drain tubes located on
the end of the drain tray that are routed to the outside of
the cabinet. Ensure that the tubes are not kinked or
blocked.
7. If equipped with the hybrid efficiency (D-Cabinet only) or
high efficiency (90% or 94%) gas heat option:
a. Inspect and clean the condensate drain trap and piping.
b. Fill the trap with water to ensure proper operation.
c. If a condensate neutralizer tube is installed, recharge per
the neutralizer tube manufacturer’s instructions.
d. Check the condensate overflow switch for cleanliness
and proper operation.
Manifold Assembly Removal
1. Shut off gas and electric supply.
2. Open the duct furnace control access compartment doors.
3. Disconnect gas manifold at ground union joint.
4. Remove the screws holding the manifold to the heat
exchanger support.
5. Slide the manifold through the manifold bracket.
6. Clean the orifices as necessary.
7. Slide the manifold back into the manifold bracket and
reinstall the screws that hold the manifold to the heat
exchanger support.
8. Reconnect the gas line to the manifold at the ground joint
union.
9. Turn on the electric and gas supply.
10. Check the ground union joint for leaks with a soap solution.
Tighten if necessary.
11. Close the duct furnace control access compartment doors.