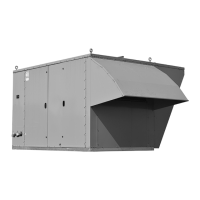
21MCP15-500.7
START-UP PROCEDURE - CONTINUED
Gas Heating Option
The Gas Heating Option requires gas pressure be measured
and adjusted as required at several points on the unit. The
following steps must be completed:
Identify the Gas Control Type
Before you begin, review the furnace serial plate to determine
the model installed. The serial plate is located on the right hand
access door for the furnace section. Refer to Pages 56 through
59 for Serial Plate and Model Nomenclature information. Note
that the furnace serial plate is separate from the unit (model
MPR) serial plate.
Digit 11 of the furnace model number denotes the type of gas
control used. These are defined below:
4 - Indicates two heat exchangers using basic modulating
controls with United Technologies ignition. Manifold
pressure of both heat exchangers is varied
simultaneously based on demand. Power exhausters
operate at a constant speed.
6 - Indicates a single heat exchanger with Beckett advanced
modulation control which varies the manifold pressure
and power exhauster speed based on demand. High
turn down and more consistent efficiency are possible
with this control.
8 - Indicates two or more heat exchangers; one equipped
with advanced Beckett modulation master control and
the other(s) equipped with non-modulating single input
slave control. The slave heat exchanger(s) is controlled
and monitored by the master control and will turn on or
off depending on demand.
Check/Adjust Pressure Upstream of Unit
With the field installed manual gas shut-off valve in the “OFF”
position, recheck the gas supply pressure at the field installed
manual shut-off valve. The inlet pressure should be 6"-7" W.C.
on natural gas, while all the burners are operating, but never
more than 14" W.C when the burners are off. If inlet pressure is
too high, install an additional pressure regulator upstream of the
combination gas control.
Check/Adjust Pressure at Combination Gas Valve
1. Open the field installed manual gas shut-off valve and set
the combination gas control valve to the “ON” position. Note
for C- and D-Cabinet sized units, the Gas Heating Option
consists of two or more heating sections. For this step, only
one combination gas valve is to be set to the “ON” position.
2. Enable the unit controls. For furnace models with furnace
model Digit 11=6, the LED readout on the furnace control
board (Figure 23.1) will briefly display the furnace size.
Verify that the model readout is correct for the unit being
started.
3. Ensure that the supply fan blower is operating at the proper
airflow and adjust the Modine Control Systemc control
setpoint to create a call for heat. Refer to the Controls
Manual for instructions on changing the setpoint.
4. Check the ignition control and gas valve for electrical
operation.
5. Check to make sure that the main gas valve opens while
the supply fan blower is operating.
6. Check the gas pressure at the INLET to the combination
gas control valve (refer to figures on pages 24 through
26) and adjust as needed to maintain 6"-7" W.C while the
burners are operating at high fire. This pressure is required
for proper ignition and to attain the rated input of the unit.
If this pressure cannot be obtained, the gas supply is
undersized and needs to be corrected or the gas supplier
must be contacted.
7. Check gas pressure on the OUTLET of the combination
gas control valve (refer to figures on pages 24 through 26)
when the burners are functioning. This should be set to 4.0"
W.C. for all furnaces with furnace model Digit 11=4, or 6.
For C-Cabinet furnaces with furnace model Digit 11=8, only
the right hand modulated heat exchanger is set to 4.0”W.C.
The left hand fixed input heat exchanger is set to 3.5”W.C.
Adjust the gas control valve regulator as needed (see gas
valve instruction sheet for location.)
8. Check to ensure that gas controls sequence properly (see
Controls Manual).
9. For units with multiple heat exchangers, repeat steps 3
through 8 for each heat exchanger before proceeding to the
next step.
Check/Adjust Pressure at Manifold
The following steps are required to check/adjust the manifold
pressure on modulated heat exchangers. For units with furnace
model Digit 11=4, this process applies to both heat exchangers
and is conducted on one heat exchanger at a time. For all
other units, this process applies to only one heat exchanger,
normally the lower right heat exchanger on multiple heat
exchanger units.
1. Move the field installed manual shut-off valve to the “OFF”
position.
2. Remove the 1/8" pipe plug in the pipe tee of the furnace.
3. Attach a digital or “U” tube type water manometer which is
at least 12" high and capable of reading to 0.1" W.C.
4. The Maxitrol EXA modulating valve series (refer to figures
on pages 24 through 26) has a cover secured with two
screws that must be removed. Once removed, there
are a bank of (3) DIP switches and two buttons and a
communication LED for the user interface as shown in
Figure 22.1.
5. Verify that the DIP switches are properly set to the settings
shown in Figure 22.1.
6. Move the field installed manual gas shut-off valve to the
“ON” position.
7. Adjust the High Fire Setting as follows:
a. Enable the unit controls.
b. For units with furnace model Digit 11=6 or 8, place
the furnace control into the “Checkout Test Mode” as
described on the next page and set the Fire Rate Input
to 10.0.
c. Press and hold Button #1 on the modulating valve until
the LED lights solid red, then release.
d. With the valve now in the high fire setting mode, confirm
THIS SECTION APPLIES TO UNITS WITH
OPTIONAL GAS HEAT
(MODEL DIGIT 17=2 OR 3).
IF THE UNIT DOES NOT HAVE GAS HEAT,
SKIP TO PAGE 28.
REVIEW BEFORE PROCEEDING