www.miinet.comMoore Industries-International, Inc.
- 33 -
User’s Manual
225-748-00P
August 2024
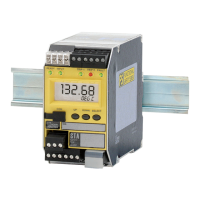
Programmable RTD, T/C, Ohms, mV and Potentiometer Safety Trip Alarm
STA
TPRG
SECTION 4
Configuring the Alarm(s)
The STA has one relay which is an Fault alarm and two user-configurable Trip alarms. The Fault
alarm has limited configuration with respect to trip alarms. All diagnostic faults will be latched and
must be reset by cycling power to the unit. Input faults can be configured to be latched/unlatched
and can also be configured to be reset by the Manual Reset (MR) in addition to front panel reset.
For more information about trip points, latching, etc., please reference the Alarm Terminology in
Section 1 of this manual.
1. At the “CONFG ALARM” menu, press SELECT. Use the UP and DOWN buttons to toggle
between both alarms. When the desired alarm appears, press SELECT.
2. At “ENTER TRIP”, press SELECT and enter your alarm trip value. Use the UP or DOWN
buttons to set your trip value; press SELECT.
If you prefer to capture the input trip value instead of entering it, you must use the “INPUT
TRIP” menu. To do so, bypass the “ENTER TRIP” menu by using the DOWN button to
scroll to the menu; press SELECT. Ensure that the value you wish to capture is present
then press SELECT.
3. Press SELECT at “ENTER DB” and enter your dead band value using the UP or DOWN
buttons. Press SELECT once your desired setting appears.
4. Pressing SELECT at the “SET HI/LO” menu directs you to configure the alarm type as an
“ALARM HI” or “ALARM LO”. Use the UP or DOWN buttons to reach your selection and
press SELECT.
ALARM LO– You are notified if your process input drops below your trip point setting.
ALARM HI– You are notified if your process input exceeds your trip point setting.
5. At the “SET LATCH” display, press SELECT and choose “LATCH ON” or “LATCH OFF”
using the UP or DOWN buttons; press SELECT.
Latching Alarm– When an STA is configured with latching alarms, an alarm condition will
not “clear” (the relay will not change state) until the input returns to a non-alarm level AND
manual reset terminals are shorted.
The manual reset terminals, labeled “MR” are located on the top row of terminals on the
STA (see Table 3.3).
6. At the “ENTER DELAY” display, press SELECT. Using the UP or DOWN buttons enter the
desired value (range is 0-120 seconds in increments of 1 second); press SELECT.
Delay– When your unit is in an alarm condition, the delay is the amount of time you set
(0-120secs; 0-60secs for firmware versions 1.1.2 and earlier) to elapse before a relay
trips.
Note: Firmware versions 1.1.2 and earlier permit 0-60 seconds time delay only. If a delay value
is entered greater than 60, the delay will not operate correctly. (The firmware revision of the unit is
displayed at power up and in the STA Device Info window of the PC Configuration Software).
7. If you are to program Alarm 2, use the UP or DOWN buttons to reach “CONFG ALRM2”
and repeat the steps performed from Alarm 1 using the appropriate values and settings.
8. At the “INPUT FAULT” display, press SELECT, this will display “LATCH YES?” to set latch
press SELECT or press DOWN button to display “LATCH NO?”, press SELECT here if
you want to disable latching.