80
ROUTINE MAINTENANCE
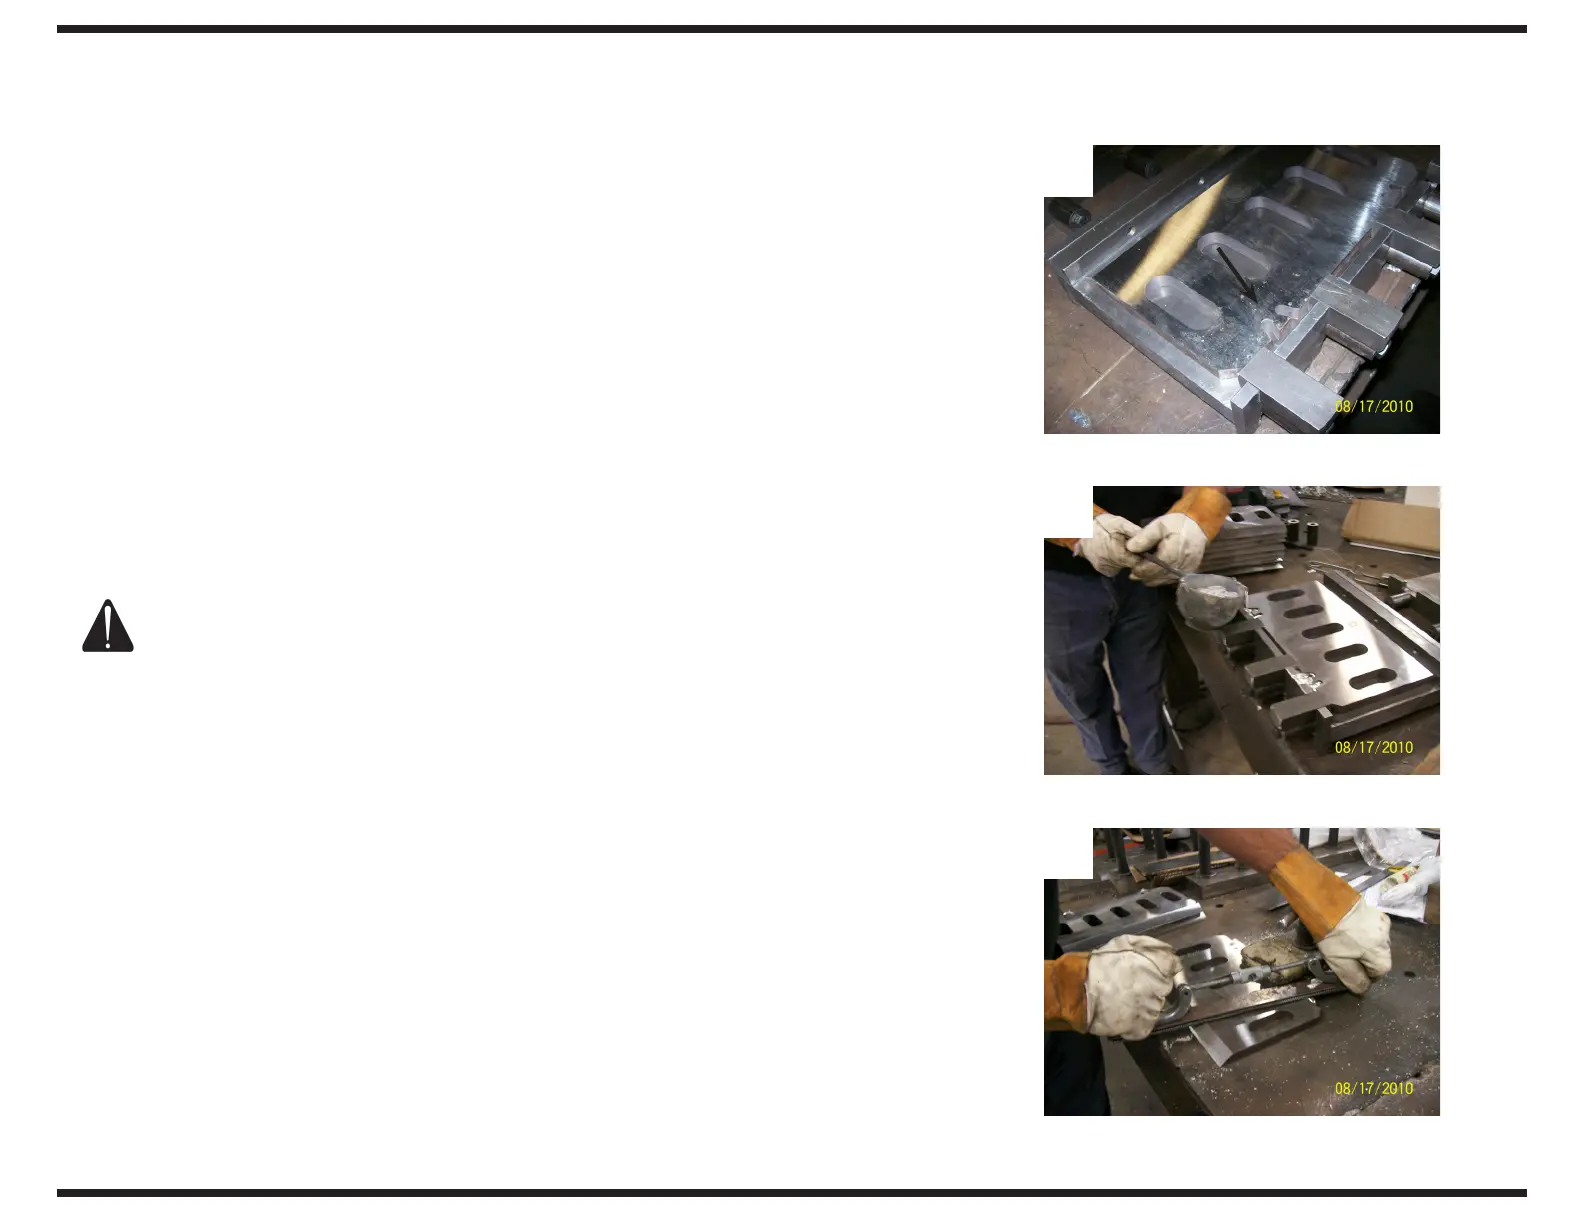
BABBITTING STANDARD COUNTER KNIFE
To maintain the desired chip size, it is important that you babbitt your knives after
each grinding.
NOTE: Pay close attention to the knife gauge. The knife gauge sent with your
machine has 2 sides. One is for the counter knife. This will be the shorter side
measured from the inside width of the gauge which is adjustable. Use the
washers installed to adjust the total depth of the gauge to 6 3/8" for 45°
counter knives or 6 9/16" for 35° counter knives.
To babbitt your knives, follow these steps:
1� Warm Counter knives and all babbitting hardware with a torch until all
moisture is eliminated from the surface of the parts.
WARNING: All parts must be moisture free or blow back may occur,
causing personal injury�
2� Place knives into the babbitting xture and bring spacers up to the back of
the knife. Center slots in counter knife between spacers.
3� Place the babbitting funnel over the cavity and slowly pour the babbitt from
the ladle until the cavity is lled.
4� Let babbitt cool.
5� After babbitt is cool, remove the knife from the babbitting xture.
6� Place the knife on a table and clamp so it cannot move. File off the excess
babbitt until babbitt does not project beyond the sides of the knife. This is
extremely important to assure a proper clamp and eliminate the possibility of
a knife slipping out and contacting anvil.
2
3
6