NPort IA5150A/IA5250A Series Initial IP Address Configuration
10. Type y and then press Enter to save the new IP address and restart the NPort IA5150A/IA5250A.
Serial Console (19200, n, 8, 1)
You may use the RS-232 console port to set up the IP address for the NPort IA5150A/IA5250A. We suggest
using PComm Terminal Emulator, which is available free of charge as part of the PComm Lite program suite, to
carry out the installation procedure, although other similar utilities may also be used.
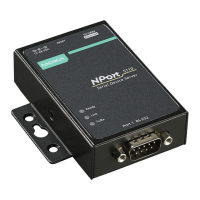
Serial Console is serial port 1 of the NPort IA5250A series and it is the DB9 serial port (in RS-
232 mode)
of the NPort IA5150A series.
Before you start to configure the NPort IA5150A/IA5250A via serial console, turn off the power and connect the
serial cable from the NPort IA5150A/IA5250A to your computer’s serial port.
1. Connect the NPort IA5150A/IA5250A’s serial port 1 directly to your computer’s male RS-232 serial port.
From the Windows desktop click on Start
Programs PComm Lite Terminal Emulator.
2. When the PComm Terminal Emulator window opens, first click on the Port Manager menu item and select
Open, or simply click on the Open icon.
3. The Property window opens automatically. From the Communication Parameter page, select the
appropriate COM port for the connection, COM1 in this example, and 19200 for Baud Rate, 8 for Data Bits,
None for Parity, and 1 for Stop Bits.
4. From the Property window’s Terminal page, select ANSI or VT100 for Terminal Type and then click OK.
 Loading...