USER MANUAL V1.0 | Updated January 19, 2019 37
Steps to update different font/size:
Insert USB flash into USB port 1 on Machine.
From the Settings menu, go to Update Font and press Enter.
Select your desired font/sizes (1 to 5) and press Enter to begin updating. FONT1 on your USB
will replace FONT1 on the machine memory and the same with other fonts.
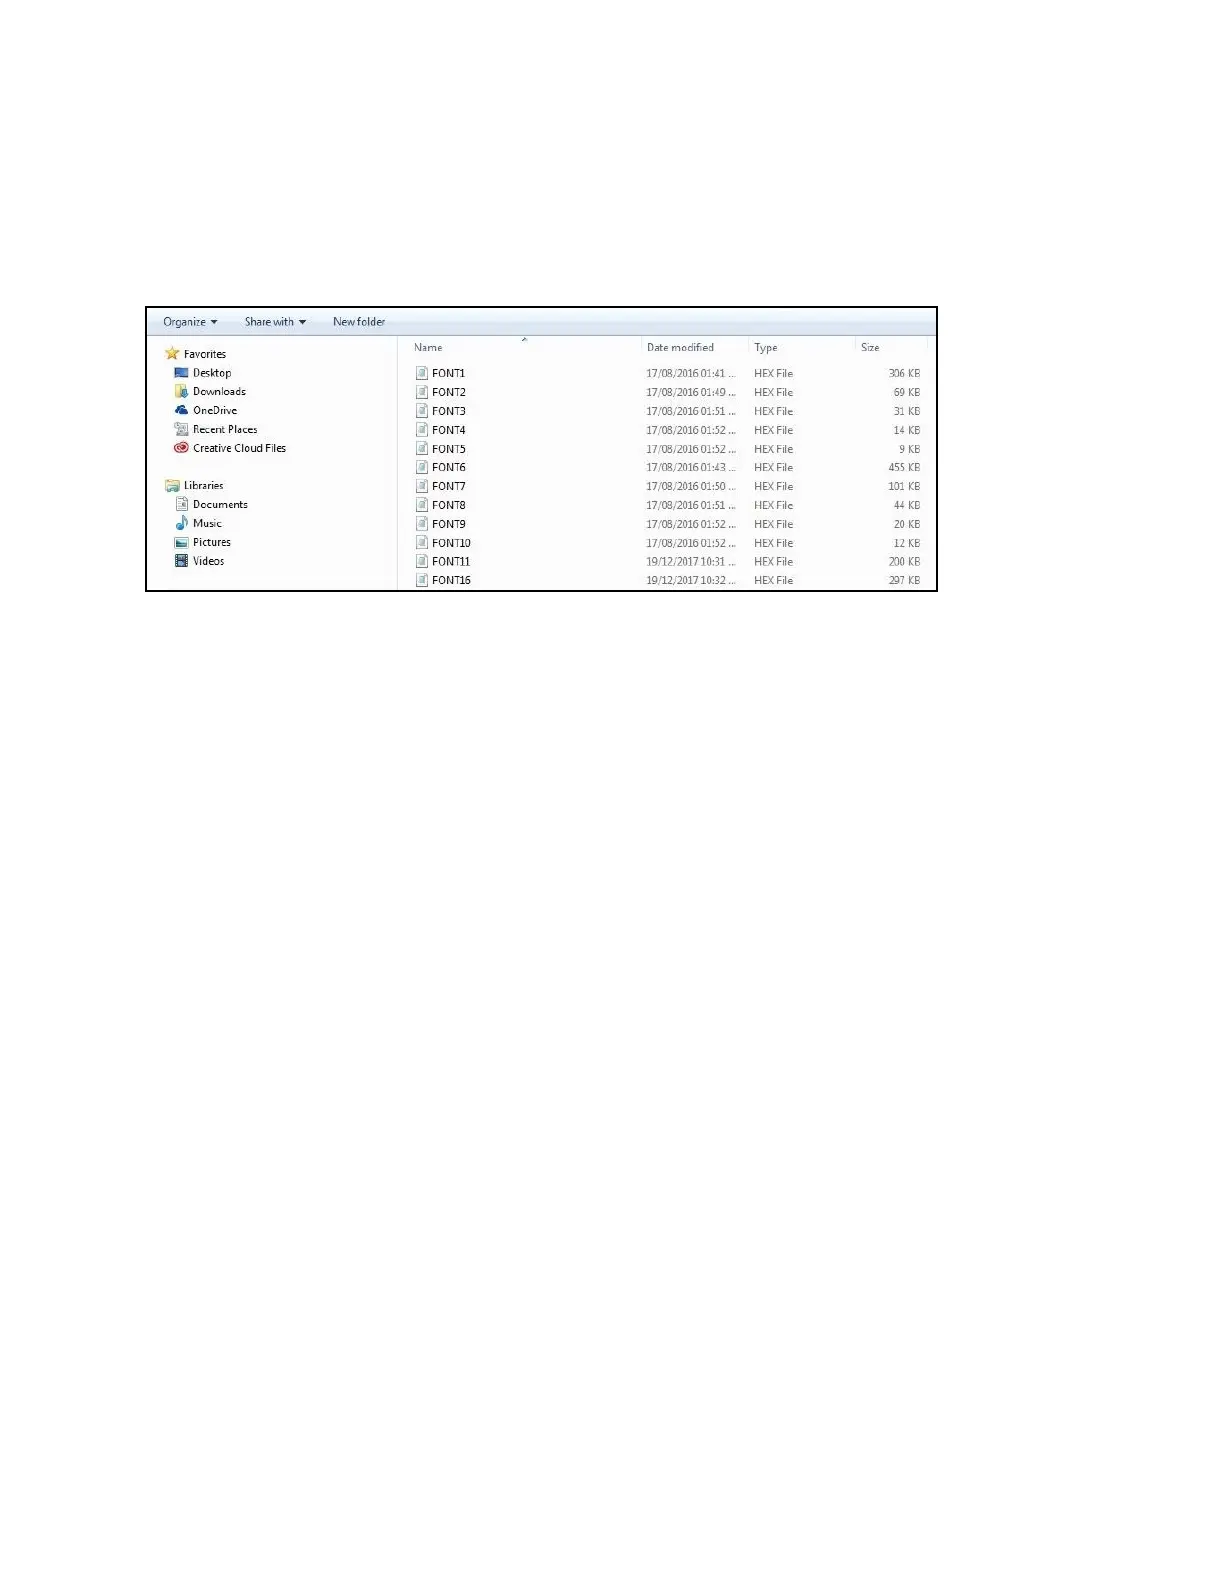
Machine accepts font/sizes with .hex format only. All font/sizes must be named as showed below.
NOTES:
Fonts being updated will replace the existing ones on the machine memory.
Machine prints true fonts while working with PC.
Font 1 to 5 is Normal font.
Font 6 to 10 is Uppercase font.
Rollover
Set different date depending on the shift schedules of your production.
From the Settings menu, use the arrow keys to move to Rollover and press Enter.
Go to Set and press Enter. Enable this function and input value at Time. Press Enter to
apply (default value is 00h: 00). Otherwise select Disable and press Enter to apply.
NOTES:
Value input varies from 0 to 23.
System Clock
Set time and date for your system clock.
From the Settings menu, use arrow keys to go to System clock and press Enter.
Go to Date, use and arrow keys to change date value and press Enter to apply.
Go to Time, use and arrow keys to change time value and press Enter to apply.
Rotate
This function will allow you to control the direction of menu interface and help the user to see
the screen and operate. An internal rotate sensor allows automatic adjustments to the
interface to match the current direction of machine.
From the Settings menu, use the arrow keys to go to Rotate and press Enter.
Select Auto or Lock rotate or others, press Enter to apply.
Screen will rotate according to the direction of the machine when Auto is selected.