COCKPIT SX
Page 74
Starting from the INFO display, carry out the follow-
ing steps to move to the mixer effect adjust menu:
4 to MENU, r (SETUP appears),
3 to MIXER, r (TH >S4 appears, e.g.),
3 to MIX1, r
Stick left Stick right
If you have activated flight phases (Î 17.10.2.), the
numbers indicate the flight phase to which the adjust-
ment applies.
A further brief press on the 3-D digi-adjustor r opens
the value for adjustment; the current value flashes. Set
the appropriate value using the 3-D digi-adjustor. If you
move the associated transmitter control, any changes
you make will take effect on the model immediately.
A brief press r on the 3-D digi-adjustor concludes the
process. The flashing ceases, and the values are
stored.
Note: two values for A, E, R and F
If you select AILERON, ELEVATOR, RUDDER or
FLAP as source, there are always separate values to
be set for each direction of travel of the transmitter
control. Use the transmitter control itself to select the
side of centre you wish to adjust.
If SPOILER or THROTTLE is selected as source, there
is always only a single value to be set.
17.3. Erasing the free mixers
If you wish to erase a free mixer, the destination must
be erased in the mixer definition.
This is the procedure for erasing:
4 to MENU, r (SETUP appears),
3 to MIXER, r (TH >S4 appears e.g.),
3 to MIX1, r (mixer appears),
3 to MIXDEF, r (mixer definition appears)
Current definition Destination erased
Turn the 3-D digi-adjustor to the left (4) until “--” ap-
pears after the “S” in the top line. This removes the
mixer destination, and the mixer is erased.
A brief press on the 3-D digi-adjustor r takes you back
to the MIXDEF menu. There you can re-define the
mixer (Î 17.1.) or leave the menu entirely
(4 to EXIT).
18. Managing model memories
Menu: MEMO
The model memories of the COCKPIT SX are managed
in the MEMO menu. This menu has five functions:
• Switch model memory
Menu: GO TO Î 18.1.
• Set up a new model
Menu: NEW Î 18.2.
• Change the model name
Menu: NAME Î 18.3.
• Copy a model memory
Menu: COPY Î 18.4.
• Erase a model memory
Menu: ERASE Î 18.5.
The menus NEW and NAME are only covered briefly
here, as they have already been described in detail in
the individual model type sections.
18.1. Switching the model memory
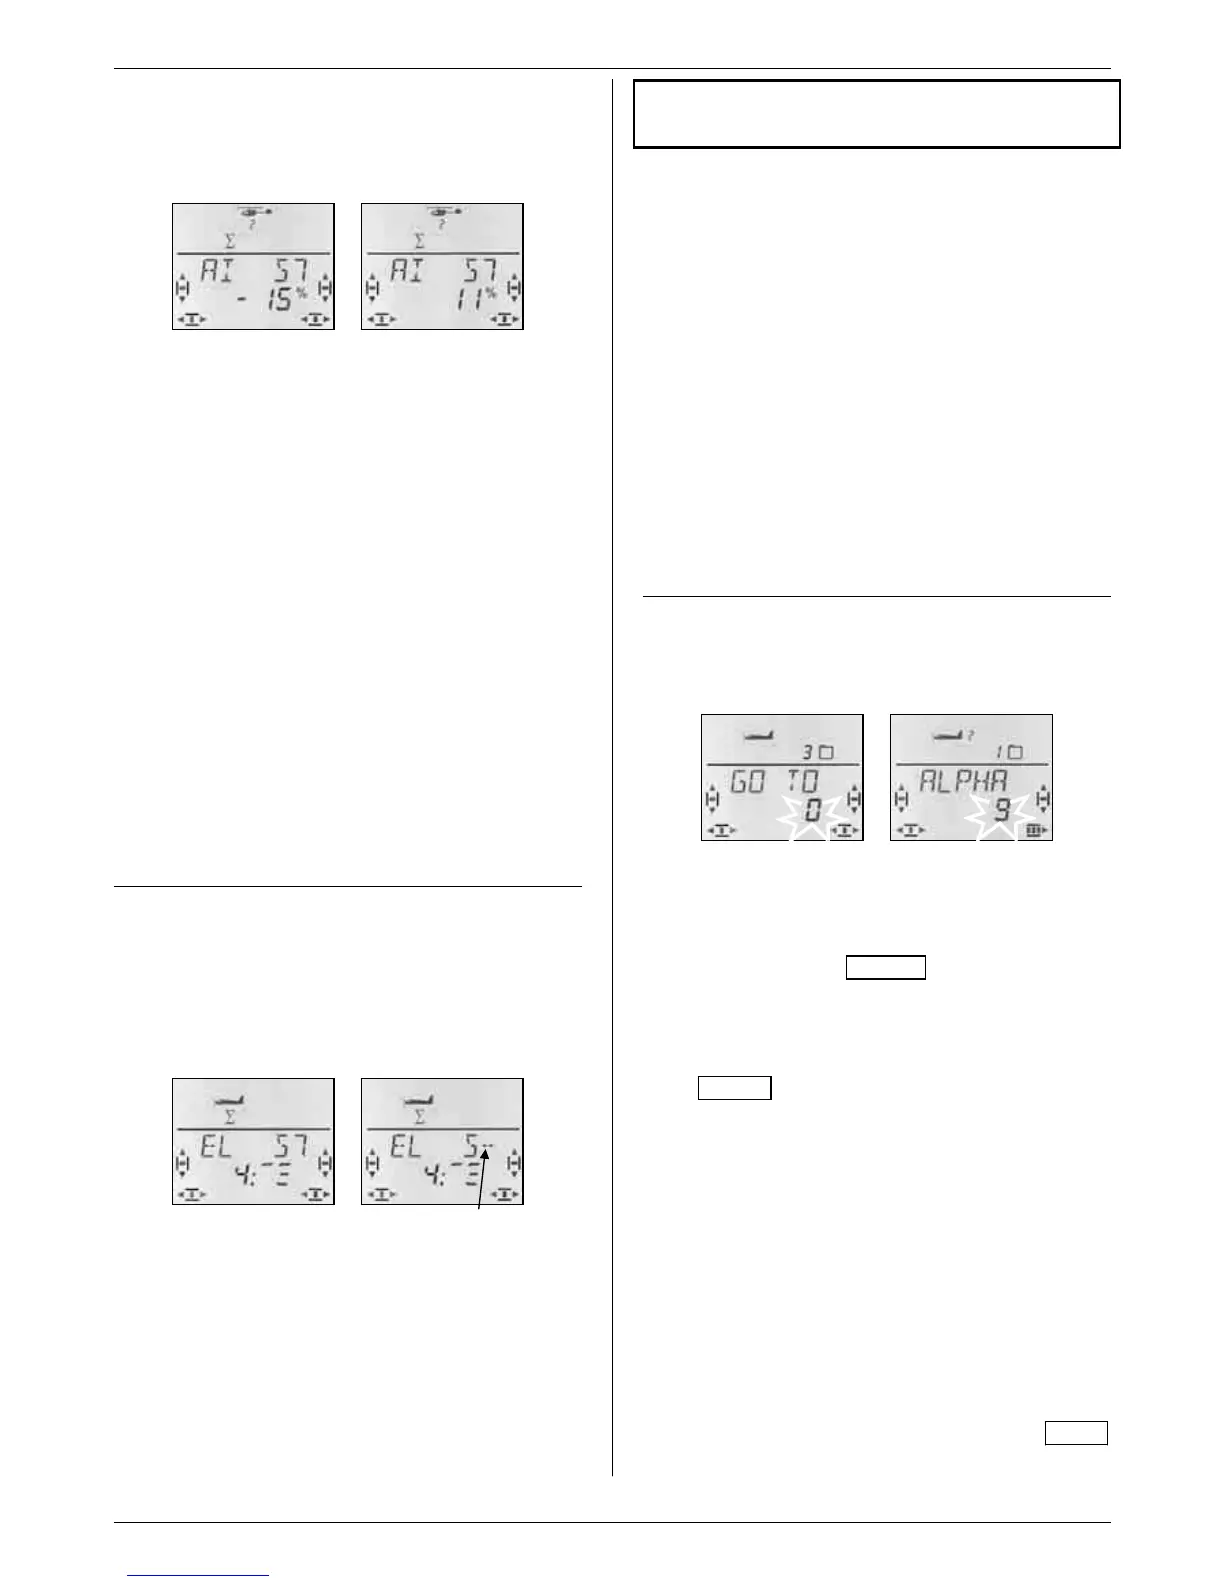
Menu: (MEMO) GO TO
Moving to the GEH ZU menu:
4 to MENU, r (SETUP appears),
3 to MEMO, r (GO TO appears),
r (0 appears and flashes)
The flashing 0 indicates that you can now switch to a
different memory by turning the 3-D digi-adjustor.
A brief press r on the 3-D digi-adjustor concludes the
selection process. The INFO 1 display appears with
the symbol and number of the selected model memory.
A long press ª on the 3-D digi-adjustor (wait for the
confirmation beep) concludes the memory select proc-
ess without switching memories, and also takes you
to the INFO 1 display.
Notes:
You are only offered memories containing data
When you leaf through, only those memories are of-
fered which already contain programmed data for a
model. If the transmitter is new, only model memory 1
appears, as this contains a model of the EASY type as
standard, with the name<EASY>.
The model name appears
When you leaf through, the top line shows the model
name you have entered (Î 18.3.). This simplifies the
task of searching for particular models.
Selecting “0” for no memory switch
If you select 0 using the 3-D digi-adjustor, no memory
switch takes place, and you are returned to the INFO 1
display.