© 2020 Natus Medical Incorporated 35 026057 RevE
Maintaining the Device and Components Echo-Screen III Pro Instructions for Use
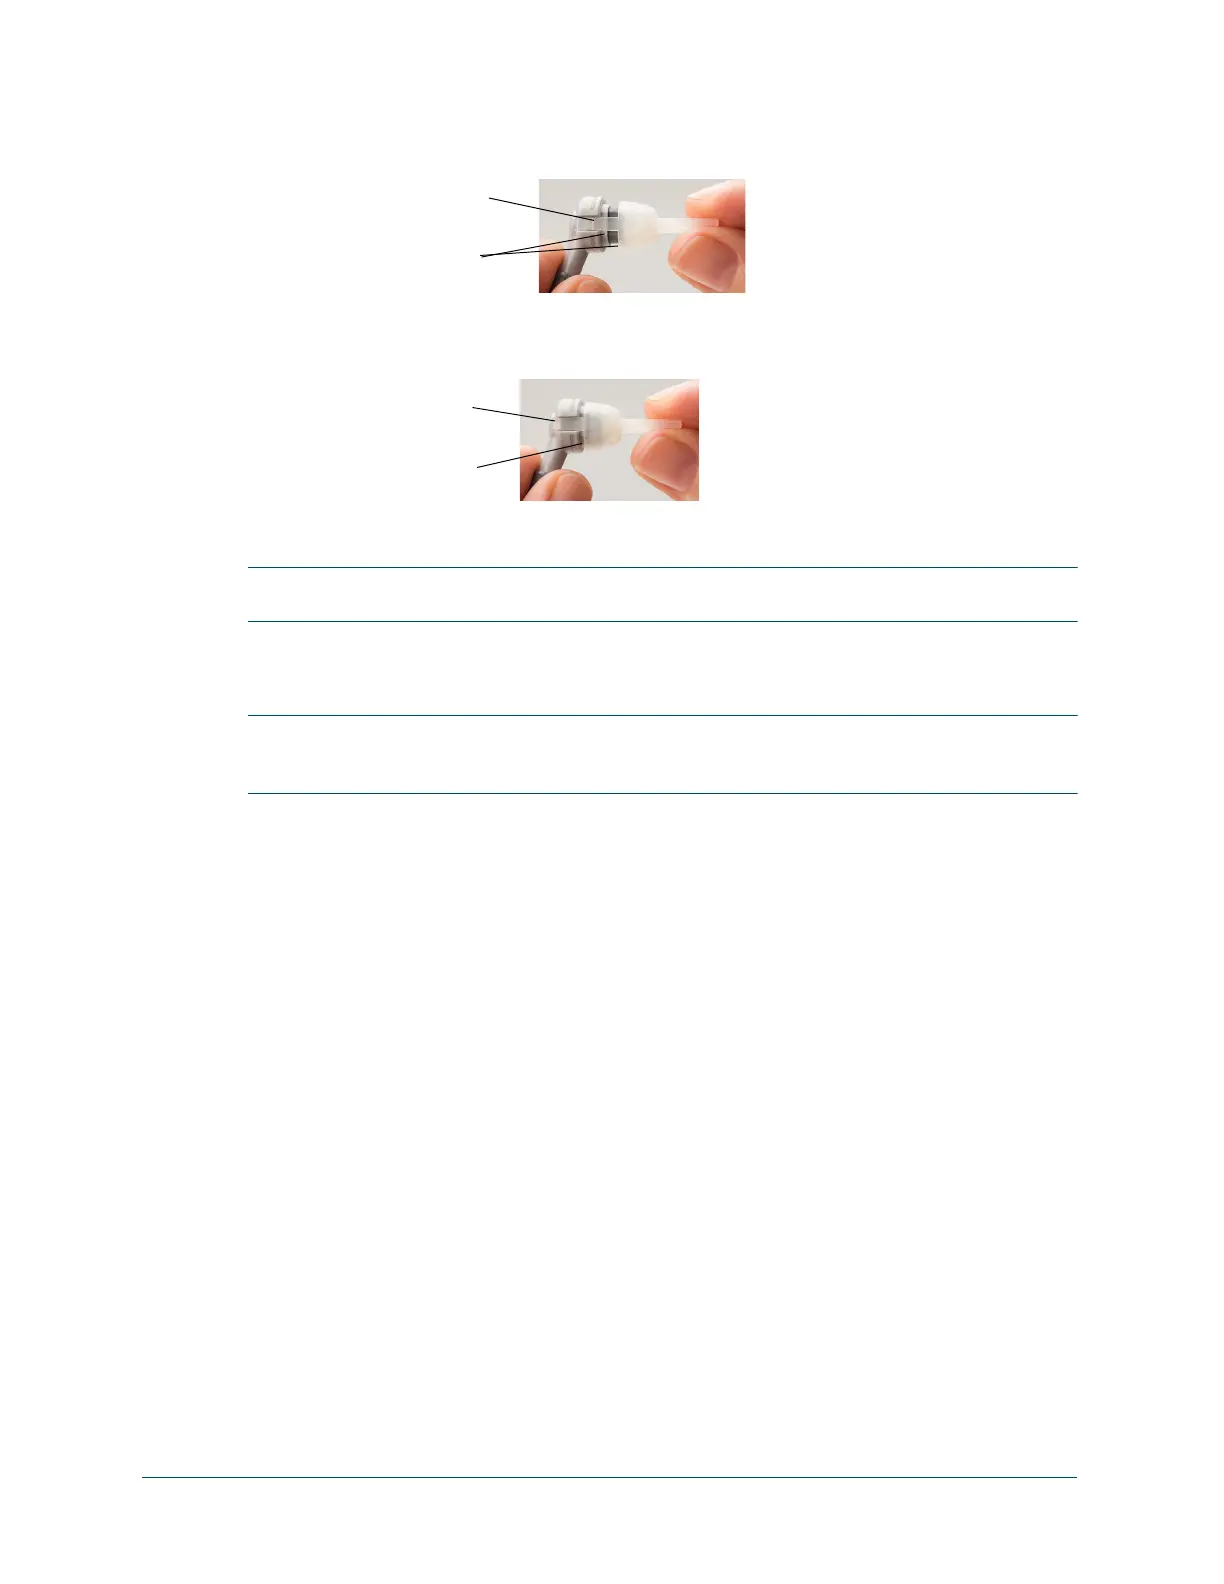
2 To install a new nozzle, align the clips of the nozzle with the slots on the probe housing and
make sure that the shape of the nozzle is oriented with the shape of the probe housing. The
nozzle fits only one way.
3 With the clips in the slots on the housing and the nozzle aligned with the probe housing, slide
the nozzle clips down the slots until they snap into place in the small indentations at the back
of the probe housing.
4 Verify that the nozzle is securely attached to the probe housing.
IMPORTANT: Make sure that the nozzle clips are firmly snapped into place and that the nozzle
is flush with the front of the probe body. Improperly placed nozzles result in screening errors.
Maintaining the Battery
IMPORTANT: Review the user manual for proper use of the battery and for instructions about
inserting and removing the battery in the Echo-Screen III device and docking station. After your
review, place the user manual in a secure location for future reference when needed.
The battery for the Echo-Screen III Pro system is designed to retain a charge for least 40
screenings before needing to be recharged. A screening is defined for this purpose as a
complete bilateral ABR test from start to finish, from entering patient information to printing
labels, including idle or standby time during patient preparation.
The battery indicator turns red when about 20% of the battery charge remains, and you may be
able to perform another half a dozen or so screenings based on this definition of screening. If
your screening sessions are shorter, or you perform Quick Tests, you may be able to perform
many more screenings before you are prohibited from screening due to low battery. Your results
will vary based on the device configuration and the screening modality you use.
When the battery level reaches 15%, you receive a reminder that the battery is getting low, and
you are prevented from screening. When the battery level is 12% or less, a message to connect
the charger is displayed and the device automatically shuts down.
The batteries normally charge to 100% in about 4.5 hours.
To obtain a replacement battery, contact Natus Technical Service or your authorized service
representative.
Follow your institution’s protocol for the proper disposal of batteries.
Clips aligned with slots
Nozzle shape oriented
with probe housing
shape
Clips snapped into
place
Nozzle must be flush
with probe body