026057 RevE 24 © 2020 Natus Medical Incorporated
Performing a Quick Test Echo-Screen III Pro Instructions for Use
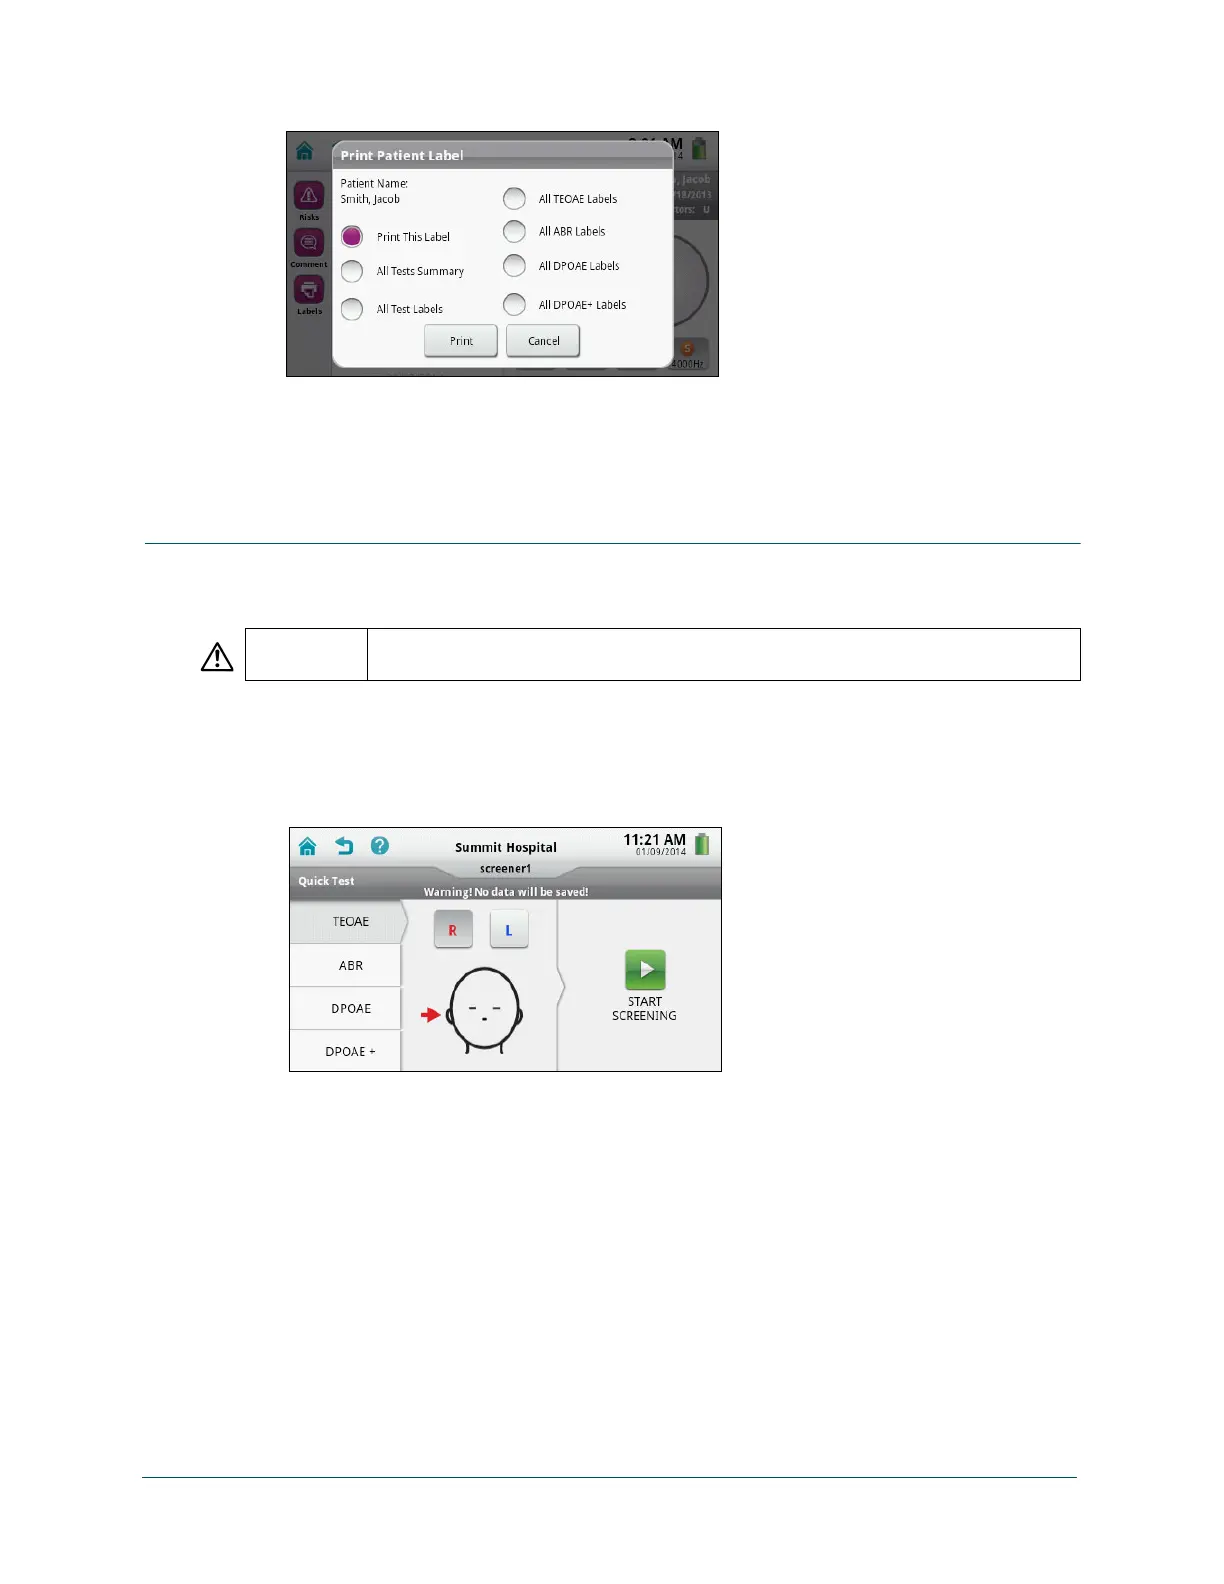
4 Touch Labels.
5 Select the type of labels to be printed. Be sure to select only the types of tests that were
performed on the patient.
6 Touch Print.
Performing a Quick Test
Use Quick Test for situations such as a demonstration, training, or a quick, preliminary
assessment. Quick Test is an optional feature that must be configured by your administrator.
Perform a Quick Test:
1 Connect the cables as for a regular test. Insert the OAE probe or attach the earphones and
electrodes as for a regular test.
2 On the Home screen, touch Quick Test.
3 Touch the type of test you want to perform. Only the modalities that have been purchased
by your organization are available. DPOAE+ is available only if configured by your
administrator.
4 Select the ear you want to test first, or touch Sequential for ABR tests with the ATA cable.
5 Touch Start Screening. The test progresses the same as for a regular test. Monitor the test
the same as for a regular test.
6 When testing completes, review the results. The details that are displayed depend on the
type of test selected.
Be sure to check the results immediately, because no data is saved for Quick Tests and
you cannot view the results later.
CAUTION When you use Quick Test, no data is saved or transferred to your data management
program.