026057 RevE 26 © 2020 Natus Medical Incorporated
Testing Equipment Echo-Screen III Pro Instructions for Use
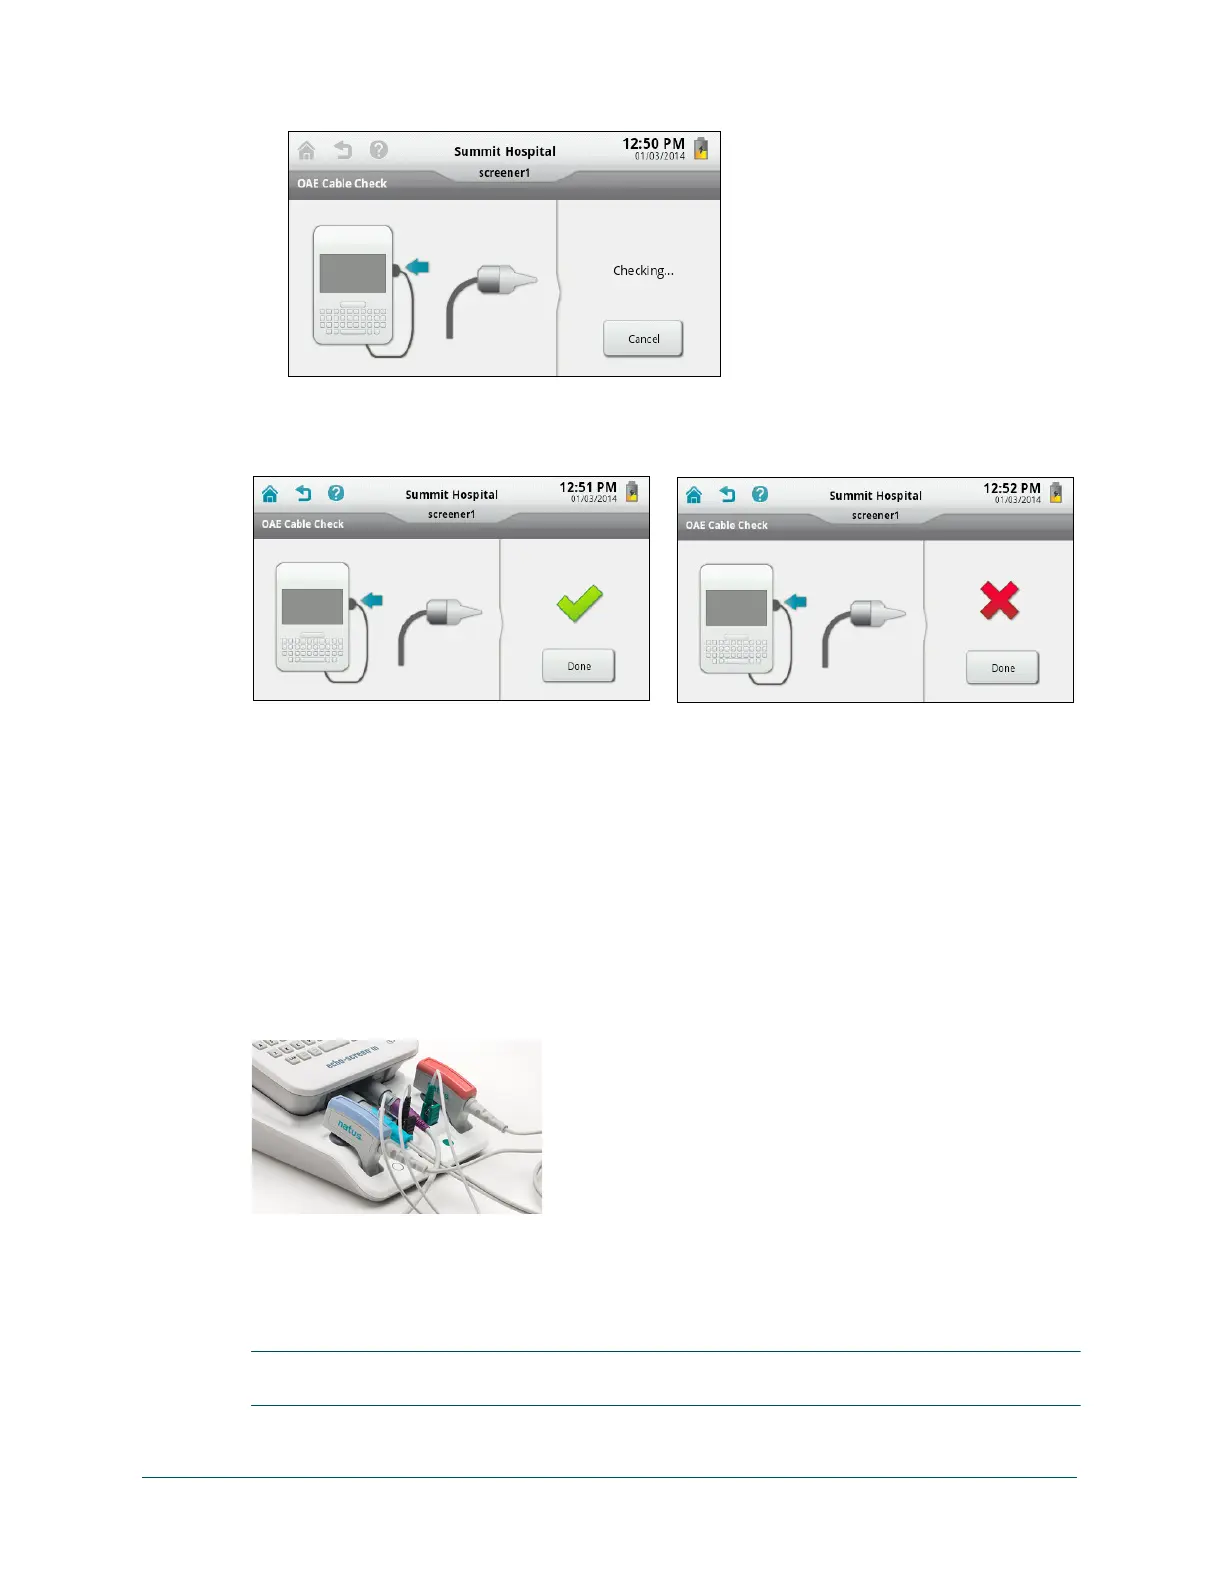
4 Touch OAE Cable Check. The test begins immediately.
5 Check the cable check result and then touch Done.
A green check mark indicates that the cable is functioning properly. A red “X” indicates that
the test failed.
6 If the test failed, do any of the following and retest.
• Make sure that a tree tip is properly fitted on the probe and that the probe is firmly seated
in the test chamber.
• Clean or replace the probe nozzle.
• Contact Technical Service or your authorized service representative.
ATA Cable
The ATA cable check requires both the ATA cable and the PCA cable to be plugged into the
cable ports at the bottom of the device.
The ATA cable test fixtures are on the docking station. You do not need to insert the PCA clips
into the PCA test fixtures; just plug the cable into the port.
Test the ATA cable:
1 Plug the ATA cable into the OAE/ATA (left) port and the PCA cable into the PCA (right) port
at the bottom of the device.
IMPORTANT: Wait about 10 seconds after connecting the cables before starting the cable test
to allow the device time to recognize the cables.