Do’s:
• Make drip and service loops.
• Use cable-tie on all cables to keep them secure.
• Solder/crimp and insulate all wiring connections if extending or shortening the cables. Extending cables
should be done with suitable crimp connectors or solder and heat shrink. Keep joins as high as possible to
minimize possibility of water immersion.
• Leave room adjacent to connectors to ease plugging and unplugging of cables.
• Connect the radio to a 12 V DC, negative ground power supply.
⚠Warning: All wiring on the radio should be done with the vessel power supply turned off. While
the radio power is polarity protected, the fuse will blow if the connection is made the wrong way
round.
⚠Warning: All cables provided with the system is designed to ensure the systems operates as
designed under the stated operating conditions. Ensure that if any wiring is extended, the additional
cabling is suitable to meet the system operating requirements.
⚠Warning: A Halier cable is not supplied. If using the Hailer/Fog Horn/Announce function, use a
cable with the same profile and conductor size as the supplied power cable.
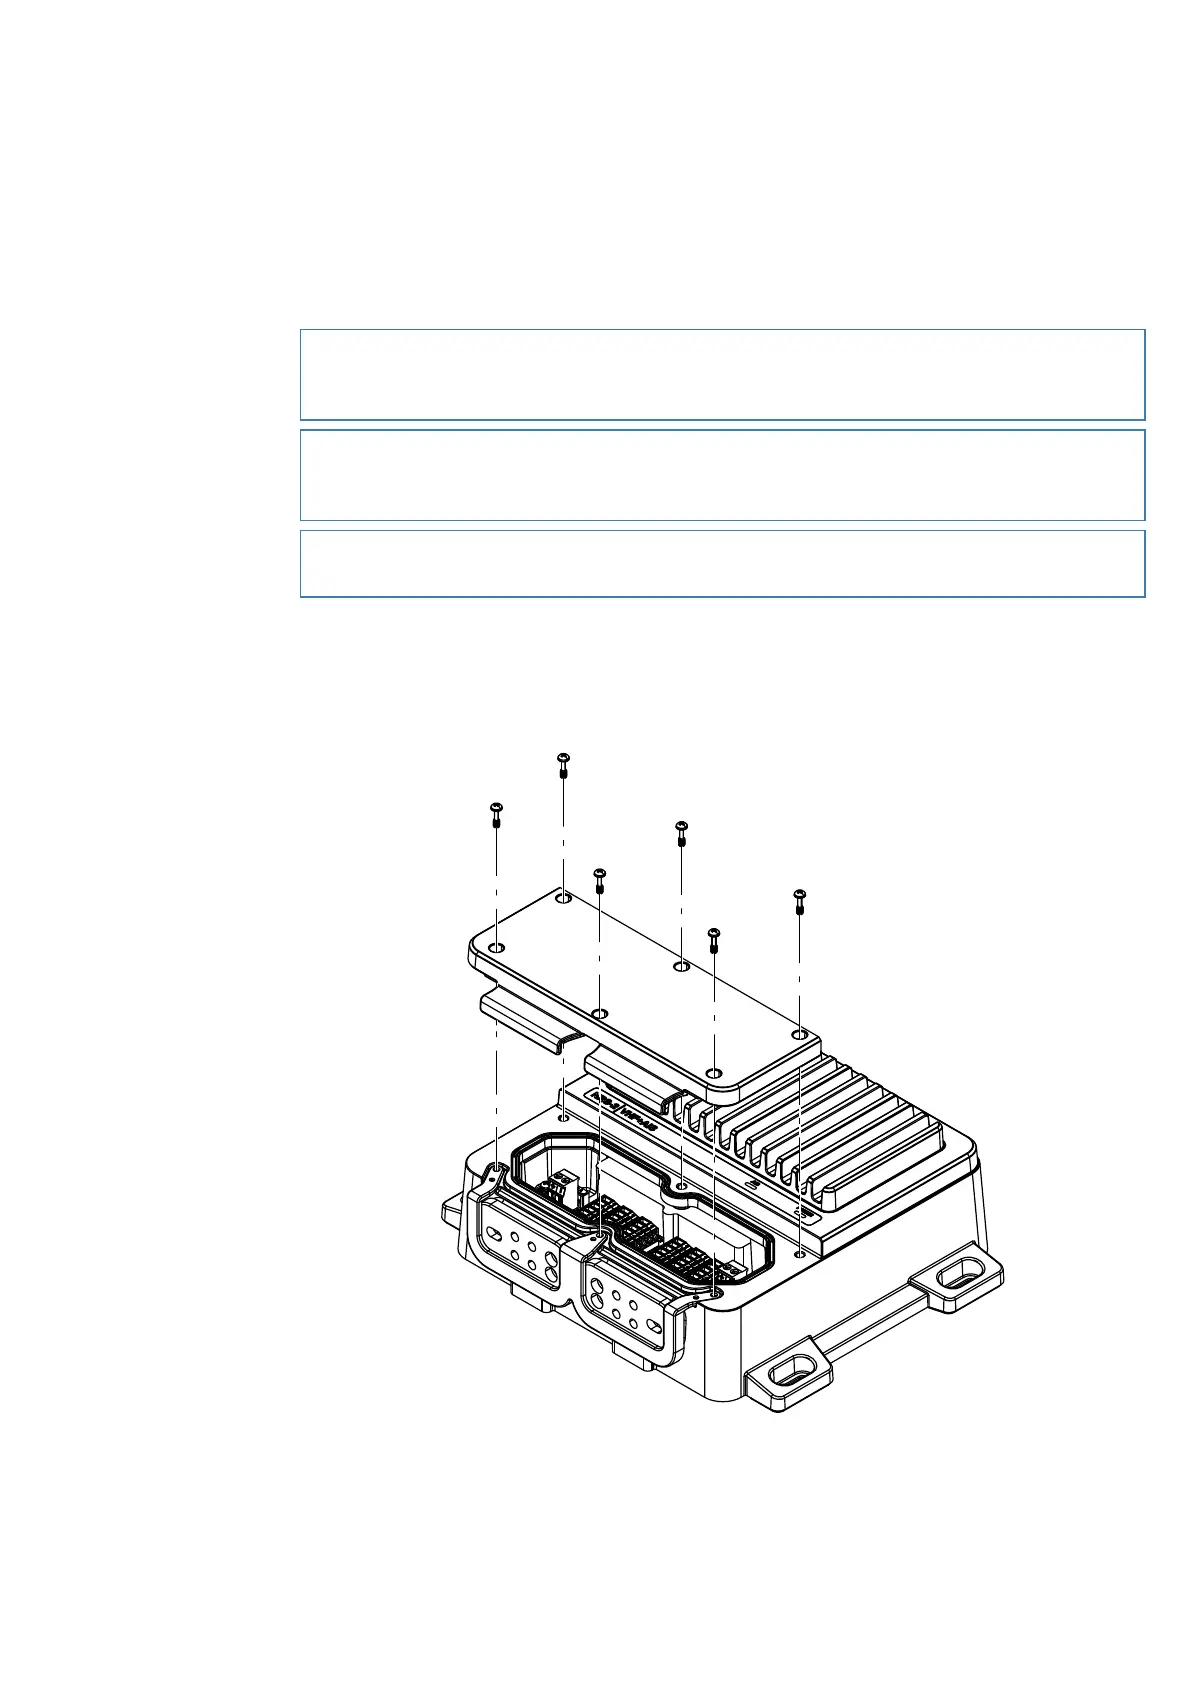
Blackbox connector details
Wiring receptacles are accessible under the connector cover on the base unit. Remove the 6 screws on
the cover plate to expose the wiring connectors:
56 |
Installation | RS100 / RS100-B / V100 / V100-B User Manual

 Loading...