EasyManuals Logo

NEC P547UL User Manual

NEC P547UL
174 pages
To Next Page IconTo Next Page
To Previous Page IconTo Previous Page
Page #94 background imageLoading...
Page #94 background image
4. Using On-Screen Menu
73
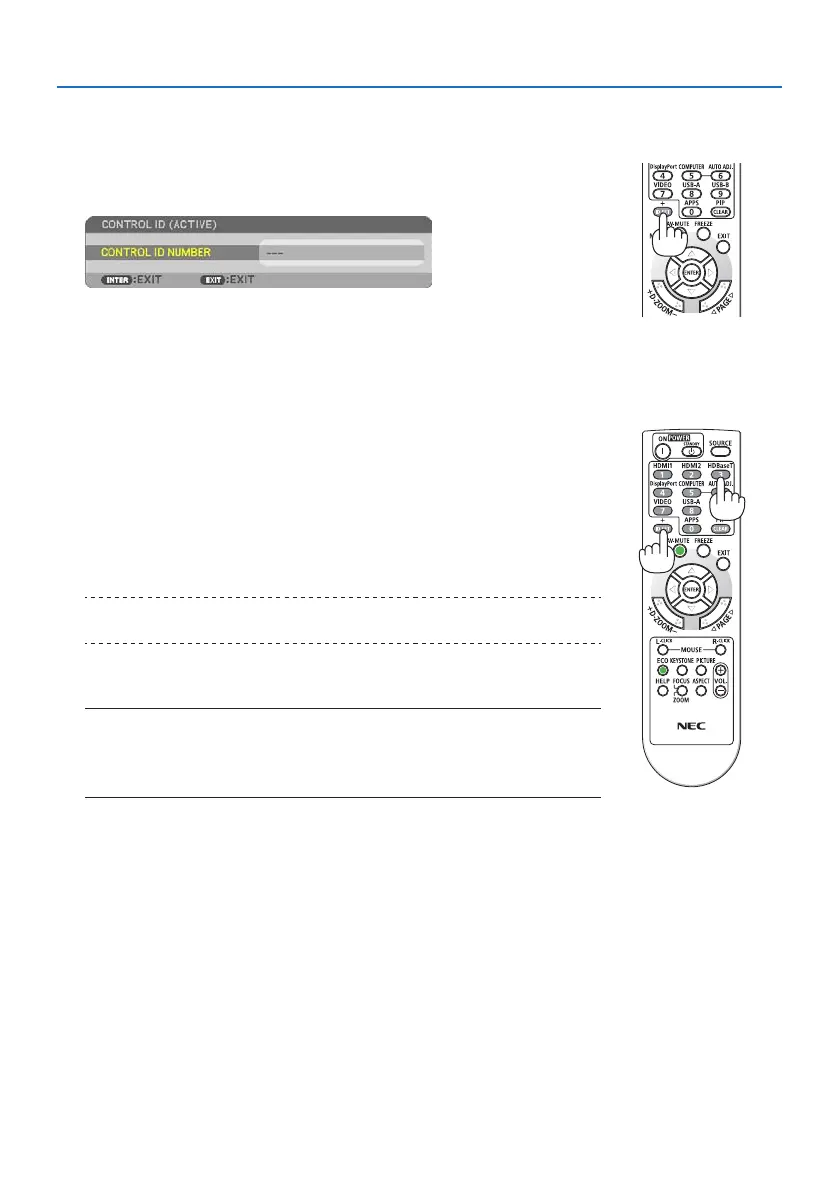
Assigning or Changing the Control ID
1. Turn on the projector.
2. Press the ID SET button on the remote control.
The [CONTROL ID] screen will be displayed.
If the projector can be operated with the current remote control ID, the
[CONTROL ID (ACTIVE)] will be displayed. If the projector cannot be op-
erated with the current remote control ID, the [CONTROL ID (INACTIVE)]
will be displayed. To operate the inactive projector, assign the [CONTROL
ID] used for the projector by using the following procedure (Step 3).
3. Press one of numeric keypad buttons while pressing and holding
the ID SET button on the remote control.
Example:
To assign “3”, press the “3” button on the remote control.
No ID means that all the projectors can be operated together with a
single remote control. To set “No ID”, enter “000” or press the CLEAR
button.
TIP:
The range of IDs is from 1 to 254.
4. Release the ID SET button.
The updated [CONTROL ID] screen will be displayed.
NOTE:
The IDs can be cleared in a few days after the batteries are run down or removed.
Accidentally pressing any one of the buttons of the remote control will clear currently speci-
ed ID with batteries removed.
Using Test Pattern [TEST PATTERN]
Displays the test pattern for adjusting distortion on the screen and the focus at the time of the pro-
jector setup. Once the [TEST PATTERN] on the onscreen menu is selected, the pattern for adjustment
will be displayed on. If you nd distortion on the pattern, adjust the projector installation angle
or correct distortion by pressing the KEYSTONE button on the remote. If the focus adjustment is
required, control the focus lever. Recommend to perform the focus adjustment after leaving the
projector under the state the TEST PATTERN has been projected for over 30 minutes. Press EXIT
button to close the test pattern and return to the menu.
Setting the network [NETWORK SETTINGS]
This function display the [NETWORK SETTINGS] menu. ( page 111)

Table of Contents

Questions and Answers:

Question and Answer IconNeed help?

Do you have a question about the NEC P547UL and is the answer not in the manual?

NEC P547UL Specifications

General IconGeneral
Native aspect ratio16:10
Projection distance0.8 - 12.9 m
Projection technology3LCD
Contrast ratio (typical)500000:1
Screen size compatibility30 - 300 \
Projector native resolutionWUXGA (1920x1200)
Keystone correction, horizontal-30 - 30 °
Light source typeLaser
Service life of light source20000 h
FocusManual
Focal length range17.2 - 27.7 mm
Aperture range (F-F)1.5 - 2.1
Vertical lens shift range0 - 60 %
Horizontal lens shift range-29 - 29 %
3DNo
Video color modesPresentation
Analog signal format systemNTSC 3.58, NTSC 4.43, PAL, PAL 60, PAL M
Supported graphics resolutions1920 x 1200 (WUXGA), 3840 x 2160
Composite video in0
HDMI connector typeFull-size
Serial interface typeRJ-45, RS-232
USB 2.0 ports quantityUSB 2.0 ports have a data transmission speed of 480 Mbps, and are backwards compatible with USB 1.1 ports. You can connect all kinds of peripheral devices to them.
Noise level26 dB
CertificationCE; EAC; ErP; RoHS; TUEV, TÜV
Projection modesCeiling, Front
Number of OSD languages30
Noise level (economic mode)22 dB
RMS rated power20 W
PlacementCeiling, Desktop
Product typeStandard throw projector
Product colorWhite
Market positioningHome cinema
Cable lock slot typeKensington
Power sourceAC
Power consumption (standby)1.6 W
Power consumption (typical)293 W
Power consumption (economy mode)220 W
Recommended genderAny gender
Storage temperature (T-T)-10 - 50 °C
Operating temperature (T-T)5 - 40 °C
Operating relative humidity (H-H)20 - 80 %
Remote control typeIR
Weight and Dimensions IconWeight and Dimensions
Depth407 mm
Width480 mm
Height122 mm
Weight9700 g

Related product manuals