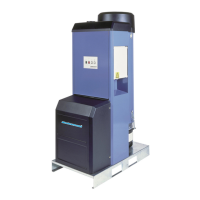
E-PAK 500
31
EN
WARNING! Risk of personal injuries.
Always disconnect the compressed air supply before any service.
9.1 Checks one month after installation and every year
WARNING! Risk of electric shock.
Always disconnect the supply voltage with the maintenance switch before any service, whether
mechanical or electrical. Always lock the maintenance switch in the off position.
WARNING! Risk of personal injuries.
Ensure that there is no vacuum present in the system during service.
WARNING! Risk of personal injuries.
Always disconnect the compressed air supply before any service.
One month after installation, and then every year, perform the following checks:
• Check all power conductor and ground wire connections. Tighten, if required, to ensure
good contact.
• Inspect the integrity of the dust separator.
• Ensure that the inside of the unit and the connection ducts are free from deposits. Build-up
of deposits inside the duct system may cause discharge of static electricity.
• Clean the area around the unit and all areas where the collected material is stored to ensure
that there are no dust deposits.
• Check that all signs/markings regarding safe operation are in place and that the personnel
knows about them.
9.2 Emptying the collector bin
WARNING! Risk of personal injuries.
Ensure that there is no vacuum in the dust separator before removing the collector bin.
WARNING! Risk of personal injuries.
Crush hazard. Pay attention when lowering and retting the collector bin. Use proper protective
equipment.
WARNING! Risk of personal injuries.
Wear a protective mask.
The plastic bag is to be replaced when lled up to 2/3, see Figure 12.
NOTE! Use Nederman plastic bags only.
To replace the plastic bag:
1. Ensure that there is no vacuum in the dust separator.
2. Remove the collector bin.
3. Seal and remove the plastic bag. Use a cable tie or equivalent, see Figure 10.
4. Fit a new plastic bag in the collector bin.
5. Ret the collector bin onto the dust separator.
6. Check that the pressure equalizer hose is attached to the collector bin, see Figure11.
7. Check that the collector bin seals properly once vacuum is re-applied to the dust separator.
 Loading...