Element Manager User’s Manual Nimbra OneSerie DTM Configuration • 75
©2006 Net Insight AB, All rights reserved
Adding a new DTM interface
It is possible to configure an interface that is currently not present in the unit.
This is done for example when pre-configuring an interface that will be added
to the unit later.
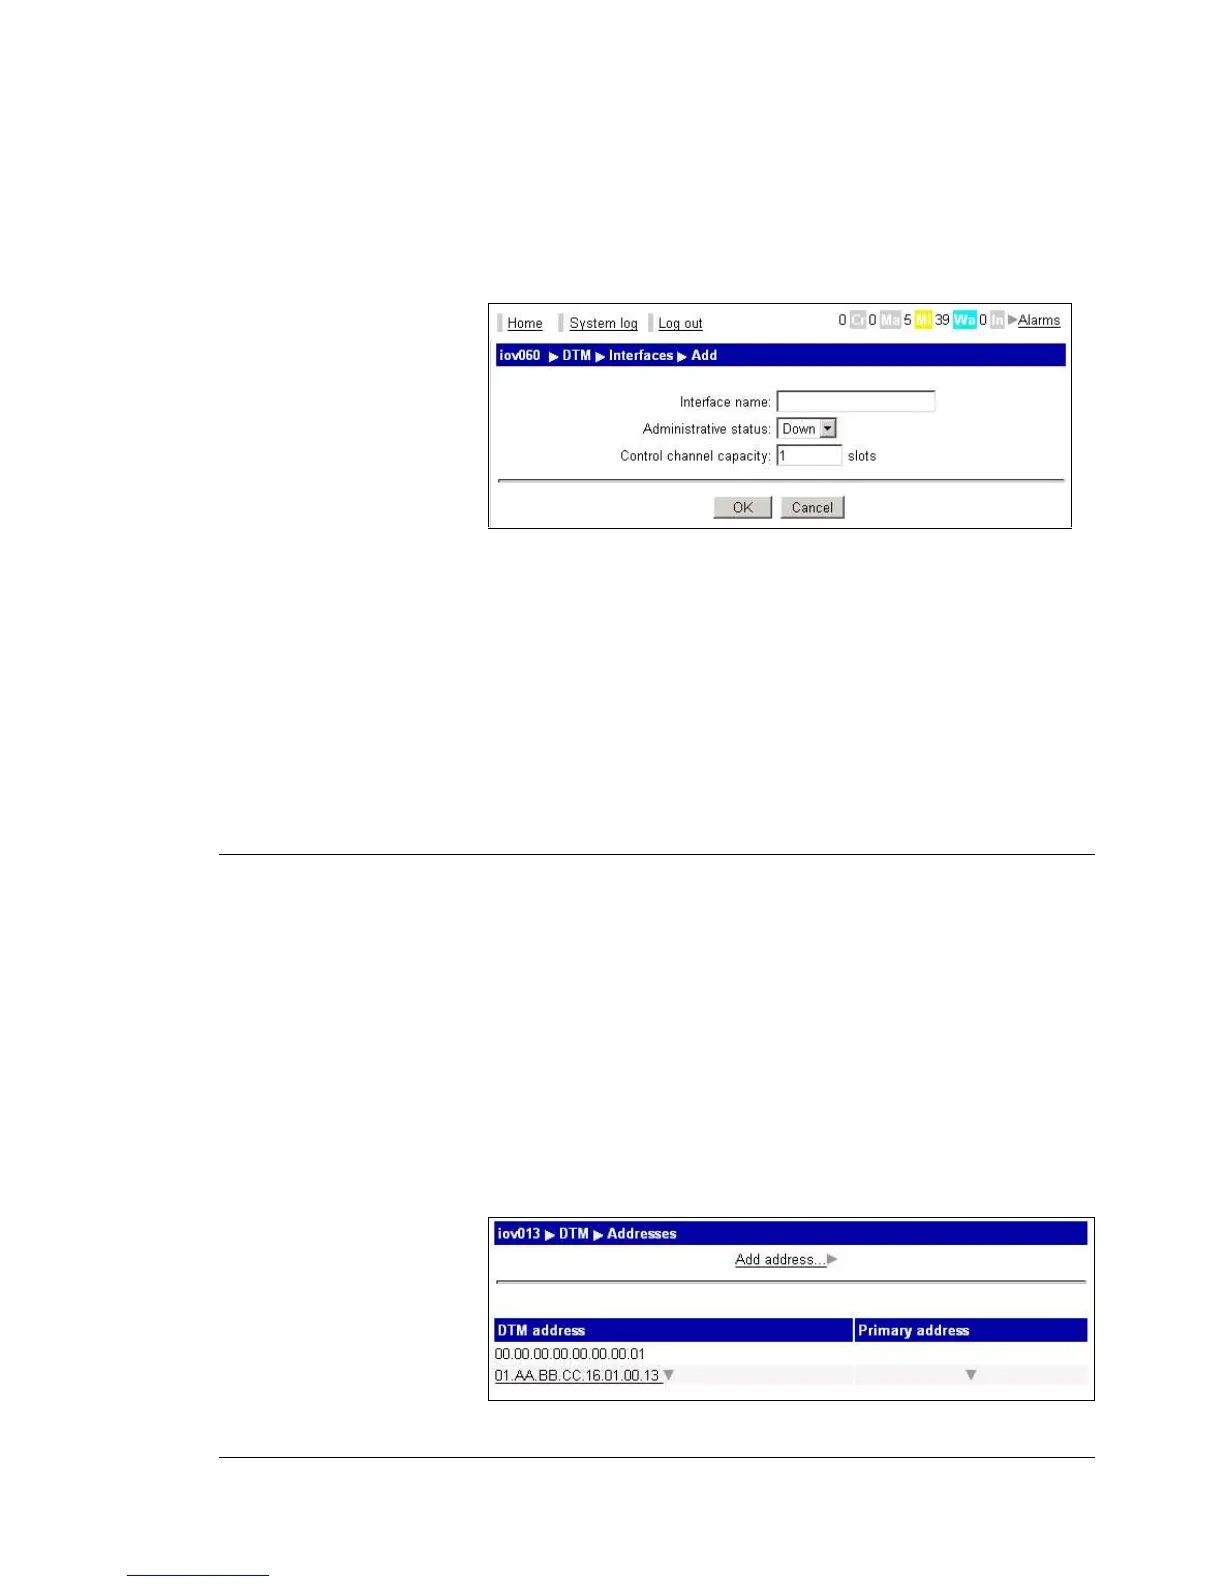
1. To add a DTM interface, access the DTM|Interfaces page. Click on the
Add interface link. The Add page, Figure 67, will appear.
Figure 67. Add DTM interface
See the Edit Interface in previous section for definitions.
2. Enter the Interface name, for the new interface, set the Admin status to
Up in the drop down list.
3. Enter 1 for the Control channel capacity.
4. Click OK.
5. The DTM|Interfaces page will reappear with the new interface listed.
6. If required, back up the configuration changes; refer to chapter
Maintenance, section Configuration handling.
Addresses
This chapter describes how to configure the DTM addresses of the unit. The
DTM address must be configured before any configuration of services can be
done!
Each node can have one primary DTM address and several alias addresses. The
primary address (marked with a symbol in the “ Primary address” column), in
the table below, is always used as the source address when the node establishes
a channel. In addition to the primary address a node also accepts channels to all
its alias addresses.
The address “ 00.00.00.00.00.00.00.01” is a loop back address that all nodes
listens to. It is equivalent to the address 127.0.0.1 in an IP-node.
1. Click on the DTM menu item and then click on Addresses. The
Addresses page, Figure 68, will appear.
Figure 68. DTM address page
 Loading...